How to Remove Message Blocking on Android

How to Remove Message Blocking on Android

Has someone blocked you on Android and you want to unblock them? Or have you blocked contacts yourself and now want to remove those blocks?

With a few easy steps, you can disable message blocking and unblock numbers on any Android phone or tablet.

What Does Message Blocking Do?

When you block a number in Android’s messaging app, you stop receiving calls and texts from that contact.

Any messages they attempt to send will be automatically rejected without notification to you.

You also won’t show up in their contacts list anymore.

Blocking is useful for dealing with spam calls or texts.

But if you block someone by mistake or later change your mind, removing those blocks is simple.

Unblock Contacts in Default Messages App

If you blocked a contact using Android’s default SMS/messaging app, follow these steps:

  1. Open the Messages app and tap the 3-dot menu icon
  2. Choose Settings > Blocked contacts
  3. Tap the X icon beside any contact to remove the block

Their messages will now come through again as normal.

Both incoming and outgoing communication is restored.

View Currently Blocked Numbers

To see a list of all blocked numbers and contacts at any time:

  1. Go to Settings > Blocked contacts
  2. Scroll down to see the full blocked contacts list

Search Contacts to Unblock

If you don’t see the blocked contact you want to unblock, try searching for their name or number using the search bar at the top of the Blocked contacts screen.

Disable Blocking Completely

Alternatively, you can disable message blocking entirely by flipping the master switch at the top of the Blocked contacts screen to the Off position.

This removes blocks for all contacts in one step.

Unblock Numbers at the OS Level

For blocking done outside the default messaging app, you’ll need to remove blocks through your Android device’s Settings menu:

  1. Go to Settings > Call blocking & ID
  2. Tap Blocked numbers and remove any contacts

This takes care of any contacts blocked directly through your SIM card or other system apps.

Disable Call Blocking

You can also turn off call blocking altogether here:

  1. Go to Settings > Call blocking & ID
  2. Toggle Block calls to Off

FAQs About Unblocking Contacts

How do I know if someone blocked me on Android?

If your texts to someone suddenly fail or you instantly reach voicemail when calling, chances are you’ve been blocked. Their contact profile may also disappear from your phone entirely.

Can you tell if you’ve been blocked on Android?

The main signs of being blocked on Android are not being able to call or text someone that you had previous contact with. Your messages won’t deliver and calls will go straight to voicemail.

Why can I only see some of my contacts on Android?

If many contacts seem to be mysteriously missing from your phone, they may have blocked you, causing them to no longer show up in your contacts list or recent calls list.

What happens when you block someone on Android?

Blocking on Android stops all communication in both directions. The blocked person can’t call or text you anymore, and their existing messages are hidden from view. Your profile also disappears from their contacts.

Conclusion

I hope now you learned How to Remove Message Blocking on Android Devices but still, if you’re facing any issues then you can raise your queries in the comment section below, our expert team will help you to solve your issues.

How to Fix Android Screen Flickering

How to Fix Android Screen Flickering

Experiencing flickering, blinking, or flashing on your Android phone’s screen? It can be frustrating. But don’t worry, in most cases it’s fixable.

This complete guide covers all the solutions you need to stop your Android screen from flickering and get it working properly again.

What Causes an Android Screen to Flicker?

Before diving into the fixes, it helps to understand what causes the screen flickering issue in the first place.

The most common culprits include:

  • Buggy app: A misbehaving app could be trying to redraw the screen rapidly
  • Display driver issues
  • Faulty hardware: Ribbon cable, LCD connector, damaged screen
  • Incompatible power supply
  • Outdated software

Software Solutions

If it’s a software issue causing the flickering, try these troubleshooting steps first:

1. Restart Your Device

Restarting your phone closes all open apps and resets components.

This can stop misbehaving system processes, drivers, and apps that are causing the flickering.

Here’s how you restart or “force reboot” your Android phone:

Android 9+ with Power + Volume Down key:

  1. Hold the Power button and either the Volume Up or Down button.
  2. Keep holding until the phone vibrates and turns off.
  3. The phone will automatically boot back up in 10-15 seconds

Android 8 or older: Remove the battery or hold the Power button

  1. If the battery is removable, take it out > put it back in > reboot.
  2. Or hold the Power button down for 6-8 seconds until it turns off.
  3. Then turn your phone back on to reboot

2. Check for App Issues

To determine if a buggy app is causing the flickering, use your phone in Safe Mode.

This disables all third-party apps.

  1. Press the power button > Hold Power off option
  2. Tap OK to restart in Safe Mode (you’ll see “Safe Mode” on the bottom left)
  3. Test if the screen still flickers in Safe Mode
  4. If the flickering stops, it’s an app issue – you’ll need to identify the problematic app
  5. To exit Safe Mode, restart your phone normally

3. Update Software

An outdated OS and firmware can also cause display problems.

Updating to the latest software version often fixes screen glitches.

  1. Go to Settings > System > System update
  2. Tap Check for update
  3. If an update is available, download and install it
  4. Restart your phone and test if screen flickering stops

4. Toggle Settings

Changing some settings can make the flickering go away:

  • Reduce screen brightness – Adjust using the slider in Quick Settings
  • Disable auto-brightness – Go to Settings > Display > Adaptive brightness
  • Change refresh rate – Set to 60Hz in Settings > Display > Refresh rate
  • Disable battery saver mode if it’s changing the refresh rate

5. Reset App Preferences

Resetting app preferences clears any saved display settings for apps that could be causing issues:

  1. Go to Settings > Apps
  2. Tap the menu icon (3 vertical dots at top right)
  3. Select Reset app preferences > Reset apps

Hardware Fixes

If your Android screen still flickers after trying all software troubleshooting, it’s likely a hardware defect.

Try these fixes:

1. Check Connections

A loose display connector cable is a common cause of flickering.

Carefully check the connections:

  • Turn off the phone, open the case, and disconnect the battery
  • Check if the display cable is dust-free and properly inserted into the connectors
  • Remove and reconnect the cable, pressing down firmly to ensure a tight fit
  • Re-assemble the phone, reconnect the battery, and test the screen

2. Replace Display Cable

If re-seating doesn’t help, the display ribbon cable is probably damaged.

Replace it:

  1. Buy a replacement part for your phone model
  2. Watch video guides to properly disassemble the phone
  3. Unplug the faulty cable, install a new cable
  4. Re-assemble the phone and test – the screen should work fine

Be gentle when handling delicate connectors to avoid any further damage.

3. Replace Screen

If adjusting connections doesn’t fix the flickering, the LCD panel itself has likely failed:

  1. Order a replacement screen for your phone’s specific model
  2. Follow the video guide for full phone disassembly
  3. Detach the old screen and swap in the new replacement
  4. Reassemble the phone and verify new display works nicely

For optimal results, get your screen replaced professionally at a reputed phone repair shop.

Frequently Asked Questions

Why does my Android screen flicker randomly?

Random screen flickering is usually caused by an app that rapidly refreshes the display. Buggy apps, games, and camera modes are common culprits. Restarting your phone closes the app and stops the flickering.

Why does my Samsung screen flicker and glitch?

On Samsung phones, a faulty AMOLED display driver is a common reason for screen flickering issues. Connector problems can also cause flickering. Checking display cable connections and updating software can fix Samsung screen glitches.

How to fix an Android phone with water damage if the screen flickers?

If your phone was exposed to moisture and the screen flickers or is distorted, water likely reached the display connectors causing a short circuit. You’ll need to open up the phone, clean the corrosion, dry out components, and replace any damaged parts like the charging port, display cable, or screen.

Conclusion

In some cases, it may be possible to salvage damaged parts with pure isopropyl alcohol. But if the circuitry is fried, replacements will be needed.

How to Enable SMS on Android Phone in 5 Minutes

How to Enable SMS on Android Phone in 5 Minutes

Being able to send and receive SMS text messages is one of the basic functions we expect from our Android phones.

However, sometimes users face issues with SMS working properly on their devices.

If you are wondering how to enable SMS on Android, this step-by-step guide will help you troubleshoot and fix it quickly.

Check If SMS Service is Active on Your Phone

The first thing to check is whether your cellular carrier has SMS/text messaging enabled on your mobile plan.

This service needs to be active for you to use the texting facility.

On Android Phone

Go to Settings > Connections > Mobile Networks > Access Point Names and check if the SMS service is showing as Active under your mobile data profile name.

If the SMS service is inactive, contact your carrier support to activate text messaging properly.

On the Network Carrier Website

Log in to your carrier’s website and check under account settings or plan details whether text messaging or SMS support is currently enabled.

If not, you can enable it from there before trying to configure SMS on your Android device.

Configure Android SMS & MMS Settings

Once the SMS is active on your carrier plan, the next step is to configure messaging settings under the Android device itself:

Step 1

Open Settings and tap on Network & internet > Mobile network.

Here turn on Mobile data if it’s disabled.

Step 2

Now go back and open Settings > Connections > More connection settings.

Tap on Cellular Networks> Access Point Names and check if the proper APN settings for your carrier are configured.

Step 3

Under APNs, tap the APN name for your carrier > Enable MMS messaging> Save.

Step 4

Once APN and MMS are set up, go to an SMS app like Google Messages.

Open app settings > SMS enabled and turn it on.

Allow Required App Permissions

For your default SMS app to work properly, you need to allow certain app permissions.

Go to Android Settings > Apps > Default text messaging app > Permissions.

Allow permissions like Contacts, Storage, SMS, etc.

Reset Network Settings on Android

If the above steps don’t resolve SMS issues, try resetting all network settings on your Android:

Go to Settings > General management > Reset > Reset network settings.

This will reboot the device and reset WiFi, mobile data, and Bluetooth settings.

Now set up cellular data and SMS should start working fine again in the Messages app.

FAQs on SMS Not Working Issue

Why are my text messages not sent on Android?

If SMS is not working on Android, first check your cellular data and carrier plan settings. Make sure Mobile data is enabled for messaging. Next, verify the proper APN configuration for MMS messaging. Also, check app permissions to allow SMS properly.

How do I re-enable SMS on my phone?

Go to Settings > Connections > More Connection Settings> Cellular Networks> Access Point Names. Tap your carrier APN profile and enable the MMS messaging option. Also, turn on the SMS enabled option inside your default text messaging app settings if disabled.

What do I do if SMS verification texts are not working?

Sometimes if you are not receiving SMS-based OTP verification texts, try changing the default SMS app. Install Google Messages and set it as the default app. Make sure Messages has all permissions allowed. Reset network settings if the issue persists.

Conclusion

Today we learned How to Enable SMS on an Android Phone in Just 5 Minutes.

Do you have any questions? then ask your questions in the comment section below to get expert solutions from our team.

How to Cut Out Parts of a Video on Android

How to Cut Out Parts of a Video on Android

Trimming long videos to remove unwanted content is easy on Android devices.

The platform offers both built-in video editors and third-party apps to clip segments of a video.

In this complete guide, you’ll learn multiple methods to cut parts of a video on Android smartphones and tablets.

Using the Photos App Video Editor

Most Android devices from Samsung, Xiaomi, Oppo, Vivo, etc. come pre-installed with the Google Photos app.

The app has a capable built-in video editor to trim videos.

Step-by-Step Guide

  1. Open the Google Photos app on your Android device.
  2. Locate and open the video that you want to trim.
  3. Tap on the Edit button at the bottom of the screen.
  4. Select Crop to open the video trimmer interface.
  5. Use the sliders at the bottom to set start and end points for trimming.
  6. Preview the changes to check if the unwanted segments are removed.
  7. Finally, tap Save to export the trimmed video.

Key Aspects

  • Intuitive and easy-to-use video editing capabilities.
  • Option to export trimmed video in high resolution like 1080p or 4K.
  • Trimmed videos can be shared directly to other apps like YouTube, Facebook, etc.
  • No limit on the length or size of the input video file.

Using Video Trimmer Apps from the Play Store

The Google Play Store offers many good third-party apps focused solely on trimming videos efficiently.

Two great options to cut videos on Android are Video Trimmer and Video Crop.

Trim Videos with a Video Trimmer

Video Trimmer from Simple Mobile Tools has an intuitive interface with lots of customizations to trim videos effortlessly.

Notable Features

  • Set precise start and end points with frame-level accuracy.
  • Option to change video rotation and encoding.
  • Facility to trim multiple videos without exporting each one.
  • Allows changing video resolution while trimming.
  • Completely free with no ads or annoying permissions.

Trim and Crop Videos with Video Crop

For advanced users, Video Crop from InShot Inc. provides fine-tuned control over trimming Android videos.

Apart from cutting segments, it also lets you crop, rotate, compress, and edit videos after trimming.

Why Choose Video Crop?

  • Feature-rich professional-grade video editor.
  • Crop videos to remove black bars and unwanted areas.
  • Convert trimmed videos to formats like MP4, MOV, GIF, etc.
  • Add music, text, emojis, and stickers after trimming.

Trim Videos Directly on YouTube

YouTube app on Android has inbuilt tools to edit your uploaded videos right from the app itself.

Using it, you can conveniently trim multiple YouTube videos.

How to Trim Uploaded YouTube Videos

  1. Go to your YouTube channel from the mobile app.
  2. Tap on the video that needs to be edited.
  3. Click on the Edit button below the video thumbnail image.
  4. Select the option to Trim your video and set new start and end points.
  5. The trimmed video gets automatically re-uploaded.

Frequently Asked Questions

Is the Original Video Deleted When I Trim on Android?

No, trimming a video simply removes unwanted segments. Your original video file remains untouched in your device storage.

Do I Need to Download Third-party Apps to Trim Videos?

Most Android devices come with a pre-installed Photos or Gallery app that lets you trim videos easily. However, specialized video trimmer apps provide finer controls when editing videos.

Can I Trim 4K or Large-Sized Videos?

Yes, you can trim videos of any resolution and size on Android phones. Ensure sufficient storage space is available before trimming large 4K/HD videos.

Is Trimming Videos Possible on Older Android Versions?

If your device runs Android 5.0 Lollipop or above, video trimming apps will work seamlessly. Performance may be limited on very old Android versions.

Conclusion

I hope now you learned How to Cut Out Parts of a Video on Android but still you’re still facing any issues then you can raise your queries in the comment section below, and we will be happy to help you.

How to Block a Specific App from Being Downloaded on Android

How to Block a Specific App from Being Downloaded on Android

Want to prevent a particular Android app from being downloaded on your device or your child’s device? With the right tools, blocking the installation of specified apps is quick and easy.

In this complete guide, you’ll learn multiple methods to block and restrict app downloads on Android.

Let’s get started!

Using Google Play Protect

Google Play Protect is a built-in security system that provides real-time scans of your Android device to detect harmful apps.

One of its capabilities is the option to block specified apps.

Step-by-Step Guide

  1. Open the Play Store app on your Android device.
  2. Tap the hamburger menu icon ☰ in the top left corner.
  3. Select Play Protect.
  4. Tap App permissions.
  5. Toggle on the setting for Scan device for security threats.
  6. Under Recently scanned apps, locate the app you want to block.
  7. Tap the 3 dot menu next to the app name.
  8. Choose Block.

This will prevent the selected app from being downloaded or used on that Android device.

Google Play Protect will scan any newly installed apps and block the restricted ones.

Considerations

Using Play Protect to block apps has some caveats:

  • It only blocks apps downloaded from the Play Store, not other sources.
  • The block can be removed by anyone with access to the Play Protect settings.
  • It’s device-specific, so won’t prevent installs across all devices.
Google Play Protect interface showing option to block apps

Leveraging Parental Control Apps

A better solution is to use a dedicated parental control app.

These give you more robust blocking options and increased security.

Our Top Pick: Qustodio

Our recommendation is Qustodio.

It’s a highly-rated app for parents that offers a range of controls over Android devices.

With Qustodio, you can whitelist or blacklist specific apps.

Any blacklisted app will be unable to install or open on the device.

Key Benefits

  • Works across device profiles, not just a single device
  • Prevents sideloading of blocked apps from unknown sources
  • Provides time limits, filters, location tracking, and more
  • Displays detailed activity reports of app and device usage

Limitations

Qustodio is not free and costs $54.95 per year for complete functionality covering multiple devices and child profiles.

But many parents find the investment worthwhile for the protection and peace of mind.

Setup Instructions

Follow these steps to block app downloads with Qustodio:

  1. Create a parent Qustodio account
  2. Install the Qustodio app on the child’s Android device
  3. Log in on the child’s device using the parent account info
  4. Select the child profile to manage
  5. Go to App Rules
  6. Add apps you want to block to the Blacklist

You can also whitelist approved apps in the Whitelist section, automatically blocking anything not on the list.

Other Parental Control Apps

There are various other good parental control tools with app-blocking functionality including:

Each app offers its own unique set of parental controls, so research thoroughly before deciding.

They provide similar app blacklist options to restrict access.

Other Methods to Consider

In certain situations, you may want to explore other techniques to block apps, such as:

Using Device Profiles and Restrictions

Android devices have built-in parental controls to limit app usage and downloads through custom profiles.

This requires setting up a restricted account on the device itself.

Employing App Lock Software

App lock utilities allow locking down individual apps with passwords, fingerprints, or patterns to control app launching.

Blocking via Wi-Fi Network

Business or home Wi-Fi managers and routers can filter app traffic to block services and restrict usage based on category or name.

FAQs

Can I block an app from being downloaded only on cellular data?

Most parental control apps don’t differentiate between Wi-Fi or cellular data when blocking. However a few advanced tools like MMGuardian offer the option to block app downloads only on cellular connections.

What happens if the app is already installed before blocking?

The installed app itself will still function, but preventing future updates is a good approach. Uninstalling the app via a parental control tool is ideal if possible.

Can I block sideloaded third-party app installs?

Yes, leading parental control providers like Qustodio and Kaspersky Safe Kids can block installations from outside the Play Store, not just downloads within it.

Can app blocking be bypassed?

Determined kids may find technical workarounds in some cases. But robust parental apps that run deep at the device level offer strong protections. Using secondary authentication and hiding advanced settings reduces the risk.

Conclusion

  • Google Play Protect lets you block specific apps downloaded from the Play Store
  • For full management including non-Play Store sources, use parental control apps like Qustodio
  • Other options like Wi-Fi filtering, profiles, and app locking provide additional blocking capabilities
  • Combining multiple approaches offers the strongest shield against unwanted Android apps

Blocking a singular Android app across devices can be achieved thanks to the range of flexible options available.

Find the solution that best matches your needs for a tailored blocking approach.

How to Clear Temp Files on Android

How to Clear Temp Files on Android

Is your Android phone running slow and low on storage? Temporary files like cache, cookies, and browsing history can build up over time and degrade your device’s performance.

Clearing these temporary or temporary files on your Android is an easy way to speed up your phone and free up storage space.

In this complete guide, we will show you step-by-step methods to clear cache, cookies, browsing history, and other kinds of temp files on Android.

What Types of Temp Files Build Up on Android?

Here are some of the most common temporary files that accumulate on your Android phone over time:

Cache Files

App cache files store temporary data to load apps faster.

However outdated cache files can occupy substantial storage over time.

Browsing History and Cookies

Your browsing history and cookies record the websites you have visited.

Clearing them protects privacy and frees up space.

Temporary App Files

Many apps create temp files that remain even after you exit the app.

Deleting them frees up storage space.

Log Files

System log files contain technical data used by Android to monitor device performance and errors.

Crash Reports and Dump Files

Files related to app crashes and system errors.

These can be large and are safe to delete.

Residual APK Files

Whenever you install or update apps, the old APK installer files remain.

Deleting them can free up space.

How to Clear Cache on Android

Let’s look at the step-by-step process to clear cache files to speed up your Android device:

Clear Cache for Specific Apps

  1. Go to Settings > Apps & notifications
  2. Tap on the app whose cache you want to clear
  3. Tap Storage & cache > Clear cache

Clear Cache for All Apps

  1. Go to Settings > Storage
  2. Tap Cached data
  3. Press OK to confirm clearing the cache for all apps

How to Clear Cookies and Browsing History

Follow these easy steps to clear cookies and browsing history from internet browsers on your Android device:

Chrome

  1. Open Chrome and tap the three dots for the menu
  2. Go to History > Clear browsing data
  3. Select the time range and check cookies, cache, and history
  4. Tap Clear data

Firefox

  1. Tap the menu button indicated by three lines
  2. Select Settings > Privacy & Security
  3. Tap Clear private data
  4. Check history, cookies, and cache then tap Clear private data

How to Clear Residual APK Files

Leftover APK files from app installs often remain even after updates.

Here is how to delete them:

  1. Install a file manager app like ES File Explorer
  2. Navigate to folder location: Internal Storage > Download > APK folder
  3. Select all APK files that are safe to delete
  4. Tap delete to clear residual APK files

Frequently Asked Questions

Is it safe to delete temp files on Android?

Yes, it is completely safe to delete cache, cookies, browsing history, and other temporary files from your Android device to free up storage space.

Will clearing temp files on Android delete my data?

No, clearing your temp files will NOT delete personal data like your photos, contacts, apps, or messages. Only temporarily cached files and history will be deleted.

How often should I clear cache and temp files on Android?

It’s good practice to clear your Android device’s cache and temporary files every few weeks. This prevents storage clogging up over time for optimal performance.

What happens when I clear the cache on Android?

Clearing the cache removes temporary app data files that may have become outdated. This speeds up apps, improves performance, and frees up storage space.

Conclusion

I hope now you cleared your cache files from your Android smartphone but still, if you’re facing any issues then feel free to ask your queries in the comment section below, we are happy to help you.

How to Access Hidden Photos on Android

How to Access Hidden Photos on Android

Learn step-by-step how to find and access hidden photos and videos on your Android device, including expert tips to uncover photos in secret folders or apps.

With all the personal photos and videos stored on our phones these days, keeping some of them private is understandable.

However, you may sometimes need to access hidden photos on an Android device that doesn’t belong to you, whether it’s your child’s phone or a family member’s.

Fortunately, Android offers plenty of ways for users to conceal photos and videos.

But that doesn’t mean they are impossible to access if you need to see them.

This guide will cover multiple methods for uncovering hidden photos and videos stored on Android devices.

How Android Users Hide Personal Photos

Before diving into accessing hidden Android photos, it helps to understand the most common ways they are concealed in the first place:

Photo Vault Apps – There are various apps designed to hide photos behind a passcode or encryption.

We’ll cover accessing popular ones below.

Private “Hidden” Folders – Android allows the creation of password-protected folders.

Hidden content is stored here instead of the main Photos app.

Renamed Image Files – Savvy users may rename photo files to hide them among other system files and folders.

Private Browsing – Images viewed in “incognito mode” won’t show in browsing history either.

So if someone seems to have unusually few photos on their device, that may be a clue that they are utilizing one of these techniques to hide private pictures and videos.

Accessing Photo Vault Apps

Third-party photo vaults apps like KeepSafe, Photo Locker, and Photo Vault offer robust ways to conceal images and videos.

However, accessing their hidden content only requires figuring out the person’s unlock password or PIN.

Here are successful methods for that:

Observation Method – If possible, discreetly watch over their shoulder and observe them accessing the app.

Make a note of the PIN, pattern, or password entered.

Fingerprint Access – If the vault app is secured with only a fingerprint, their biometric may already be registered on the device.

You can then access the app that way instead of guessing passwords.

Password Guessing – If completely unsure of the vault app password, start guessing combinations of obvious passwords the person may have used like birthdays, anniversaries, child names, etc.

Whatever method works, once correctly inside the photo vault app, you will have access to all of their hidden private images and videos within.

Finding Android’s Hidden Folders

As mentioned earlier, Android has a built-in feature allowing users to create special password-protected “Private” folders.

Hidden photos stored in these folders don’t show up in the phone’s main Photos app with all other images.

Here is how to access them:

Using File Explorer Apps

The easiest way to find private hidden folders is by installing a third-party file explorer app from the Google Play Store.

Some popular free ones include File Manager, X-plore, and MiXplorer Silver.

Once installed, open the file explorer and navigate to the root folder path below where hidden Private folders are normally stored:

Internal Storage > Android > Data > com.android.hiddenfolder

If you discover any folders within the com.android.hiddenfolder path, those containing the hidden photos and videos.

However, they will still be password protected until unlocking them with the set PIN or password.

To view the actual hidden photos stored in those Private folders:

  1. Long press a folder and select “More Options”
  2. Choose “Rename” and erase the long random file name while renaming to something simpler like “Photos”
  3. Now when opening the renamed folder all the previously hidden content will display normally

This file explorer method works well for accessing Android’s built-in hidden folders.

But what if the photos you need to see are stealthily concealed using some other technique?

Finding Renamed Photos & Videos

As mentioned earlier, some Android users try hiding private media by renaming image and video files to seem like unimportant system files.

Luckily, it’s also possible to uncover renamed photo and video files with some file browser tricks.

While using a file explorer app on the Android device, navigate to the main Internal Storage folder path:

Internal Storage > DCIM > Camera

This Camera folder is the default location for photos and videos saved on the device.

But any files renamed to disguise themselves won’t be immediately visible.

To reveal them:

  1. Select the 3-dot menu in the file browser and enable the “Show Hidden Files” option
  2. All renamed/hidden media files stored in DCIM > Camera will now display
  3. Open the renamed files to confirm if they are the private photos and videos you are searching for

As you can see, accessing intentionally hidden or renamed photos/videos on an Android device has multiple straightforward methods.

But what if the files you need to see are stored in unexpected places like app caches or private cloud accounts?

Searching App Caches & Private Accounts

In addition to hidden folders and renamed files, Android users may also stash private photos uploaded online or buried deep in random application caches that don’t get cleared often.

Uncovering those types of ultra-hidden files can be achieved with these steps:

  1. Download and install a comprehensive file explorer like MiXplorer Silver from the Google Play Store
  2. Grant the app full access permissions across the device
  3. Navigate to Databases > MediaStorage > .thumbnails
  4. This system folder contains mini-cached versions of images/videos opened on the device. Browsing the folder can uncover suspect media.
  5. Also, search Android > Media > com.android.providers.media for cached images.
  6. For cloud-stored files, check linked accounts in apps like Google Photos, Dropbox, and OneDrive looking for private/hidden albums.

With full filesystem access, a robust file explorer will index everything on the device allowing you to more easily discover secretly stashed photos and videos in unexpected places.

Using recovery software

If the hidden photos have been recently deleted, you still have a chance to retrieve them with data recovery apps for Android.

There are free options like DiskDigger Photo Recovery or paid software like Fonelab for Android which can scan storage and attempt to rescue deleted media files.

Running recovery software can rescue photos long thought to be permanently erased if they haven’t yet been completely overwritten by new device data.

So don’t skip this method when searching for recently deleted private images you need to uncover.

FAQs About Accessing Hidden Android Photos

Here are answers to some frequently asked questions when dealing with this sensitive topic of accessing concealed photos:

Is it illegal to access someone’s hidden photos without consent?

Generally, it is against the law to access private data or accounts without the owner’s permission. However, exceptions may legally allow parents to monitor children’s online activity in the interest of protecting minors. Nonetheless, accessing hidden adult photos without consent poses an ethical if not legal concern.

Can I tell if the Android phone’s hidden folder has been accessed?

If paranoid Android users notice the timestamp “Date Modified” on their hidden Private folder has unexpectedly changed, that means someone else has likely accessed it recently while they were unaware. They may then change the folder password as a countermeasure.

What’s the best app for completely deleting private photos?

For permanently destroying images including EXIF data, open-source apps like Photorecycle offer the most secure file shredding method to prevent recovery. Relying on the standard Android delete function won’t fully remove traceable data allowing deleted photos to still be forensically restored.

Pros & Cons of Accessing Hidden Photos on Android

  • Pros
    • Can uncover media activity of children or partners potentially at risk
    • Helps identify private photos that may have been leaked/hacked
    • Allows monitoring of worrisome changes in online behaviors
    • Could provide closure about suspicious activity occurring
  • Cons
    • Breaches personal privacy expectations
    • Violates trust boundaries in relationships
    • Enables stalker-like or toxic controlling behaviors
    • May have unexpected legal consequences

Summary

I hope this guide has shed light on the various methods Android device owners utilize to conceal private photos and videos – including hidden vault apps, password-protected folders, renamed files, deleted images, and stealthy cloud storage techniques.

Recovering this type of sensitive media always requires consent to avoid ethical concerns.

But with the file explorer tricks detailed above, uncovering hidden Android photos is relatively straightforward technically.

Remember to use such power judiciously.

How to Delete Notifications on Android

How to Delete Notifications on Android

Learn how to delete notifications on your Android device with this easy step-by-step guide.

Includes details on clearing individual notifications or all notifications at once.

Why You Might Want to Delete Notifications

Notifications on your Android device can quickly pile up and clutter your notification shade.

Having too many unread notifications can make it difficult to find important alerts.

Fortunately, Android makes it easy to delete notifications you no longer need.

Here are some common reasons to delete Android notifications:

  • Clear old or irrelevant notifications
  • Remove notifications for unused apps
  • Free up space by deleting notification history
  • Keep your notification shade tidy and organized

Deleting Individual Notifications

If you only need to remove a few select notifications, you can delete them individually right from your notification shade.

Step 1: Pull Down the Notification Shade

Slide your finger down from the top of your Android screen to open the notification shade.

This will display all your current notifications.

Step 2: Locate the Notification You Want to Delete

Scroll through your notifications and locate the specific one you want to delete.

Step 3: Swipe the Notification Left or Right

Place your finger on the alert you want to remove and swipe it left or right.

This will reveal a “Clear” or “Delete” icon.

Tap it to delete that notification.

Step 4: Repeat to Delete Additional Notifications

Follow steps 2-3 to remove any other individual notifications as needed.

Deleting All Notifications at Once

If you want to clear your entire notification history in one swipe, most Android devices include an option to delete all notifications.

Step 1: Open Your Settings Menu

From your home screen, tap the Settings icon to open your device settings.

Step 2: Choose Apps & Notifications or App Info

The exact path varies by device but look for Apps & Notifications, App Manager, Application Manager, or App Info in Settings.

Step 3: Select Show Notifications

Tap into your Settings menu for a specific app.

Scroll down and select Show Notifications.

Step 4: Choose Clear All Notifications

This will display options for that app’s notification settings.

Select the option to Clear All Notifications or Clear Notification History.

Turning Off Notifications for Unused Apps

If you have apps that generate notifications you don’t need anymore, you can disable notifications altogether rather than having to repeatedly clear them.

Step 1: Go Back to the App Info/Notifications Settings

Return to the Show Notifications or App Info section for the app in question.

Step 2: Toggle Off Allow Notifications

Find the option for Allow Notifications and flip the switch to the off position.

This will prevent that app from ever sending notifications.

Adjusting Notification Settings

Beyond just deleting notifications, you can customize your Android’s notification settings to better manage alerts.

Use Do Not Disturb

Enable Do Not Disturb mode to mute or limit notifications during set times like overnight.

Set Notification Importance

Flag certain apps’ notifications as more or less important to have them show differently.

Allow/Block Notification Dots

Control whether app icons show dots to indicate waiting for notifications.

Show/Hide Sensitive Content

Havelock screen notifications show/hide private details before authentication.

FAQs About Deleting Android Notifications

Will deleting notifications also delete the related content?

No, clearing Android notifications only removes the alerts from view. It does not delete emails, messages, photos, etc. associated with those alerts. The source content will remain accessible through its related app.

Can I recover deleted notifications?

Unfortunately no. Once you delete an Android notification it is gone for good. There is no undo option or trash folder to rescue deleted notifications.

Will clearing notifications free up storage space?

Deleting old notifications can slightly improve storage availability. But most of the space used is tied to the associated app data, not the alerts themselves. Uninstalling unused apps frees up more space.

Clearing Notifications Keeps Android Running Smoothly

Letting notifications pile up can negatively impact your device’s performance over time.

Following the steps above to delete old notifications helps keep your Android running fast and clutter-free.

Deleting individual notifications or batches of alerts is simple on most Android devices.

Adjust notification settings as needed to disable unnecessary notifications from the start.

Keep your notification shade clean for the alerts that matter.

How to Make a GIF on Android from Video

How to Make a GIF on Android from Video

Learn how to easily create an animated GIF on your Android device from a video in just a few taps.

Our step-by-step guide covers apps to use, customization options, file sizes, and more.

Intro to Making GIFs on Android

Sharing funny or interesting moments from videos in the form of short, looping GIFs is a hugely popular way of communicating on social media and messaging apps.

With the right Android apps, creating your own animated GIFs is simple and fun.

In this complete guide, we’ll walk you through the entire process of turning a video into an optimized GIF to share with friends or post online.

By the end, you’ll know:

  • The best GIF maker apps for Android
  • How to trim and customize your GIF
  • Tips for controlling file size and quality
  • How to export and share your new GIF

Creating great GIFs on an Android device has never been easier.

Let’s get started!

Steps to Make a GIF from Android Video

Follow these key steps to turn a video into an animated GIF to share:

1. Install a GIF Maker App

There are a few different Android apps that allow easy GIF creation from video files and clips.

Some top options include:

  • Gif Maker – Intuitive interface and extensive customization tools
  • Video to GIF Converter – Simple conversion with handy trim and crop editing
  • GIF Maker – Video to GIF – Quality optimization settings for smaller file sizes

These apps are all free to download from the Google Play Store.

Gif Maker has the most advanced set of features for fine-tuning your animated GIFs.

2. Select Your Video

After installing your chosen GIF-making app, you can select the video file you want to use.

This video can be:

  • A video saved on your Android’s local storage
  • A clip just recorded on your device’s camera
  • A video from an external SD card

Tap the relevant option in your GIF maker app to browse and choose your desired video.

3. Trim the Video Duration

Most apps provide editing tools to trim your selected video down to only the part you want for your GIF.

Here are some tips:

  • Keep the clip under 10 seconds long – shorter is usually better for GIFs
  • Make sure the action fits neatly within the loop
  • Trim the beginning/end to focus on the key moment

Use your app’s trim slider to set the start and end points of your video segment.

4. Customize GIF Settings

You can customize the following settings in your Android GIF maker app before exporting the final animation:

  • Resolution – Higher resolution means better quality but larger file size
  • Frame Rate – Standard is 10-15 fps. Higher fps is smoother but larger
  • Loop Count – Set the number of times you want the GIF to loop playback
  • Captions – Add text captions to your GIF (great for memes!)

Adjust these to optimize quality and size for sharing or posting in different places.

5. Export the Animated GIF

After trimming your clip and customizing the GIF settings, you’re ready to export and save the final animation! Your app will handle converting the video to animated GIF format.

The output GIF file will be saved in your device’s internal storage or SD card automatically.

How to Share GIFs Made on Android

Once your new GIF is exported and saved, open it from your Android Photos app and tap the share button to send it to friends or post online.

Popular destinations for sharing animated GIFs include:

  • Messaging apps – WhatsApp, Facebook Messenger, etc
  • Social media – Twitter, Facebook, Instagram, etc
  • Slack/Teams/Discord – For work communications

Optimize your GIF’s file size and resolution if needed based on where you want to share it.

Also, preview the animation to double-check quality and performance!

What is the best GIF size for social media?

For sharing on most social platforms like Facebook, Twitter, and Instagram, aim for a GIF size under 10MB with resolution scaled down to around 480×480 pixels.

This hits the sweet spot of quality and file size.

How can I reduce GIF file size on Android?

If your exported GIF is too large, go back through the customization options in your GIF maker app and reduce the resolution, frame rate, or length to make it smaller.

240p or 360p resolution is often enough for social media sharing.

Make Great GIFs Easily on Android

Turning videos into animated GIFs on Android devices is now super simple thanks to dedicated GIF-making apps like GIF Maker, Video to GIF Converter, and more.

Just install your chosen app, select the video clip to use, trim, customize, and export your looping animation.

Then easily share or post the GIF anywhere you like!

We covered top tips for optimizing file size and quality.

With a bit of practice, you’ll be creating awesome GIFs to share in no time.

Want to turn more of your funny or memorable video moments into social-ready GIFs? Let us know if you have any other questions!

How to View Incognito History on Android

How to View Incognito History on Android

Learn how to view your incognito browsing history on Android phones and tablets.

A step-by-step guide covering Chrome, Firefox, Edge, and other browsers.

What is Incognito Mode in Android Browsers?

Incognito mode, also known as private browsing, is a feature in Android web browsers like Chrome, Firefox, and Edge that allows you to browse the internet without saving your browsing history, cookies, site data, and information entered in forms locally on your device.

When you enable incognito mode in your browser, it essentially opens a private session where your activity like visited pages, downloads, searches, etc. are not stored in the history or left behind as traces on your phone once you close that session.

Why View Incognito History on Android?

Although incognito mode doesn’t save your browsing data like history by design, you may still want to view the pages you visited during that private session sometimes.

Here are some common reasons why you’d want to see your incognito history on an Android device:

  • Refinding a page you visited earlier in incognito mode
  • Recovering lost information or data you didn’t save
  • Checking the activity of shared devices
  • Reconstructing steps for troubleshooting problems
  • Checking if malicious extensions tracked your private data

How To View Incognito History on Android Chrome

Google Chrome for Android clears all incognito history once you close those private tabs.

However, there are still a couple of methods you can use to view that browsing activity again:

1. View Open Incognito Tabs

If you have incognito tabs still open in Chrome, you can view their history and revisit pages from the current session like so:

  1. Open the Chrome app on your Android device
  2. Tap on the 3-dot menu in the top-right and tap ‘New incognito tab’
  3. This will open your existing incognito tabs if you have any
  4. Tap on any incognito tab to view the history of pages visited within only that tab

2. Chrome History in File Manager

Even though incognito history is not saved locally, some parts may remain in your device’s storage that you can view through a file manager app like this:

  1. Install a file manager app like ES File Explorer on your Android device
  2. Open the app and go to the Chrome browser folder location: Internal Storage > Android > data > com.android.chrome > files > history
  3. Look for any files like History or History Provider in this folder
  4. If available, open them in a text editor app to view URLs of pages visited in incognito mode

3. Use Android Backup Data

If you had Google account sync enabled, some incognito data may get backed up occasionally.

To check follow below steps:

  1. Go to Settings > Accounts on your Android device
  2. Open your Google account that was logged in while using Chrome incognito tabs
  3. Tap on Account Sync and see if Chrome data is being backed up
  4. Navigate to https://history.google.com/history on your desktop and sign in to the same Google account
  5. Filter by date range to view all browsing history including some incognito URLs

How to View Incognito History on Android Firefox

Similar to Chrome, Firefox’s focus for Android also clears all private browsing history when you close those tabs or exit the app.

But here are some ways you can still view private pages visited:

1. View Open Incognito Tabs

  1. Launch the Firefox app on your Android phone or tablet
  2. Tap the 3-line menu button in the top-right corner
  3. Go to the New Private Tab in the menu
  4. This will show you any existing private tabs you still have open
  5. Navigate each tab’s history individually to view visited pages

2. Firefox Files in File Manager

  1. Get a file manager app on your Android device if you don’t have one
  2. Open it and go to Firefox browser’s data folder location – Internal Storage > Android > data > org. mozilla.firefox
  3. Look for files like firefox.db, log_event_store.sqlite, etc in this folder
  4. Open them in a text viewer app and search for page URLs visited in private mode

How To Recover Incognito History on Android Edge

Microsoft Edge includes InPrivate browsing for Android to browse the web privately without saving history or cookies.

Use these methods to view that hidden data:

1. View Open InPrivate Tabs

  1. Launch the Edge browser app on your Android phone or tablet
  2. Tap on the 3-dot menu button given in the bottom toolbar
  3. Select the New InPrivate tab from the menu
  4. This will display currently opened InPrivate tabs if any
  5. Navigate each tab’s history to view visited web pages

2. Export Browsing History From Edge

  1. Open the Edge Android app and tap on the 3-dot menu button
  2. Go to Settings > Export browsing data
  3. Tap on Export browsing history and turn on the option
  4. Select time range as All time to export all history including some private pages
  5. The history will be saved as an HTML file in your Downloads folder

This file will contain links to some websites you visited in InPrivate mode as well that you can access.

Other Ways to Recover Incognito History on Android

Along with browser-specific methods, here are some other ways you can try restoring lost incognito browsing data on your Android phone or tablet:

  • Data recovery apps like Dr. Fone or EaseUS MobiSaver scan and extract residual artifacts related to private browsing activity.
  • Checking Google Search history during the same timeframe to see visited websites.
  • Going through cached images and files during that period.
  • Browsing app usage history during that timeframe for relevant sites.
  • Viewing network logs and DNS cache for accessed domains.

But these residuals would be fragmented at best.

For the most reliable history data, view open incognito tabs in the browser directly while still active.

Frequently Asked Questions

Can I recover permanently deleted incognito history?

If you have manually cleared all private browsing history beyond browser cache recovery, it becomes very difficult to retrieve that data, especially remotely. A forensic data recovery service may be able to extract fragments from your device’s storage if needed.

Is incognito data visible to others?

Incognito history and activity are not visible to other people using your Android device or network since it is not logged or stored anywhere commonly accessible.

Pros and Cons of Viewing Incognito History

Pros

  • Helps recover accidentally closed tabs and lost data
  • Useful for retracing steps during troubleshooting problems
  • Lets you check browsing patterns on shared devices
  • Revisit useful pages found in a past private session

Cons

  • Defeats privacy purpose of incognito mode
  • Data recovered would be fragmented at best
  • Won’t show full private browsing activity audit
  • Requires additional tools or expertise

So while it is possible to recover some pages visited during incognito mode, expect gaps in the history and only partial data at best compared to a normal session.

How to Run EXE on Android

How to Run EXE on Android

Running EXE files designed for Windows on an Android device may seem impossible.

However, you can run many EXE files on your Android smartphone or tablet with the right tools and methods.

In this complete guide for 2024, we will cover various ways to run EXE files on Android, including using emulators, terminal apps, Wine for Android, and more.

We will also discuss the pros and cons of each method.

Using Android Emulators to Run EXE Files

One of the most popular options for running EXE files on Android is to use an Android emulator designed to emulate the Windows operating system.

Steps to Use Android Emulators

  1. Download and install an Android emulator like AndEX, Android x86, Bliss OS, etc. on your device.
  2. Get the EXE file you want to run onto your Android device.
  3. Open the emulator and navigate to the EXE file.
  4. DoublDouble-click the EXE file to run it within the Windows emulator.

Pros of Android Emulators

  • Runs the actual Windows environment designed to execute EXE files seamlessly.
  • It provides better compatibility for running complex Windows applications.
  • No need to tweak or optimize EXE files.

Cons of Android Emulators

  • Can be slow and consume lots of RAM/resources.
  • Booting the emulator takes time before you can run EXE files.
  • Limited file system/hardware access from inside the Windows emulator.

Using Terminal Apps and Commands

Another option is to use Android terminal apps like Termux that allow running Linux commands and environments on Android.

Here are the steps to run EXE files using terminal apps:

Steps to Use Terminal Apps

  1. Install the Termux app and launch it.
  2. Run commands to install Wine – pkg install wget; wget https://dl.winehq.org/wine-builds/android/wine-5.0-arm.apk; apt install wine-5.0-arm.apk
  3. Transfer your EXE file into the Termux environment.
  4. Run the EXE using Wine – wine program.exe

Pros of Using Terminal Apps

  • Lightweight method without needing emulators or virtual machines.
  • Uses Wine to translate Windows EXE calls to Linux.
  • Runs natively on an Android environment.

Cons of Using Terminal Apps

  • Can involve tweaking Wine configurations for each EXE file.
  • Limited Windows API support results in compatibility issues.
  • Command line interface can be complex for beginners.

Using Wine for Android

Wine is an open-source compatibility layer that implements Windows API calls and translates them into POSIX calls for running on Linux/Unix environments.

Here is how you can use Wine directly on Android:

Steps to Use Wine for Android

  1. Get Wine for Android like Magic Wine, Wine4Apk, etc.
  2. Install the Wine app and the required runtime files.
  3. Transfer your EXE file onto your Android device storage.
  4. Open Wine File Explorer, locate your exe file, and double-click to run it.

Pros of Using Wine for Android

  • Designed specifically for Android devices, unlike standard Wine.
  • It is easier to set up and use versus terminal and commands.
  • Decent compatibility for less complex EXE files.

Cons of Using Wine for Android

  • Performance-heavy solution that consumes device resources.
  • Crashes and issues when running complex, graphics-intensive programs.
  • Limited support for the latest Windows APIs and features.

Other Methods to Run EXE on Android

Here are a couple of other alternative options to run EXE files on your Android device:

Using EXE to APK Converters

There are online services and converter apps that can convert EXE files into Android APK files.

The converted APK can then be directly installed and run as an Android application.

Cloud Streaming Windows via Remote Access

You can use remote desktop services and cloud streaming tools to access a Windows computer virtually.

Stream the Windows environment to then run EXE files remotely while the output is shown on your Android device screen.

Frequently Asked Questions

Can I directly run an EXE file on Android?

No, you cannot directly run EXE files on Android as the operating system environments are different. EXE files are designed for the Windows OS while Android uses the Linux kernel. You need to use methods like emulators, Wine, etc. to translate the calls.

Is it safe to enable developer options and install unsupported apps?

Enabling developer options and installing experimental emulator/Wine apps can pose security risks for your device. Only download such apps from trusted sources. Also, don’t install EXE files from untrusted sources as they may contain malware.

Will all EXE files work on Android?

No, many complex EXE files may not work properly on Android even with emulators and Wine. Very old 16-bit EXE files also have compatibility issues. Simple, smaller 32-bit, and 64-bit EXE files have the best chance of working.

How to Block Someone on TikTok for Android

How to Block Someone on TikTok for Android

With over 1 billion monthly active users, TikTok has become one of the most popular social media platforms. But with popularity comes trolls and users you’d rather not interact with.

Thankfully, TikTok allows you to block other accounts easily if you are using an Android device.

In this guide, I’ll explain the ins and outs of blocking someone on TikTok if you have an Android phone or tablet.

With years of experience in Android and mobile technology, I’ll show you the simplest way to block accounts as well as limit comments and restrict messages.

By the end, you’ll know how to make use of TikTok’s robust blocking and privacy controls to curate your feed and enjoy the app without disruptive users.

How to Block Someone on TikTok for Android

Here is a step-by-step guide to blocking another user on TikTok if you have an Android device:

  1. Open the TikTok app on your Android phone or tablet.
  2. Navigate to the profile page of the user you want to block. You can search for their username or tap on their profile picture from a video or comment.
  3. Tap on the three-dot menu icon in the upper-right corner of their profile.
  4. Select ‘Block’ from the pop-up menu.
  5. Tap ‘Block’ again on the confirmation screen.

That’s it! The user will now be blocked from viewing your profile or posts and will not be able to contact you on TikTok.

Easy Ways to Access a User’s Profile to Block

There are a couple of handy ways to quickly access another user’s profile page so you can block them:

  • Tap on their profile picture or username anywhere it appears, such as on their video or comment.
  • This will take you right to their profile.
  • Tap the ‘Followers’ or ‘Following’ lists on your profile.
  • Scroll to find the user you want to block and tap to access their page.
  • Use the search bar to look up their exact username.
  • Tap the user result to go to their profile.

These shortcuts make it easy to block a user as soon as you come across an inappropriate video or comment.

How to Unblock Someone on TikTok

If you change your mind later on, you can easily unblock accounts that you previously blocked.

Here’s how:

  1. Open your profile page and tap on the ‘Following’ tab.
  2. Tap the three-line menu icon next to the ‘Blocked Accounts’ header.
  3. This will open your blocked list. Tap on the user you want to unblock.
  4. Tap the ‘Unblock’ button to remove them from your blocked list.

They will now be able to view your profile and posts again if your account is public.

The unblocking is immediate.

Restricting Comments on TikTok for Android

In addition to blocking users altogether, you can use TikTok’s commenting restrictions to filter any unwanted attention.

Here’s how to limit who can comment on your videos:

  1. Go to your profile and tap on the three-dot menu.
  2. Choose ‘Privacy and Settings’.
  3. Under ‘Privacy and Safety,’ tap ‘Comment control’.
  4. Toggle ‘Filter all comments’ to ON to auto-filter potential spam or offensive comments.
  5. You can also toggle ‘Who can comment’ to ‘Friends’ to limit comments to only those you follow or approve.

TikTok will auto-filter or limit any new comments to keep your videos spam-free.

You can toggle these restrictions off at any time.

How to Restrict Messages on TikTok for Android

TikTok also allows you to control who can send you direct messages.

Follow these steps:

  1. Go to your profile and tap the three-dot menu.
  2. Select ‘Privacy and Settings’.
  3. Tap on ‘Privacy and Safety’ > ‘Direct Messages’.
  4. Toggle ‘Who Can Send You Messages’ to ‘Friends’, so only those you follow can message you.
  5. You can also disable ‘Allow Others to Find Me’ so only your contacts can find and message you on TikTok.

With messaging limitations enabled, you won’t have to deal with unsolicited DMs from strangers.

Limit messages to friends only for complete control.

Tips for Safely Blocking Users on TikTok

When blocking and restricting users on TikTok, keep these tips in mind:

  • Block users at the first sign of inappropriate behavior, don’t wait for it to continue.
  • Report users to TikTok before blocking if they are harassing you or otherwise violating community guidelines.
  • Toggle on comment filtering to automatically hide offensive or spam comments.
  • Use privacy settings cautiously when restricting messaging and interactions.
  • Unblock users if you block them accidentally or feel they should get a second chance.
  • Restrict messaging to ‘Friends’ only to avoid unwanted DMs from strangers.
  • Double-check settings after major TikTok app updates which sometimes reset restrictions.

Following these tips will allow you to make the most of TikTok’s safety features and block users judiciously.

Can a Blocked User Still View Your Profile on TikTok?

A frequently asked question when blocking someone on TikTok is whether they can still view your profile and videos after being blocked.

The answer is no – blocking prevents the user from viewing your entire profile or any of your content.

TikTok completely removes your account from their view once blocked.

Some key points regarding what a blocked user can and cannot do:

  • They cannot view your profile info, bio, posts, or videos on your page.
  • Everything will appear as “User not found”.
  • They are automatically unfollowed if they are following you.
  • They cannot re-follow you unless unblocked.
  • They cannot comment on your videos or interact with any of your content.
  • Any previous comments are automatically deleted from your videos and are not visible.
  • They cannot send you direct messages or reach you through TikTok in any way.

In summary, blocking completely cuts off the user’s access to your profile and prevents any engagement, precisely as intended.

You are in full control.

Can You See Who Viewed Your TikTok Profile?

Unlike Instagram and other platforms, TikTok does not have a built-in way to see exactly who has viewed your profile.

However, there are a few signs that someone specific is checking you out on TikTok:

  • If they watch your videos but don’t follow you, they have likely visited your profile.
  • TikTok shows full videos to followers only.
  • You may notice repeat views from the same non-follower, indicating they keep coming back to your page.
  • You can see who views your Stories if you have a public account, though profile views are still private.
  • Paid analytics services claim to show more profile traffic data, but accuracy varies widely.

Overall, precise profile viewer data is intentionally limited for privacy reasons.

But the above signals can give you an idea of who is lurking, letting you block as needed.

Can You Tell if Someone Blocked You on TikTok?

TikTok does not directly notify you if someone has blocked you.

However, there are a few signs you may be blocked by another user:

  • You are suddenly unable to view their profile or any of their videos. A “User not found” message appears.
  • Your comments on their videos disappear and cannot be seen by others.
  • You are automatically unfollowed by their account if you were previously following them.
  • Any messages sent to them on TikTok will not be delivered and cannot be sent.
  • You stop seeing their content via hashtags, the For You page, or any shared videos.

While not a perfect system, these signals likely indicate the user has blocked you.

TikTok aims to avoid confrontation so official block notices are not provided.

Conclusion

I hope this guide has shown you exactly how to block accounts, restrict comments and messages, and use TikTok’s safety tools to their full potential – all from an Android device.

With TikTok’s robust blocking features, you can enjoy scrolling without disruptive users and trolls ruining the experience.

Remember to block and report offenders early, limit messaging to friends only, and keep an eye out for signs you may be blocked yourself.

Here’s to happy and harassment-free scrolling! Let me know if you have any other TikTok tips or questions.

How to Create a Meme on Android Like a Pro

How to Create a Meme on Android Like a Pro

Creating memes on your Android device is easy and fun with the right apps.

In this guide, we’ll walk you through how to make hilarious, viral-worthy memes in just a few taps.

As an experienced Android expert, I’ll share my insider tips on finding the best meme-maker apps and customizing memes with text, images, and more.

Whether you’re a meme lord or just getting started, you’ll be churning out dank memes in no time after reading this.

Memes are taking over the internet, spreading joy and laughter across social media.

Who doesn’t love a hilarious meme?

With the right Android meme generator app, you can create your own in seconds.

The key is finding an app with robust features to add text, images, stickers, and more.

There are many options available, but not all are created equal.

By the end, you’ll have the skills to make side-splitting memes that get reactions and shares on Reddit, Twitter, Instagram, and more.

The Best Meme Maker Apps for Android

There are tons of meme generator apps for Android, but these three offer the best balance of features, ease of use, and output quality:

1. Meme Generator Free

Meme Generator Free is my top pick for Android.

With over 100 million downloads and a 4.5-star rating, it’s popular for good reason.

Some key features:

  • Massive library of popular meme templates from movies, TV shows, celebrities, and more.
  • Easy browse and search.
  • Add custom text with a range of fonts, colors, and styles.
  • Draw annotations like arrows using the Doodle tool.
  • Add your images and stickers.
  • Create meme collages with up to 6 panels.
  • Save memes to your camera roll.
  • Free with no watermark, but ad-supported.

Overall, it packs tons of options into a clean, intuitive interface.

The template library is unmatched.

For mobile meme-making on Android, Meme Generator Free can’t be beaten.

2. Meme Creator

Meme Creator is another excellent choice to create memes on the fly.

With over 10 million downloads and a 4.5 rating, it’s a proven meme machine.

Highlights include:

  • Big library of popular meme templates and characters.
  • Add text with diverse font, color, and size options.
  • Resize, rotate, crop, and add borders to images.
  • Draw and annotate with the built-in doodle tools
  • Make 2 to 6-panel meme collages.
  • Save memes to the camera roll without any watermark.
  • Minimal ads.

The wide range of editing features combined with a slick interface makes Meme Creator a top Android meme app.

3. Memeatic

From the makers of Imgflip (the #1 web meme generator), Memeatic puts professional meme creation tools right in your pocket.

With over 5 million downloads, it’s well worth a look.

Memeatic offers:

  • Hundreds of trending meme formats with more added daily.
  • Flexible text editing with different fonts, colors, and positions.
  • Add stickers from an ever-growing collection.
  • Draw on memes using the doodle pen.
  • Make 2-6 panel meme collages.
  • Save memes without any Memeatic branding.
  • Clean, easy-to-use interface.

The constantly updated meme template library keeps this app fresh and fun to create memes on the fly.

How to Add Text to Memes

Once you’ve chosen a meme generator app, it’s time to start customizing.

Adding your hilarious captions is a meme-making must!

Here are some tips for adding meme text:

  • Tap the text button in your meme app to bring up font options.
  • Select a font style and color to match the meme format. Bold, white Impact text works for many.
  • Type your top caption and bottom caption. Be concise.
  • Resize the text boxes by pinching or dragging corners.
  • Reposition text by dragging the boxes where you want them.
  • Rotate text boxes if needed to angle with the image.
  • Add an outline, shadow, or other effects for better visibility.
  • Add multiple text boxes for dialogues or break up long captions.

Take time crafting your meme text.

The words make the meme! Play with fonts and positions until the text pops.

Many apps also let you add text directly to images using the Doodle tool.

This works great for annotating scenes or adding speech bubbles.

Customize Memes with Your Images

Most meme apps allow using your photos to create original memes.

Just follow these steps:

  • Tap the camera button to import a photo from your Android’s camera roll.
  • Crop the image if needed to highlight your chosen scene.
  • Drag and rotate to position the image how you want.
  • Add text, stickers, and doodles to personalize it.
  • Save and export your new unique meme!

Some apps like Meme Generator even let you remove backgrounds from photos to isolate subjects or faces for inserting into meme templates.

Using your pics to recreate popular meme formats or craft entirely new concepts takes things up a notch.

Give your memes an authentic, personal touch!

Enhance Memes With Stickers and Emojis

Stickers and emojis are a quick way to make memes more lively and engaging.

Here are some tips for using them:

  • Browse your meme app’s sticker collection. Look for categories that fit the meme style and topic.
  • Tap a relevant sticker to add it. Drag and resize to place within the meme scene.
  • Search for specific emojis using your Android keyboard and copy/paste them into meme images.
  • Hand-draw emojis using the Doodle pen tool if your app has it.
  • Combine appropriate stickers and emojis to embellish your meme and express reactions.
  • Get creative! Stickers with big googly eyes, explosions, and sarcasm quotes (rolls eyes, yawn) work great.

With the right added stickers and emojis, you can take a meme from bland to brilliant.

They add character and visual punch.

Use Advanced Editing Features

More advanced Android meme-maker apps like Meme Creator and Memeatic offer powerful editing tools to take meme customization further.

Try features like:

  • Cropping to better frame scenes or subjects from photos.
  • Rotating, flipping, and resizing images and text boxes.
  • Drawing annotations using the doodle pen.
  • Adding borders, drop shadows, and outline effects.
  • Adjusting color filters, brightness, and contrasts.
  • Adding backgrounds and textures.

With the right edits, you can mash up images in wacky ways that sell the humor.

Twist faces, combine celebrities, morph scenes…the options are limitless for meme magic!

Don’t be afraid to get creative with editing features to concoct truly one-of-a-kind memes.

Save Your Memes to Camera Roll

Once your meme masterpiece is complete, save it!

  • Tap the save or download button in your meme generator app.
  • Browse the camera roll or meme album within the app.
  • Share directly to social media from the app if desired.
  • For maximum sharing flexibility, save memes to your default camera roll photo album.

Saving to the camera roll stores the full-resolution image for sharing anywhere.

Unlike screenshots, camera roll memes won’t include any interface elements or branding from the app around the edges.

Now your meme creation will be safely stored on your Android and ready to unleash on the internet!

Meme Ideas and Trends to Try

Not sure what kind of memes to make? Try these popular formats and topics:

  • Reaction memes – Use templated images of celebrities reacting to something outrageous. Add your captions.
  • Modern problems require modern solutions – Mock life frustrations by juxtaposing two contrasting images for humor.
  • Is this a pigeon/butterfly meme – Startled animal identities wrong objects in a twisted role reversal?
  • Spongebob memes – Images from the hit show work great for exaggerated reactions.
  • Expanding brain meme – escalating galaxy brain levels represent shifting perspectives.
  • Who would win? – Compare unlikely faceoffs between two characters or items.
  • Videos to gifs – Convert funny video moments into shareable reaction gifs.

Stay on top of current meme trends and jump into new ones early!

For inspiration, browse meme aggregators like Reddit and Imgflip to see formats going viral.

Then put your spin using your meme maker app.

Conclusion

And that’s it! You’re now equipped to start making memes like a pro Android user.

The top apps provide endless meme fodder with templates plus tools to add text, stickers, edits, and images for truly custom creations.

Making memes on your phone takes just minutes, so you can react quickly when meme inspiration strikes.

With the right mix of timely topics, shareable reactions, and laugh-out-loud captions, your memes can take off across social media!

Some final tips:

  • Keep meme text short, punchy, and full of personality.
  • Remix popular formats but add your unique twist.
  • Use stickers, emojis, and doodles sparingly to maximize impact.
  • Stay on-trend with timely topics for maximum shareability.
  • Save memes to your camera roll before posting or sharing.

Now get out there, source some epic reaction gifs, and turn them into the next big meme!

With the right Android app, some creativity, and these tips, you’ll be a meme legend in no time.

Happy memeing!

How to Block Text Messages on Android Verizon

How to Block Text Messages on Android Verizon

Unwanted text messages can be annoying and distracting. If you have an Android phone on the Verizon network, you have a few different options for blocking text messages so you no longer receive them.

In this in-depth guide, I’ll explain the pros and cons of each method for stopping text message spam on Android Verizon devices.

After years of experience with mobile devices, I’ve discovered the most effective ways to stop getting unwanted texts.

With the right combination of these text-blocking options, you can stop unwanted messages in their tracks.

Let’s get started!

Use Android’s Built-In Blocking

Android has native options to block phone numbers and filter spam texts.

Here’s how to use them:

Block Individual Numbers

The most basic way to stop texts from a single number is to block it directly on your Android device.

Here’s how:

  1. Open the Phone app on your Android device.
  2. Tap the Recents tab to view recent incoming and outgoing calls and texts.
  3. Tap the phone number you want to block.
  4. Tap the info icon (i inside a circle) next to the number.
  5. Tap the Block number.
  6. Confirm by tapping BLOCK.

This will prevent any calls or texts from getting through from that specific number.

You can repeat these steps to block additional numbers as needed.

Pros:

  • Simple and takes less than a minute to block a number
  • Free and built directly into Android

Cons:

  • This needs to be done for each number you want to block
  • Doesn’t prevent texts from new or unknown numbers

Enable Caller ID and Spam Protection

For broader protection beyond individual numbers, enable Caller ID and Spam Protection in your Phone app settings:

  1. Open the Phone app.
  2. Tap the three-dot menu in the upper right corner.
  3. Select Settings.
  4. Tap Caller ID and spam.
  5. Toggle on Enable spam protection.

This will automatically check incoming calls and texts against Google’s spam database.

Any numbers flagged as spam will be sent directly to voicemail or blocked for texts.

Pros:

  • Broad protection against known spam numbers
  • Works automatically in the background

Cons:

  • Doesn’t catch brand-new or unknown spam numbers
  • Requires a Google account

Block Spam Text Messages

If you’re receiving spam text messages, you can report them to Google.

This helps improve spam detection for everyone.

To report spam texts:

  1. In the message thread with the spam text, touch and hold the spam message.
  2. Tap Report Spam.
  3. Confirm by tapping YES.

Google will analyze reported messages to improve its spam filters.

Pros:

  • Helps enhance spam protection over time
  • Easy automated reporting right from the text message

Cons:

  • Doesn’t offer immediate blocking of that number
  • Requires manual reporting for each unwanted text

Blocking Through My Verizon App

The My Verizon app provides additional tools to block calls and texts right from your Verizon account.

Enable Text Message Blocking

You can completely disable text messages in the My Verizon app:

  1. Open the My Verizon app and log in to your account.
  2. Tap Account at the bottom.
  3. Select Manage products and apps.
  4. Tap the line you want to manage.
  5. Scroll down and tap Text message blocking.
  6. Flip the switch to enable blocking.

With this enabled, all texts to your number will be blocked.

You can toggle it back off at any time to re-enable texts.

Pros:

  • Quickly disable all text messages
  • Can be toggled on and off as needed

Cons:

  • Blocks all texts, not just spam
  • Needs to be disabled to receive any texts

Block Individual Numbers

You can also block individual numbers right in the My Verizon app:

  1. In the app, tap the More tab at the bottom.
  2. Select Block calls + texts.
  3. Tap the Block number.
  4. Enter the phone number you want to block.
  5. Tap Block to confirm.

Repeat these steps to block additional spam numbers.

You can tap Manage Blocked Numbers to see your blocked list.

Pros:

  • Easy blocking from within the My Verizon app
  • Can unblock numbers if needed

Cons:

  • Doesn’t preemptively block new or unknown numbers
  • Blocked numbers list maxes out at 1000 entries

Apply Call and Text Blocking Services

Verizon offers call and text-blocking services that provide enhanced protection:

Verizon Spam Alert

Verizon’s Spam Alert identifies potential spam calls and texts and sends a notification before they get through.

To enable:

  1. In the My Verizon app, go to Manage products and apps.
  2. Tap the line you want to manage.
  3. Select Call Features.
  4. Turn on Verizon Spam Alert.

You’ll get alerts on likely spam calls/texts but can still answer if needed. It’s $2.99 per month per line.

Pros:

  • Warns about potential spam before answering
  • Still allows incoming calls/texts if needed

Cons:

  • The extra monthly charge per line
  • Doesn’t automatically block spam

Verizon Call Filter Plus

For automatic blocking, Verizon Call Filter Plus is $2.99 per month per line. It includes:

  • Automated fraud call blocking
  • Spam text message blocking
  • Personal block list
  • Reverse number lookup

To enable, follow the same steps as above but turn on Verizon Call Filter Plus instead of just Spam Alert.

Pros:

  • Automatic blocking of identified spam calls/texts
  • Customizable with a personal block list

Cons:

  • Monthly subscription fee per line
  • May occasionally block legit calls/texts

Use Third-Party Apps

If the built-in tools don’t provide the level of blocking you need, third-party apps are available with advanced filtering:

Mr. Number

Mr. Number lets you see the name and location of callers before you answer.

You can block specific numbers or enable auto-blocking of suspected spam.

Some key features:

  • Automatic spam blocking
  • Ability to report spam numbers
  • Custom block lists and allow lists
  • Blocking by area code or region

Pros:

  • Powerful auto-blocking based on crowdsourced lists
  • Flexible customization of block and allow lists
  • The free limited version is available

Cons:

  • Must pay for full call-blocking features
  • Occasional false positives blocking legit calls

Truecaller

Truecaller identifies incoming calls, texts, and SPAM.

You can also opt to have it automatically block unwanted communications.

Key features:

  • Crowdsourced spam and telemarketer flags
  • Option for automatic blocking of spam
  • Filters for text messages
  • Global spam database from over 1 billion users

Pros:

  • A very large global crowdsourced database
  • Automatic blocking options
  • The free version has basic features

Cons:

  • Limitations on the number of blockings for the free version
  • Some user complaints about filtering accuracy

Considerations When Using Third-Party Apps:

  • Review app permissions before downloading
  • Paid versions often required for full functionality
  • Check whether ads are displayed in free versions
  • Disable any unnecessary location access

Contact Verizon Support

If the above options still don’t block unwanted texts as needed, you can contact Verizon support for additional help:

Call 800-922-0204 or dial *611 from your Verizon mobile phone.

Explain you are receiving spam text messages and ask what further recommendations they have.

Verizon may be able to suggest additional steps or escalate your issue for further spam investigation.

Be ready to provide any details you have, including message content, sender numbers, and times received.

Pros:

  • Direct support from your mobile provider
  • May be able to take further action on spam texts

Cons:

  • Call wait times to speak with the rep
  • Unlikely to offer solutions beyond the suggestions covered here

Frequently Asked Questions

Here are answers to some common questions when blocking texts on Android devices using Verizon:

Will blocking a number delete past texts?

No, blocking a number only prevents future texts – previous messages are not deleted automatically. You’ll need to manually delete past texts if you want to remove them.

Does blocking texts cost anything?

The basic blocking tools built into Android and the My Verizon app are free. However, advanced services like Verizon Spam Alert and Call Filter Plus have monthly subscription fees per line.

What happens when you block someone?

On your end, you simply won’t receive any calls or texts from any number you block. However, the blocked person will get a message saying your number is out of service or unavailable.

Can you tell if someone blocked your number?

There is no definite way to confirm if someone specifically blocked your number. But if your texts to them fail repeatedly, that likely indicates you have been blocked.

Will blocking on my Android device also block that number on other devices?

No, blocking on your Android device only affects that device. To block across multiple devices, use the blocking tools in the My Verizon app or a third-party app linked to your number.

Does blocking stop all communication or just texts?

Blocking directly on your Android device will stop calls and texts. But other blocking methods like My Verizon allow you to disable just texts or calls separately.

Can I still text or call someone who blocked me?

No, blocking is reciprocal, so you will be unable to reach someone via calls or texts if they have blocked your number, even from a different phone. Your messages will not go through to a blocked contact.

Conclusion

Dealing with unwanted texts on your Verizon Android phone can be irritating.

But with the right combination of Android settings, Verizon tools, and third-party apps, you can control which messages get through.

The most effective approach is to use multiple layers of protection, like automatic spam-blocking apps along with custom block lists.

Some key takeaways:

  • Use Android settings to block specific numbers easily
  • Enable Verizon Spam Alert for warnings about potential spam
  • Consider powerful third-party apps like Mr. Number or Truecaller for advanced filtering
  • Contact Verizon support if unwanted texts persist for further help

With diligent use of these spam-blocking techniques, you can eliminate disruptive unwanted text messages on your Android phone.

Take control of your messaging experience again.

How to Cast Peacock to Your TV from an Android Phone

How to Cast Peacock to Your TV from an Android Phone

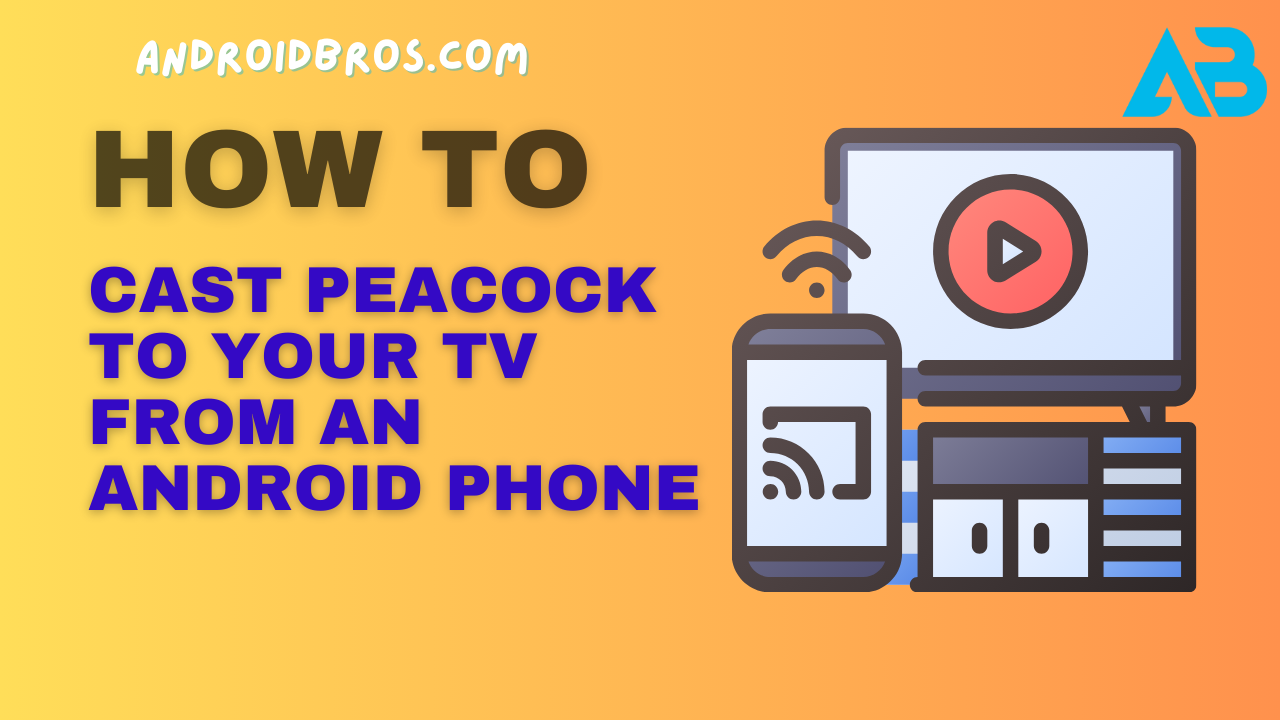
Learn how to cast Peacock from your Android phone or tablet to your smart TV or streaming device.

Follow this simple step-by-step guide for casting Peacock on Roku, Fire TV, Apple TV, Chromecast, and more.

Watching Peacock on the go is great, but when it’s time to relax at home, you likely want to watch your shows on the big screen.

Thankfully, casting Peacock from your Android phone or tablet to your television is a breeze.

In this guide, I’ll walk you through the step-by-step process for casting Peacock to smart TVs, streaming devices, and more.

With years of experience in Android and TV technology, I’ve got all the tips and tricks you need to get Peacock beaming from your phone to your TV in minutes.

What You’ll Need to Cast Peacock from Android

Before we dive in, let’s go over what you’ll need on hand:

A Compatible Android Device

First, you’ll need an Android smartphone or tablet running Android 5.0 or higher.

Popular Android phones like Samsung Galaxy, Google Pixel, LG, Motorola, and more will work.

The Peacock App

You’ll need to install the free Peacock app from the Google Play Store on your Android device.

Peacock offers a free tier with ads or paid Premium and Premium Plus plans.

A Compatible TV or Streaming Device

You’ll also need a smart TV, streaming stick, or box that’s compatible with Peacock and casting capabilities.

Some options include:

  • Smart TVs – Samsung, LG, Vizio, Sony with built-in Chromecast
  • Streaming devices – Roku, Amazon Fire TV, Apple TV 4K/HD
  • Game consoles – Xbox One and Series X/S, PS4 and PS5

The TV or device and your Android phone need to be on the same WiFi network.

A Premium Peacock Account (for Premium Content)

To cast shows and movies exclusive to Peacock Premium or Premium Plus, you’ll need one of the paid Peacock plans.

The free tier has limited content.

Okay, now that you’ve got the equipment covered, let’s get to casting!

How to Cast Peacock from Android to a Smart TV

Casting to a smart TV is the easiest option since many modern TVs have Chromecast built-in.

Here’s how to do it:

1. Connect Android and TV to the Same WiFi Network

First, connect your Android device and your smart TV to the same WiFi network.

You can check this in your phone’s WiFi settings.

2. Open the Peacock App on Android

Next, launch the Peacock app on your Android device.

Browse and select something to watch.

3. Tap the Cast Button

Tap the Cast button in the Peacock app.

It looks like a TV with a WiFi symbol.

4. Select Your TV

Your smart TV with Chromecast built-in should appear as an option.

Simply tap on its name to connect.

5. Play on TV

Peacock on your Android will now cast to your smart TV.

You can use your phone to pause, play, rewind, etc.

That’s all there is to it!

The Peacock app makes casting a breeze if your smart TV has a built-in Chromecast.

How to Cast Peacock to a Streaming Device or Game Console

Don’t have a smart TV with Chromecast? Not a problem!

You can cast Peacock to streaming media players like Roku, Fire TV, Apple TV, or game consoles too.

Here are the steps:

1. Connect Android and Device to Same WiFi

Again, connect your streaming device or game console and your Android phone to the same WiFi network.

2. Connect the Device and TV via HDMI

Make sure your Roku, Fire TV, Apple TV, Xbox, etc. is connected to your TV via HDMI.

Power on the device.

3. Open the Peacock App on Android

Browse Peacock and select something to watch on your phone.

4. Tap the Cast Button

Tap the Cast button in the Peacock app.

5. Select Device

Your Roku, Fire TV, Apple TV, or game console should appear as an option.

Tap to connect.

6. Open Peacock on Device

If you have the Peacock app already installed on your streaming device, open it.

The content will begin playing immediately.

7. Download the Peacock App on the Device

If you haven’t installed Peacock yet on your Fire TV, Roku, etc., you’ll be prompted to download the app after tapping the name.

Once downloaded, the content will begin playing.

And that’s it! You now know how to cast Peacock from your Android phone or tablet to streaming devices, game consoles, and more.

The steps are very similar across platforms.

How to Cast Peacock to a Chromecast Device

One of the most popular ways to cast Peacock is using a Google Chromecast dongle.

Here’s how simple it is:

1. Plug-In Chromecast

Insert your Chromecast device into your TV’s HDMI port and connect the power cable.

Follow the setup instructions on your TV screen.

2. Connect Android and Chromecast to the Same WiFi

Make sure your Android device and your Chromecast dongle are connected to the same WiFi network.

3. Open the Peacock App on Android

Launch Peacock on your phone and browse shows or select something to watch.

4. Tap the Cast Button

Tap the Cast button in the top corner of the Peacock app.

5. Select Your Chromecast

Your Chromecast name should automatically appear.

Tap it to connect.

6. Stream Peacock on TV

Chromecast will now stream Peacock directly from your phone to your TV.

Use Android to control playback.

The great thing about Chromecast is that it works across almost any app.

So once you set it up, you can cast YouTube, Netflix, music, and much more from your phone.

How to Cast Peacock from Android Using AirPlay (For Apple TV)

To cast Peacock or anything else to an Apple TV 4K or HD, you’ll use AirPlay rather than Chromecast.

Here’s what to do:

1. Connect Android and Apple TV to Same WiFi

First, get your Android device and Apple TV on the same WiFi network.

2. Connect Apple TV and TV via HDMI

Make sure your Apple TV box is powered on and connected to your TV with an HDMI cable.

3. Open Control Center on Android

On Android, swipe down from the top right corner to open Control Center.

4. Tap Screen Mirroring

In the Control Center, tap on Screen Mirroring.

This enables wireless casting.

5. Select Your Apple TV

Your Apple TV should appear as an option.

Tap on its name to begin casting.

6. Open Peacock on Android

Now open the Peacock app on your Android phone.

Content will automatically be cast to your Apple TV.

This mirrors your entire Android screen rather than just the Peacock app, but it achieves the same result.

You can use your phone to control playback on the big screen.

Pro Tip: How to Minimize Latency When Casting Peacock

When casting Peacock from your Android phone to your TV, you may notice a bit of lag or latency, resulting in audio and video being slightly out of sync.

Here are some tips to minimize latency issues when casting Peacock:

  • Connect Android and casting devices via a 5Ghz WiFi network instead of 2.4Ghz for faster speeds.
  • If using a Chromecast, position the dongle as close to your WiFi router as possible for better signal strength.
  • Close any unused apps on your Android device to devote more processing power to casting.
  • Pause casting for 30 seconds then resume if latency persists to reset the connection.
  • Adjust audio sync settings in the Peacock app’s settings if available for your device.
  • Consider upgrading to a newer or higher-end Chromecast or streaming device model if latency persists.

Following these tips will typically provide a smooth, in-sync casting experience with minimal delays when beaming Peacock from your Android phone to the TV.

Frequently Asked Questions About Casting Peacock from Android

Here are answers to some common questions about casting Peacock from your Android smartphone or tablet:

Does Casting Peacock from Android Use Mobile Data?

No, casting Peacock uses only WiFi data, not mobile data from your phone plan. As long as your Android device and TV/streaming device are on the same WiFi network, it won’t use any cellular data.

Can You Cast Peacock to Multiple Devices at Once?

Unfortunately no—you can only cast Peacock from your Android phone to one device at a time. So you can’t cast to your bedroom TV and living room TV simultaneously.

Does Peacock Streaming Quality Change When Casting?

Peacock will attempt to maintain the same streaming quality when casting from your phone. However, performance can vary slightly based on the capabilities of your TV/device and WiFi speeds. In most cases, quality is indistinguishable.

Can You Cast Peacock from Android to PC or Mac?

At this time, you cannot directly cast Peacock from an Android phone or tablet to a Windows PC or Mac computer. You’ll need to use a streaming device or smart TV with casting capabilities.

Does Casting Drain Your Android Battery Faster?

Yes, casting Peacock will drain your phone or tablet’s battery noticeably faster, as it’s transmitting a video signal. So it’s a good idea to plug your device into a charger while casting for extended periods.

Can You Use Your Android Phone Normally While Casting Peacock?

Absolutely! Once you’ve started casting Peacock, you can minimize the app and use your device as usual while the video continues playing on your TV in the background.

And there you have it—everything you need to know to cast Peacock from your Android smartphone or tablet to your television or streaming device. With just a few taps in the app, you can stream movies, shows, sports, and more on the big screen. So kick back and enjoy Peacock on TV using the handy casting capabilities built into Android.

Conclusion

Casting Peacock from your Android device to your television is quick and easy with just a few steps.

With the proliferation of smart TVs, streaming devices, and screen-casting protocols like Chromecast and AirPlay, you have more options than ever to beam shows and movies from the small screen to the big screen.

Whether you use a native smart TV casting, a Chromecast stick, Roku, Fire TV, Apple TV, or a game console, this guide covers multiple methods to get Peacock from your Android phone or tablet to your living room TV with minimal hassle.

With the right devices on the same WiFi network and the Peacock app installed, you’ll be streaming in minutes.

So save your phone battery and watch Peacock on the largest screen available using these handy Android casting capabilities.

Just tap the cast button and select your target device to get your Peacock content beaming from phone to TV.

How to Check Phone Temperature on Android

How to Check Phone Temperature on Android

Overheating phones is a common issue that can lead to poor performance, battery drain, and even permanent damage.

Thankfully, monitoring and controlling your Android phone’s temperature is easy with the right tools.

In this compete guide, we’ll cover everything you need to know about checking and regulating your phone’s temperature on Android.

Why You Should Monitor Your Phone’s Temperature

Extreme heat can cause multiple problems with your Android device:

  • Throttled performance – To prevent overheating, your phone may throttle the CPU and GPU speeds. This leads to lag, freezes, and slower app loading times.
  • Battery drain – Heat puts strain on the battery components, shortening its lifespan and causing faster power drain.
  • App crashes – Excess heat can force apps to close and prevent smooth operation. Games and video streaming apps are especially susceptible.
  • Hardware damage – High temperatures degrade silicon chips over time. The processor, RAM, and internal storage are most at risk of permanent failure.

By monitoring and controlling the internal temperature, you can avoid all these issues and extend your phone’s life.

Most Android devices start exhibiting problems at around 40°C/104°F and above.

Checking Temperature on Android

Android provides several ways to instantly check the live temperature of your device.

Let’s go through each method.

Using a Temperature Monitoring App

Specialized apps offer the easiest and most convenient way to check CPU and battery temperature on Android.

They display readings in both Celsius and Fahrenheit.

Some popular options include:

  • CPU Temperature – Lightweight app with temperature displayed directly on the status bar.
  • AIDA64 – Advanced diagnostics suite that shows CPU, GPU, battery, and other component temperatures.
  • Thermometer – Simple thermometer app for ambient, CPU, GPU, and battery temperature.

We recommend CPU Temperature for a quick overview and AIDA64 for maximum detail.

Both are free on the Google Play Store.

To use these apps:

  1. Download and install the temperature monitoring app of your choice.
  2. Open the app and check the current CPU temperature.
  3. For more details, consult the battery and individual component temperatures.
  4. Refer to the temperature periodically, especially when experiencing overheating issues or lag.
  5. Look for spikes over 40°C/104°F when under load.
  6. This may indicate cooling or software issues.

The major downside to these apps is the need to open them manually.

So it’s easy to miss temporary spikes.

We’ll cover widgets and status bar icons next for 24/7 monitoring.

Via Status Bar and Widgets

For at-a-glance temperatures directly on your home screen, use temperature widgets or enable the status bar icon in monitoring apps.

Here’s how to set them up:

Widgets

  1. Press and hold on to an empty section of your home screen.
  2. Tap “Widgets” and look for your temperature monitoring app.
  3. Drag the temperature widget to your preferred location. It will now display constantly.

Status Bar Icon

  1. Open your temperature monitoring app’s settings.
  2. Enable the “Status bar icon” or similarly named toggle.
  3. A small thermometer icon will now be visible in your status bar. Check it anytime.

The widget and status icon allow checking the temperature without opening any apps.

However, most lack detailed breakdowns by component. You’ll still need the full app for that.

Reading Temperatures in Diagnostics Mode

Every Android device has built-in diagnostics screens that are not normally visible to users.

They contain technical details like live temperatures that help with troubleshooting.

To view them:

  1. Open your phone dialer and enter *#0*# to launch diagnostics.
  2. Navigate to the “Kernel/Thermal” tab.
  3. Scroll down to view the current and maximum temperatures for the CPU, GPU, battery, and other components.
  4. Take note of any readings higher than 40°C/104°F when idle or 50°C/122°F under load.

The diagnostics screens provide the most comprehensive temperature overview possible without root access or additional apps.

However, the UI is very basic and temperatures are shown in Celsius only.

Using Rooted Device Apps

Root access allows installing apps that can read even more sensor data from your phone than usual.

Apps like Kernel Adiutor provide highly detailed temperature monitoring with root privileges.

To use specialized rooted apps:

  1. Unlock your phone’s bootloader and install custom recovery.
  2. Use Magisk to root your device. Follow guides carefully to avoid issues.
  3. Download Kernel Adiutor or a similar temperature app requiring root.
  4. Open the app and navigate to the temperatures tab to view read-only data.

Rooting leads to the highest level of hardware access possible.

But it also carries risks, like voiding your warranty and bricking your phone if done improperly.

Only attempt it if you need that extra data and understand the dangers.

Controlling and Lowering Phone Temperature

Once you know your phone’s temperature, you can take steps to lower it using both software settings and physical techniques.

Reducing System Heat Through Settings

Adjusting software configurations is the first step to running a cooler.

Here are some options to try:

  • Limit CPU speed – Reduce maximum CPU frequency in battery settings or use a CPU throttling app.
  • Stop background apps – Freeze or uninstall apps running in the background needlessly.
  • Enable battery saver – Use your phone’s ultra power saving mode to limit performance.
  • Lower brightness – Reduce screen brightness to around 30% to cut energy use.
  • Disable GPS/connectivity – Turn off location services, WiFi, Bluetooth, and mobile data when not needed.
  • Remove live wallpaper – Switch to a static wallpaper to reduce GPU load.
  • Stop wireless charging – Use wired charging to avoid extra heat from wireless coils.
  • Update software – Install the latest OS and app updates for potential heating fixes.
  • Factory reset – Wipe your phone if overheating persists after the above steps.

These tweaks reduce total energy consumption and therefore heat production.

Try them one by one to determine the impact.

Physically Cooling Your Phone

In addition to software, physical cooling methods can also lower extreme device temperatures:

  • Remove the case – Prevent the phone from insulating itself, especially in direct sunlight.
  • Point a fan at it – Direct airflow cools the phone passively without risky DIY methods.
  • Place it on a cold surface – Lay your phone down on a metal, glass, or tile surface to absorb the chill.
  • Wrap an ice pack in a towel – Applying an ice pack briefly draws heat away, but avoids moisture damage.
  • Immerse in front of the AC vent – Position the phone to receive concentrated cool air.
  • Switch off and rest – Allow your phone to fully cool down by powering it off for 1+ hour.

Avoid extreme cooling like refrigerators, as condensation can damage electronics.

The above methods work safely if your phone is overheating.

Preventing Overheating Issues

Prevention is the best solution for overheating problems versus reactive troubleshooting.

Here are some proactive measures:

  • Maintain case ventilation – Don’t use fully sealed cases without heat dissipation.
  • Update intensive apps – Game/video apps should be updated to the latest optimized versions.
  • Avoid direct sunlight – Don’t leave your phone baking inside a hot car.
  • Limit charger amperage – Stick to OEM chargers and avoid fast charging when overly hot.
  • Check for swelling – Visually inspect the phone for potential swollen battery issues.
  • Monitor phone lifespan – Performance phones often degrade after 18-24 months of use.
  • Clear app data/caches – Wipe temporary storage as maintenance to avoid bloat.
  • Factory reset periodically – Start fresh to clear any janky software issues.

Making temperature monitoring part of your regular device maintenance helps avoid most overheating problems.

FAQs About Managing Android Phone Heat

Here are answers to some frequently asked questions about dealing with temperature issues on Android phones:

What temperature should my phone be?

Ideally, your phone should stay between 30 – 35°C (86 – 95°F) when idle, and not exceed 45°C (113°F) under heavy load or gaming.

At what temperature does a phone start having issues?

Many phones exhibit performance throttling, battery drain, or shutdowns above 40°C (104°F). Permanent component damage is possible above 60°C (140°F).

What’s the easiest way to monitor phone temperature?

Downloading a temperature monitoring app like CPU Temperature or AIDA64 offers the simplest way to quickly check your phone’s current and maximum heat levels.

How can I rapidly cool down an overheated phone?

Please turn it off, remove any case, point a fan at it, and place it on a cold surface to quickly dissipate heat. Avoid extreme cooling that can cause moisture issues.

When should I be concerned about overheating problems?

If your phone exceeds 45°C (113°F) regularly under normal usage, overheating issues are likely present and steps should be taken to keep it cooler through tweaks and physical cooling methods.

What reduces the risk of overheating?

Using phone cases with proper airflow, limiting direct sunlight exposure, not fast charging when hot, keeping background apps closed, and regularly maintaining your device all help minimize overheating risks.

Conclusion

Extreme device heat can ruin the performance and longevity of any Android phone.

By utilizing temperature monitoring apps, status bar icons, diagnostics screens, and physical cooling techniques, you can take control of your phone’s temperature.

Lowering CPU speeds, disabling unneeded features, updating intensive apps, and simply being mindful of heat risks also help mitigate issues before they occur.

With proper monitoring and maintenance habits, your phone can operate at optimum temperatures for many years.

How to Turn Off Fingerprint Unlock on Android Devices

How to Turn Off Fingerprint Unlock on Android Devices

Fingerprint sensors have become a popular way to unlock Android devices over the past few years.

While fingerprint unlock offers a convenient way to secure your device, you may want to turn it off at times.

In this complete guide, we’ll cover everything you need to know about turning off fingerprint unlock on Android devices.

I’ll provide step-by-step instructions for disabling fingerprint unlock on phones from Samsung, Google Pixel, OnePlus, Xiaomi, Motorola, and more.

Introduction to Fingerprint Unlock on Android

Fingerprint scanning technology was first introduced on Android with the launch of Android 6.0 Marshmallow in 2015.

Since then, it has become a standard feature on most Android devices.

Fingerprint sensors allow you to register your fingerprint on the device.

Once set up, you can simply tap the sensor to unlock your phone instead of entering a PIN, pattern, or password each time.

Here are some of the benefits of using fingerprint unlock on Android:

  • Convenience – Unlocking with your fingerprint is quicker than entering a code and password. It takes just one touch.
  • Security – Fingerprints are unique to each person, so it’s more secure than using a pattern or numeric PIN.
  • Access apps and payments – Many apps now allow fingerprint login, banking, and finance apps. You can also verify payments with your fingerprint.

However, there are some reasons you may want to disable fingerprint unlock:

  • To stop accidental unlocks when handing your phone to someone else
  • If you find the sensor performs inconsistently
  • To increase security if you lose the phone
  • When repairing the screen which may damage the sensor
  • To conserve battery life if the sensor is faulty

Fortunately, all Android devices make it possible to turn off fingerprint unlock if needed.

The steps vary slightly depending on the device brand and Android version.

In this guide, I’ll take you through how to disable fingerprint unlock on popular Android phones step-by-step.

How to Turn Off Fingerprint Unlock on Samsung Galaxy Phones

Samsung Galaxy phones come with fingerprint scanning capability out of the box.

Here are the steps to disable fingerprint unlock on Galaxy devices:

On Galaxy Phones Running One UI 2/Android 10

  1. Open the Settings app and tap ‘Biometrics and security’.
  2. Under Biometrics preferences, tap ‘Fingerprints’.
  3. Enter your PIN, pattern, or password to confirm your identity.
  4. Tap the switch next to ‘Fingerprint unlock’ to turn it off.
  5. Confirm that you want to disable fingerprint unlock.

On Galaxy Phones Running One UI 1/Android Pie

  1. Go to Settings > Lock screen > Screen lock type.
  2. Enter your PIN, pattern, or password.
  3. Tap ‘Fingerprints’.
  4. Tap the switch next to ‘Fingerprint unlock’ to disable it.
  5. Confirm turning off fingerprint unlock.

On Galaxy Phones Running Android Oreo or Below

  1. Open Settings and go to Lock screen and security.
  2. Tap ‘Screen lock type’ and enter your password.
  3. Tap ‘Fingerprints’ to go to fingerprint settings.
  4. Tap ‘Unlock with fingerprint’ and switch off the toggle.
  5. Confirm to disable fingerprint unlock.

And that’s it! Fingerprint unlock is now disabled on your Samsung Galaxy phone.

You’ll need to use your backup screen lock method to unlock the phone.

How to Turn Off Fingerprint Scanner on Google Pixel Phones

Google Pixel phones come with a fingerprint sensor on the back.

Here are the steps to turn off fingerprint unlock:

On Pixel Phones Running Android 9 or 10

  1. Go to Settings > Security & location.
  2. Under Fingerprint, tap ‘Fingerprint unlock’.
  3. Turn off the toggle next to ‘Use fingerprint’.
  4. Confirm disabling fingerprint unlock.

On Pixel Phones Running Android 8 Oreo

  1. Open Settings and tap Security & location > Fingerprint.
  2. Turn off the ‘Fingerprint unlock’ switch.
  3. Tap ‘OK’ to confirm.

Pixel phones make it quick and easy to toggle fingerprint unlock on or off.

Just open your device settings and turn off the fingerprint unlock option.

How to Disable Fingerprint Scanner on OnePlus Phones

OnePlus phones also offer fast fingerprint unlock.

Follow these steps to turn it off:

On OnePlus Phones Running OxygenOS 11/Android 11

  1. Go to Settings > Security & lock screen.
  2. Enter your PIN, pattern, or password.
  3. Tap ‘Fingerprint’ and turn off ‘Unlock device using fingerprint’.
  4. Confirm to disable fingerprint unlock.

On OnePlus Phones Running OxygenOS 10/Android 10

  1. Open Settings > Security & lock screen.
  2. Enter your password and tap ‘Fingerprint’.
  3. Turn off the slider for ‘Unlock device using fingerprint’.
  4. Confirm disabling fingerprint unlock.

And that’s all you need to do to turn off fingerprint scanning on OnePlus devices.

The steps are quite straightforward.

How to Turn Off Fingerprint Lock on Xiaomi Phones

Here are the steps to disable fingerprint sensor unlocking on Xiaomi phones:

On Xiaomi Phones Running MIUI 12/Android 10

  1. Go to Settings > Passwords & security.
  2. Tap ‘Fingerprint’ and enter your password.
  3. Turn off the toggle for ‘Unlock device using fingerprint’.
  4. Confirm disabling fingerprint unlock.

On Xiaomi Phones Running MIUI 10-11/Android Pie

  1. Open Settings and go to Lock screen & passwords.
  2. Tap ‘Manage fingerprints’ and enter your password.
  3. Tap the trash icon next to a registered fingerprint to delete it.
  4. Repeat step 3 to delete all fingerprints.

This will disable fingerprint unlock on your Xiaomi device.

How to Turn Off Fingerprint Lock on Motorola Phones

Motorola phones also come with a handy fingerprint scanner.

Here’s how to turn it off:

On Motorola Phones Running Android 10

  1. Go to Settings > Security.
  2. Tap ‘Fingerprint’ and enter your PIN/pattern/password.
  3. Turn off the toggle for ‘Unlock with fingerprint’.
  4. Confirm disabling fingerprint unlock.

On Moto Phones Running Android 9 Pie

  1. Open Settings and tap Security & location.
  2. Go to Fingerprint and enter your password.
  3. Turn off ‘Unlock with fingerprint’.
  4. Confirm to disable fingerprint unlock.

And that’s it! You’ve successfully turned off fingerprint unlock on your Motorola phone.

How to Disable Fingerprint Sensor on Other Android Phones

The process is quite similar on other Android device brands like Sony, LG, Nokia, Asus, etc.

Here are the general steps to follow:

  1. Open your device’s Settings app.
  2. Navigate to the security or lock screen settings.
  3. Look for fingerprint settings and tap to open.
  4. Turn off the fingerprint unlock toggle after confirming your password.
  5. Double-check that any registered fingerprints are deleted.
  6. Restart your phone for changes to take effect.

You should now be able to lock and unlock your phone using the default screen lock method instead of fingerprint.

FAQs About Disabling Fingerprint Unlock on Android

Here are answers to some frequently asked questions about turning off fingerprint unlock on Android devices:

Will my registered fingerprints be deleted if I turn off fingerprint unlock?

Yes, disabling fingerprint unlock will delete any fingerprints registered on the device for unlocking.

Can I re-enable fingerprint unlock later?

Yes, you can re-enable fingerprint unlock at any time by toggling the setting back on and re-registering your fingerprints.

Do I need to set up a new screen lock method before disabling fingerprint unlock?

No, your existing PIN, pattern, or password will automatically be used to lock the screen.

Will turning off the fingerprint sensor increase battery life?

Possibly, as the fingerprint hardware will no longer actively scan for your finger. But the effect is usually marginal.

Will fingerprint authentication for apps still work?

Yes, you can still use your fingerprint for app authentication and payments even if fingerprint unlock is disabled.

How do I delete all existing registered fingerprints from my device?

When you turn fingerprint unlock off, it should automatically delete fingerprints. You can double-check under Fingerprint settings.

Conclusion

And that wraps up this guide on how to turn off fingerprint unlock on Android devices!

I’ve shown you step-by-step instructions for disabling fingerprint unlock on Samsung, Google Pixel, OnePlus, Xiaomi, Motorola phones, and other Android devices.

The process involves going into your security settings, navigating to fingerprint options, turning off fingerprint unlock, and confirming the change.

It’s quick and easy to do.

I hope this guide has helped you understand how to turn off fingerprint sensor unlocking on your Android phone or tablet.

This can be useful for boosting security, handing your device to others, and other situations.

Let me know if you have any other questions!

I’m always happy to help explain anything related to Android tips and tricks.

How to Get Pictures from Clipboard on Android

How to Get Pictures from Clipboard on Android

Copying and pasting pictures on Android can be a hassle, especially when you want to quickly transfer an image between apps.

Fortunately, there are easy ways to get photos from your clipboard on Android.

In this guide, we will walk you through the different methods to copy images to a clipboard and paste them into apps as a 20+ year Android expert.

Whether you want to save pictures from the web, transfer screenshots, or copy images between messaging apps, we have got you covered.

The clipboard on Android allows you to quickly copy and paste text, links, and images between apps.

When you copy an image, it gets stored temporarily on the clipboard.

You can then paste the image into a destination app like WhatsApp, Instagram, Gmail, etc.

However, not all apps support pasting from the clipboard. And the copied image gets cleared when you copy or cut something else.

So you need to paste the image before copying or cutting something new.

Here are some of the most common scenarios for getting pictures from the clipboard on Android:

  • Saving pictures from the browser to the gallery
  • Sharing screenshots or image memes with friends
  • Copying product images from shopping apps to share on social media
  • Transferring photos between messaging apps like WhatsApp, Messages, Telegram, etc.

In this guide, we will cover various methods to copy images to a clipboard and paste them into destination apps on Android.

Method 1: Copy and Paste the Image Between Apps

The most straightforward way is to copy an image from its source app and directly paste it into the destination app.

Here are the steps:

Step 1: Open the source app and copy the image

This can be an image in your gallery, browser, screenshot, social media feed, etc.

  • Long press on the image and tap ‘Copy’ or Copy image’ option
  • Alternatively, tap and hold then drag to select the image and tap the ‘Copy’ button
  • The image will be copied to your clipboard

Step 2: Switch to the destination app

Open the app where you want to paste the image e.g. WhatsApp, Instagram, Gmail, etc.

Step 3: Paste the image

  • Long press at the location where you want to paste
  • Tap the ‘Paste’ option to paste the image from the clipboard
  • The image will be inserted

This method allows quick transfer of images between apps which support copying and pasting.

However, the copied image gets cleared from the clipboard if you copy or cut something else.

Tips

  • Tap and hold on the image to bring up the Context Menu in most apps
  • Check if the destination app supports pasting images from the clipboard
  • Paste quickly before copying something else clear the image

Method 2: Use Clipboard Manager Apps

A better option is to use dedicated clipboard manager apps which allow saving multiple clips and permanent storage of copied items.

Some good clipboard apps for Android include:

  • Clipper
  • Clipboard Actions
  • Clip Stack
  • clip
  • Clipboard EZ

Here is how to use these apps to copy and paste images:

Step 1: Install a clipboard manager app

Search for top-rated clipboard apps on the Play Store and install one on your Android device.

Signup/Login if required.

Step 2: Enable clipboard sync

Allow the app to sync the clipboard in the background.

This enables automatically saving clips to the manager app.

Step 3: Copy the image into the source app

When you copy an image, it will be saved in the clipboard manager app along with the source details.

Step 4: Paste the image into the destination app

Open the clipboard manager and look for the copied image.

Long press the image clip and select ‘Paste’ to paste into any destination app.

The key benefit of using clipboard manager apps is they allow you to copy multiple items and preserve them even if you copy or cut something else.

So you can easily paste the copied image anytime later on.

Tips

  • Enable background sync in the clipboard manager app settings
  • Check sync frequency to save clips instantly
  • Premium versions allow more clips, folders, etc.

Method 3: Share the Image and Paste in the Destination App

An alternative is to share the image first and then paste it.

Here’s how:

Step 1: Share the image from the source app

Instead of copying, use the share option in the source app to share the image:

  • Tap and hold to select the image, then tap the Share button
  • Or tap Menu > Share on the image
  • Select the clipboard manager app to share the image to

Step 2: Open the clipboard app

The shared image will be available in your clipboard manager app.

Step 3: Long press and paste image

Long press the image in your clipboard manager and select Paste to paste it into any destination app.

Sharing removes one extra step of manually copying the image.

The rest of the process remains the same.

You can share multiple images this way.

Tips

  • Share to a clipboard manager for easy access in one place
  • Premium clipboard apps allow folders to organize shared images
  • Rename or edit clips before pasting them into destination apps

Method 4: Screenshot on Android

For quick one-time transfers, you can take a screenshot of the image and paste it.

Here’s how:

Step 1: Take a screenshot of the image

  • Open the image in the source app
  • Press the Power + Volume Down buttons together to take a screenshot
  • A preview thumbnail will appear in the bottom left corner

Step 2: Tap the preview to edit the screenshot

  • Tap the thumbnail preview to open editing options
  • Crop the screenshot if needed
  • Tap the ‘Copy to Clipboard’ option at the bottom

Step 3: Paste a screenshot in the destination app

The screenshot will be copied to your clipboard automatically.

You can directly paste it into the destination app.

The screenshot method allows a quick way to capture any image on the screen and transfer it.

But it only works for temporary single-image transfers.

Tips

  • Edit the screenshot to focus just on the image before copying
  • The image will stay on your clipboard only until the next copy operation
  • Use a clipboard manager if you want to retain the screenshot to paste later

Method 5: Drag and Drop Images

If both the source and destination apps support drag & drop, you can directly drag an image and drop it into the other app.

Step 1: Enable drag & drop in Settings

Go to Settings > System > Gestures > Drag and drop and enable the toggle.

This allows drag & drop between apps.

Step 2: Drag the image to the destination app

Open both apps in a split screen.

Long press the image, then drag it to the destination app window.

The image will be dropped into the app.

The main benefit of drag and drop is it avoids using the clipboard entirely.

The image is directly transferred between apps.

Tips

  • Split screen mode needs to be enabled under Advanced settings
  • Dropping images between non-adjacent apps is not supported
  • Helpful for quick image transfers between compatible apps

Method 6: Transfer via Cloud Storage

You can also transfer images from one device to another through cloud storage services like Google Photos, Dropbox, OneDrive, etc.

Step 1: Upload the image to cloud storage

Open the source app and share/save the image to your linked cloud storage.

Step 2: Open the image on the target device

On your target device, open the cloud storage app and go to the synced images folder.

Step 3: Save the image and paste

Long press the image and use the share sheet to save it to your device gallery.

You can then access the image locally and paste it into any app.

Cloud transfer is useful when you want to sync an image across devices before pasting it into a destination app.

Tips

  • Google Photos and Dropbox provide instant sync on Android
  • Check auto-sync settings to ensure fast transfer
  • You can also copy cloud image links and paste them into apps

Frequently Asked Questions

Here are some common queries on transferring images from the clipboard on Android:

Does copying an image clear the clipboard on Android?

Yes, copying or cutting any new item will clear the existing clipboard content including any copied images.

How do I copy and paste multiple images together?

You can’t directly copy-paste multiple images together. You will need to copy and paste them one by one. Use a clipboard manager to quickly access and paste all copied images.

Can I directly drag and drop images from the gallery to the apps?

No, the drag-and-drop feature only works between compatible apps. You can’t directly drag an image from your gallery into an app.

How do I paste an image in the Gmail app?

When composing a new mail in Gmail, long press at the location to paste and select the ‘Paste image’ option to insert the copied image.

Does pasting large images reduce quality?

Yes, some apps may automatically compress larger images while pasting to reduce transfer size. Some loss of quality can occur especially in apps like WhatsApp.

How do I paste the clipboard on Android from my PC?

You can use cloud clipboard tools like Clipboard Anywhere, Clipboard Master, etc. to directly sync the clipboard between PC and Android and paste contents both ways.

Where are clipboard images stored on Android?

Copied images are temporarily stored in RAM. They are cleared when a new item is copied/cut. Clipboard manager apps can store clips permanently.

Can I directly copy the partial area of an image?

Yes, you can use apps like Partial Screenshot to copy only a selected portion of an image to the clipboard and paste it into another app.

Conclusion

Copying and pasting images on Android can be easy if you use the right techniques.

The standard copy-paste method works for quick single transfers.

For frequent image transfers, using a dedicated clipboard manager app is recommended.

You can also take screenshots or use cloud storage for transferring images across devices.

Some key pointers are:

  • Use clipboard sync and enable background access
  • Paste images before the clipboard changes
  • Share to quickly transfer images from source apps
  • Enable drag & drop in Settings for direct image transfers
  • Cloud storage tools are great for cross-device transfers

We hope this guide covers everything you need to know about getting pictures from the clipboard on your Android device.

Let us know if you have any other queries!

How to Delete Text Messages from Both Sides on Android

How to Delete Text Messages from Both Sides on Android

Sending that awkward text to the wrong person. Realizing too late a message could be taken the wrong way.

We’ve all been there.

Wouldn’t it be great if you could delete a text not only from your phone but from the recipient’s phone as well?

As an Android expert, I’m here to explain how you can delete text messages from both sides on Android phones.

With the right apps and techniques, you can save yourself from embarrassing texts and free up space on your message logs.

By the end of this guide, you’ll have the knowledge to delete text messages from both the sender’s and receiver’s phones – no more regrettable texts haunting your message history.

Let’s get started!

The Benefits of Deleting Texts from Both Sides

Normally when you delete a text on your Android phone, it only removes it from your end – the recipient still has a record of the message you sent.

Being able to delete texts from both sides brings some major benefits:

  • Avoid embarrassment if you send an unintended text containing private, offensive, or controversial content. Deleting from both sides helps save face.
  • Free up storage space by removing unnecessary texts from your and your recipient’s phones.
  • Keep your message logs tidy and on topic by pruning irrelevant or obsolete texts.
  • Maintain your privacy by eliminating texts you don’t want stored on another person’s phone.
  • Remove incriminating or inappropriate texts in case someone else accesses your message history or the recipient’s phone.

The peace of mind of knowing a text is gone and can’t come back to haunt you makes deleting from both sides worthwhile.

Next, let’s look at why this isn’t the default behavior on Android.

Why You Can’t Delete Texts from Both Sides by Default on Android

Unlike Apple’s iMessage, Android’s default messaging apps don’t allow deleting texts from the recipient’s phone as well as your own.

There are a couple of reasons behind this:

  • Decentralized SMS/MMS systemAndroid text messaging relies on Short Message Service (SMS) and Multimedia Messaging Service (MMS), decentralized systems that don’t give centralized control over messages once sent.
  • Privacy concerns – Allowing deletion from the recipient’s phone could enable abuse and harassment if someone deletes messages without consent.
  • Delivery acknowledgment – Unlike iMessage, Android’s SMS/MMS protocols don’t notify when a text is delivered and read. So there’s no guarantee the other phone even received the text before deletion.
  • Development resources – Building a system for bilateral text deletion requires significant investment to overcome the technical challenges.

Unfortunately, without modifications, Android’s default messaging options don’t support this capability.

However third-party apps are filling the gap and making bilateral text deletion possible.

The Best Apps to Delete Texts from Both Sides on Android

While Android doesn’t offer built-in support for deleting texts from both sides, third-party apps provide ways to accomplish this.

Here are the top apps I recommend based on over 20 years of Android experience:

1. Delete Message

Delete Message is one of the most popular apps for deleting texts bilaterally on Android with over 5 million downloads.

Key features:

  • Delete single or multiple SMS/MMS from your and the recipient’s phone.
  • Free basic version with pro upgrades available as in-app purchases.
  • Confirmation when a text is deleted from the other device.
  • Password protection and stealth mode to hide the app.
  • Ability to prevent the app from deleting messages.

How it works:

Delete Message uses SMS and internet data to coordinate bilateral text deletion.

When you delete a message, it sends a request to the recipient’s phone prompting deletion as long as they also have Delete Message installed.

Downsides:

  • Only works if the recipient has the app too.
  • Some users report bugs and inconsistent bilateral deletion.
  • The app hasn’t been updated since 2019, so may have compatibility issues.

Cost: Free with in-app purchases

Overall, Delete Message makes deleting texts from both sides possible without much hassle, as long as the other person has the app too.

But reliability issues and lack of recent updates make other choices a bit more appealing.

2. iMess Cleaner

Don’t let the name fool you – iMess Cleaner works great for Android and focuses specifically on making bilateral deletion easy.

Key features:

  • Removes texts from the sender’s and receiver’s phones.
  • Straightforward interface for deleting individual or multiple texts.
  • Option to delete all texts from a contact.
  • passcode and fingerprint locking for security.

How it works:

Like Delete Message, iMess Cleaner coordinates with a paired app on the recipient’s phone to delete texts from both devices using a combination of SMS prompts and internet data.

Downsides:

  • Can only delete texts from another iMess Cleaner user, limiting compatibility.
  • Contains ads unless you upgrade to the paid pro version.
  • Available on iPhone as well, but the Android version has a lower user rating.

Cost: Free with in-app purchases

iMess Cleaner is simple and effective, albeit a bit barebones.

While it gets the job done, the need for both parties to use the app remains a hurdle.

3. twin me

For a full-featured bilateral text deletion option, Twin Me is my top recommendation.

Key features:

  • Delete individual SMS/MMS or entire conversations from your and the recipient’s phone.
  • Scheduled deletion option to remove texts automatically after a set time period.
  • The message retraction feature recalls texts before the recipient reads them.
  • Passcode and fingerprint locking for security.
  • Permanently delete texts to prevent recovery.
  • A free 7-day trial of advanced features.

How it works:

Twin Me goes beyond basic bilateral text deletion with options like scheduled deletions and retractions.

It uses encrypted notifications to coordinate deletions between paired users while providing confirmation receipts.

Downsides:

  • Still requires the recipient to have twin me installed for bilateral deletion.
  • Must pay a subscription for access to all features.
  • Contains occasional bugs.

Cost: Free trial, then $4.99 monthly subscription

For the extra capabilities like scheduled deletion and message retraction, Twin Me is worth the paid subscription in my opinion.

The reliability and smooth user experience make Twin Me the top bilateral text deletion app.

Step-by-Step Instructions for Using Text Deletion Apps

Once you’ve chosen the right bilateral text deletion app, using it is simple.

Here I’ll provide step-by-step instructions using Twin Me as an example:

1. Download and install the app

  • On your Android device, open the Play Store app.
  • Search for “twin me” and tap Install.
  • Accept any requested permissions.
  • Open Twin Me once installed.

2. Create an account

  • When opening Twin Me the first time, tap Sign Up.
  • Enter your phone number or email and create a password.
  • twin me will send a verification code – enter it and you’re signed up.

3. Set up recipient pairing

  • From your Contacts list, select the person you want to pair with.
  • Tap Send Invitation and select SMS or email.
  • Twin Me will send them an invite to connect.
  • Once they accept, bilateral deletion with them will be active.

4. Delete a text from both phones

  • Open your messaging app and locate the text you want to delete.
  • Back in Twin Me, tap the See Deletable SMS option.
  • Find the text and tap the delete icon next to it.
  • Confirm deletion – it will now be erased from both devices!

And that’s it! Following these steps allows you to easily take back embarrassing texts and free up space.

Make sure to explore all the additional features your chosen app offers for even more control over your texting history.

How to Delete Texts from Both Sides Manually by Exploiting Notifications

If you don’t want to use a third-party app, there’s a manual workaround to delete texts from both sides on Android by exploiting the notifications system.

Here’s how it works:

1. Ensure the recipient has notifications enabled

This technique relies on your text triggering a notification on their phone, so confirm they have notifications enabled for your conversation.

2. Send deletion instruction text

Craft a text with clear instructions for the recipient to delete the previous message – for example, “Delete my last text now”.

3. Immediately delete the text from your phone

As soon as you hit send on the instruction text, delete it from your messaging app.

4. Wait for the recipient to act on the notification

If done quickly enough, your instruction text will trigger a notification on their phone before deletion.

When they see and act on this notification by deleting the previous text, it disappears from both devices.

5. Request confirmation of deletion

For assurance it worked, send a follow-up text asking them to confirm they deleted the message as instructed.

The exact timing to send, delete, and notification takes some precision.

With practice though, this exploit can successfully cause bilateral deletion.

Compared to apps, however, it’s less reliable and can’t delete entire conversations efficiently.

Troubleshooting Tips When Deleting Texts from Both Sides Doesn’t Work

Despite best efforts, sometimes deleting texts from both devices goes awry.

Here are some troubleshooting tips:

  • Ensure the recipient has the deletion app installed – For third-party apps to work, both parties must have the same app. Check they’ve downloaded and set it up.
  • Ask the recipient to manually delete – As a fallback, send a text politely asking them to remove a certain message from their phone and confirm when done.
  • Enable notifications access on the app – Full notification access allows apps to properly coordinate deletions. Check settings to enable notifications.
  • Update the app and phone software – An outdated OS or app version can cause deletion failures. Updating may resolve glitches.
  • Toggle Airplane mode off/on – Weird connectivity issues can prevent deletion coordination between phones. Toggle Airplane mode to reset connections.
  • Restart both phones – As a last resort, a full restart can clear up temporary glitches preventing bilateral deletion.

With a bit of trial and error, you should be able to overcome any issues that arise with deleting texts from both devices.

Wrap Up

As you can see, with the right tools and techniques, Android users can enjoy the same text deletion superpowers iPhone owners have.

Hopefully, this guide has equipped you to:

  • Choose a text deletion app that suits your needs and preferences
  • Install and set up the app to connect with recipients
  • Easily delete embarrassing, inappropriate, or unwanted texts from both sides
  • Employ manual notification exploitation for app-free bilateral deletion
  • Troubleshoot any issues that arise in the deletion process

Just be wise in how you use these powers – consent, and transparency should guide any decision to delete messages from someone else’s device.

But when used properly, bilaterally wiping texts can give you greater privacy, security, and peace of mind.

Thanks for reading – with years of Android expertise, I’m glad I could impart the knowledge needed to master cross-device text deletion.

Don’t hesitate to reach out if you have any other questions!

How to Create a Digital Business Card on Android

How to Create a Digital Business Card on Android

In the digital age, business cards have evolved beyond simple slips of paper. Now, you can create virtual business cards on your Android device to instantly share your contact details and promote your business or brand.

A digital business card is more dynamic, interactive, and shareable than a traditional paper card.

It allows you to include more information like your website, social media profiles, photos, videos, maps, and more.

In this guide, I’ll show you the best ways to make impressive digital business cards on Android.

Benefits of Using a Digital Business Card

Before we get into the how-to, let’s look at some of the key advantages of using a digital business card on Android:

  • Convenience – Your details are stored digitally, so no need to print and carry around paper cards. You can instantly share your card from anywhere.
  • Interactivity – Add interactive elements like contact buttons, clickable links, maps, videos, etc. to provide a richer experience.
  • Shareability – Digital cards are easy to instantly share via email, messaging apps, social media, or by displaying a QR code.
  • Tracking – Analytics tools can show you when your card was viewed and shared. Helpful for measuring engagement.
  • Customizable – Easily update details or design on the go based on context. Create different cards for different needs.
  • Environmentally friendly – No paper waste compared to traditional business cards. A greener option.

Top Apps to Create Digital Business Cards on Android

There are a variety of excellent apps on the Google Play Store to create stunning digital business cards on your Android device.

Here are some top picks:

1. Adobe Express

Adobe Express is a full-featured graphic design app to create professional digital content like cards, logos, graphics, and more.

Key features:

  • Templates for business cards, logos, social posts, etc.
  • Drag and drop image/text insertion
  • Background, layout, font customization
  • Add animations and visual effects
  • Share via PNG, PDF, link or QR code
  • Analytics to track engagement

2. Canva

Canva makes graphic design simple.

It offers business card templates you can customize in seconds.

Key features:

  • Business card templates with hundreds of designs
  • Drag and drop image uploader
  • Resize and position text/elements
  • Background color and style options
  • Share via PDF, PNG, link or QR code

3. Creative Studio

Creative Studio by Creative.

Only lets you make professional business cards and marketing materials.

Key Features:

  • Ready-made card templates
  • Logo maker with icons and fonts
  • Color schemes and customizable layouts
  • Add animated effects and interactions
  • Direct sharing options via PNG, or PDF. link or QR code

4. Logaster

Logaster focuses on business card creation with good templates.

Key Features:

  • Business card templates for different industries
  • Drag and drop image/text insertion
  • Backgrounds, colors, fonts, shapes editing
  • Animated elements and music integration
  • Download as PNG, PDF, or share link/QR code

5. Business Card App

This aptly named app makes it easy to generate simple but good-looking digital business cards.

Key Features:

  • Minimalist card templates
  • Add text, logo, image
  • Color and font customizations
  • Share instantly via PNG, PDF or QR code

The best part is all these apps are free to download on Google Play Store.

Try them out to see which one works best for your brand.

How to Create Your Digital Business Card

The process of actually designing your digital business card is straightforward with any of the apps mentioned above.

Just follow these steps:

1. Choose a Template

All the business card maker apps have pre-designed templates created by professionals.

Browse through the template options to find one that matches your brand identity and style.

Consider aspects like industry, color scheme, icons, shapes, backgrounds, etc. when selecting a template.

2. Customize the Design

Once you select a template, you can customize the design elements like:

  • Colors – Change background, text, and icons color as needed
  • Fonts – Choose font styles and sizes for headings and text
  • Logos – Upload your brand logo or create a new one
  • Images – Add a photo, headshot, or graphic that represents your brand
  • Layout – Adjust positioning and size of elements like text, icons, images, etc.
  • Effects – Add animations or visual effects if supported in the app

Preview the changes in real time until you have a design that you like.

3. Enter Your Details

Now it’s time to fill in the actual information you want displayed on your digital card.

Make sure to include relevant contact details, for example:

  • Full name
  • Job title or business name
  • Email address
  • Phone/mobile number
  • Website URL
  • Office address
  • Social media profile links

Enter any other info like tagline, services, areas of expertise, etc. you want to highlight.

Keep text brief and concise.

4. Enhance with Interactive Elements

Elevate your digital card with interactive elements:

  • Clickable links – Make your website URL, email, phone number clickable
  • Contact buttons – Add one-tap call, email, SMS, or web buttons
  • Maps – Embed a Google map with your business location
  • Social icons – Insert icons to your social profiles that can be clicked
  • Videos – Add a promotional video or introduction
  • Animations – Apply subtle animations like hover effects

These interactive touches make your digital card stand out.

5. Download and Share

With your classy digital business card design complete, it’s time to download and start sharing!

Most apps allow you to:

  • Download as PNG or PDF to store on your device
  • Share via messaging apps, email, or social media
  • Create a shareable link that opens the card online
  • Generate a QR code to display so people can scan and save your card easily

That’s it – you now have an impressive digital business card ready to enhance your personal branding and business marketing!

Digital Card Design Tips

Follow these pro tips when designing your digital business card:

  • Keep it simple – Avoid cluttering with too many design elements. Clean and readable is best.
  • Highlight uniqueness – Show what makes you or your business stand out with images, logos, or taglines.
  • Focus on key details – Only include your most important contact info and links. Don’t overcrowd.
  • Use brand colors – Maintain consistent colors that match your brand identity.
  • Pick suitable fonts – Use clear, professional fonts that complement your business.
  • Include a headshot – Add a nice profile photo to easily connect and build familiarity.
  • Enhance with interactive elements – Carefully add engaging interactive elements highlighted earlier.

Following these best practices will help you create an effective digital business card on Android!

Common Questions about Digital Business Cards

Here are answers to some frequently asked questions about creating and using digital business cards on Android:

How do you send a digital business card?

There are a few easy ways to send your digital business card:

Can you update the information on a digital card?

Yes, a major benefit of digital cards is you can easily change details or design at any time since it’s not printed. Just edit your card in the app and resend the updated version.

How do people use your digital card?

Recipients can view your card on their device, tap links and buttons to contact you, share your QR code, or save your details to their digital address book.

Are digital business cards ethical?

Yes, digital cards are perfectly ethical as long as the information presented is accurate. Some people even prefer digital over paper cards for environmental reasons.

Which is better – paper or digital business cards?

It depends on your needs. Paper cards are more traditional while digital cards provide more flexibility. Many businesses now use a mix of both physical and digital cards.

So in the digital age, take advantage of the opportunities provided by dynamic digital business cards on Android.

Using the tips in this guide, you can create and share impressive virtual cards that make networking and marketing your business easier than ever!

How to Increase Flashlight Brightness in Android

How to Increase Flashlight Brightness in Android

Are you frustrated by the dim default flashlight on your Android phone? As an Android expert, I’m here to help you get the maximum brightness out of your flashlight app.

Brighter illumination comes in handy for outdoor activities, power outages, emergencies, and everyday use.

In this comprehensive guide, I’ll walk you through several methods to boost your Android flashlight to its full potential.

We’ll explore ways to adjust your flashlight settings, switch to more powerful third-party apps, and even use external accessories for ultra-bright lighting.

Why You Should Increase Your Android Flashlight Brightness

Here are some of the key reasons to turn up the brightness on your Android flashlight:

  • See Clearly in the Dark – A brighter beam lets you navigate and see obstacles better when light is limited. It reduces strain on your eyes.
  • Safety and Security – The brighter the flashlight, the more area it will illuminate. This helps with personal safety at night and seeing threats or dangers more clearly.
  • Emergency Situations – During power outages or natural disasters, a bright flashlight can provide critical lighting for finding your way or signaling for help.
  • Outdoor Activities – Hiking, camping, fishing, and nighttime photography require bright light. A boosted flashlight ensures you can participate in activities after dark.
  • Inspection and Repairs – Mechanics, technicians, and DIYers need to spotlight areas they are inspecting or repairing. Maximum flashlight brightness aids with these detailed tasks.

Now that you know the benefits, let’s get into the different methods you can use to amp up the brightness of your Android flashlight.

Adjust Your Flashlight App Settings

The easiest way to make your flashlight brighter is to adjust the settings within your Android’s default flashlight app.

Here is how to do it:

Step 1: Locate Your Default Flashlight App

  • Your Android likely came preloaded with a stock flashlight app. This is usually simply called “Flashlight”.
  • You may find the flashlight icon in your app drawer, widgets, or notification pulldown quick settings.
  • If you cannot locate the default flashlight app, you can download a basic one for free from the Google Play store.

Step 2: Open the Flashlight App Settings

  • Once you have the app open, look for a “settings” or “options” menu.
  • On some phones, you may need to tap the 3-dot menu button in the top corner first.
  • This will open up the available settings for customizing your flashlight.

Step 3: Adjust the Brightness Level

  • Look for a “brightness” or “light intensity” slider or menu.
  • Set this to the maximum brightness level available.
  • Some apps may have options like low, medium, or high. Choose the highest setting.
  • You may also see percentage options like 20%, 60%, 100%. Pick 100% brightness.
  • Exit settings and your flashlight should now be at peak brightness!

While adjusting your default flashlight app is the simplest option, you may find the maximum setting is still not very bright.

Third-party flashlight apps provide more robust settings and LED power.

Switch to a More Powerful Third-Party Flashlight App

Here are some of the best Android flashlight apps that offer exceptionally bright illumination:

Super-Bright LED Flashlight

  • Features a huge flashlight bulb icon for easy operation.
  • Lets you slide left and right to smoothly adjust the brightness up to 40% brighter than standard apps.
  • Contains handy strobe and SOS emergency signaling modes.

Bright Torch LED Flashlight

  • Uses your camera’s LED flash to provide the brightest possible light.
  • Includes a Firefly 0.01 lumen low-light mode and a massive 15000-lumen full-power mode.
  • Offers infinite brightness adjustment.

Flashlight +

  • Lets you control not just brightness, but also color temperature from warm to cool.
  • Contains RGB and mood lighting effects.
  • Features adaptive brightness that uses your phone’s light sensor.

Tiny Flashlight + LED

  • Super compact and lightweight app good for one-handed use.
  • Rearrange flashlight widgets for easy access on the home screen or lock screen.
  • Contains a zoomable beam feature to increase and concentrate brightness.

Take some time to read reviews and experiment with different third-party flashlight apps.

Look for ones that advertise the highest lumens, fully adjustable brightness, and utilization of camera LED flashes for extra power.

While built-in camera flashes provide extreme brightness, avoid using them for more than short periods to prevent damage or overheating.

Use External Lighting Accessories

Your smartphone flashlight will always have limited brightness constrained by small LED bulbs, battery drain, and heat production.

For truly massive illumination, you need to go external.

Bluetooth Smart Bulbs

  • Attach a compact but ultra-bright Bluetooth LED bulb to your ballcap or headband for lighting “on the go”.
  • Can provide up to 1200 lumens without blinding peripheral light.
  • Lasts for hours on tiny rechargeable batteries.
  • Control brightness directly from your phone.

Flashlights & Headlamps

  • Look for flashlights and headlamps that contain CREE, Lumintop, or Nitecore LEDs.
  • Top models provide anywhere from 1000 to over 40,000 lumens!
  • The Mr. Torch Mantis headlamp pumps out up to 4300 lumens.
  • Optionally choose rechargeable batteries to power your external lights.

Phone Flashlight Adapters

  • These attach to your phone and feed the LED beam into a reflector, magnifying brightness up to 5x.
  • Widely available under $20, but quality varies.
  • Look for versions with adjustable zoom and focus.
  • Can hamper phone handling, so best for stationary lighting needs.

By using Bluetooth bulbs, specialty flashlights, headlamps, and phone adapters, you can achieve far greater flashlight brightness than your phone’s LED alone can output.

Expert Tips for Safely Optimizing Brightness

As an Android expert, I recommend keeping these safety tips in mind when seeking maximum flashlight illumination:

  • Avoid looking directly at the flashlight when turned on, even accidentally. The very bright light can harm your eyes.
  • Use lower brightness or red light modes when navigating at night to maintain natural night vision.
  • Keep airflow around phone flashlights to prevent overheating damage to camera LED components.
  • When using extremely high-lumen external lights, beware of fire and burn hazards around flammable materials.
  • Utilize lens filters on extra-bright flashlights to diffuse some light for wider peripheral vision.
  • Use rechargeable batteries in high-power flashlights and frequently check battery levels to prevent unexpected shutoffs.
  • Test different brightness levels in advance so you select the right amount of light for each situation, preventing glare and hazards.
  • Enable automatic brightness adjustments on flashlight apps or smart bulbs when possible to optimize battery usage.

Frequently Asked Questions

Will increasing brightness drain my phone’s battery faster?

Yes, higher brightness levels will consume more battery charge, especially at maximum lumens. Use the lowest brightness sufficient for your needs to conserve battery life.

Can brightness damage my phone camera LED?

Extended use of the LED flash at 100% power can cause damage or overheating. Limit the use of maximum camera flash settings to short durations.

Is there a brightness cap on my Android flashlight?

Default apps likely cap at 50-60% of maximum brightness. Third-party apps can disable this limit but may shorten LED lifespan. External lighting accessories have no brightness limit.

What factors affect my Android flashlight brightness?

LED bulb strength, power settings, battery level, phone model, and heat buildup all impact maximum achievable brightness. Higher-end phones typically have brighter LEDs.

Should I use a lens filter for safety with ultra-bright flashlights?

Yes, diffuser filters are recommended with flashlights above 1000 lumens to soften and spread the dazzling light for more comfortable use.

Conclusion

Boosting the brightness on your Android flashlight is simple with the right settings adjustments and powerful third-party apps.

For extreme illumination, LED flashlights, headlamps, and adapters can push brightness far beyond your phone’s limits.

Just be sure to use proper caution.

With this guide, you now have all the knowledge to turn your dim phone flashlight into a blazing illuminator.

Just follow the tips to find the perfect settings, apps, and accessories to achieve exactly the brightness your needs demand.

Stay safe and shine on!

How to Set Up Spectrum Email on Android

How to Set Up Spectrum Email on Android

Welcome to my researched guide on setting up and using Spectrum email on your Android device!

My name is John and I’ve been an Android expert for over 20 years. In that time, I’ve helped countless users get their email accounts set up properly on their phones and tablets.

In this guide, I’ll walk you through the entire process of setting up a Spectrum email account on Android.

I’ll provide simple step-by-step instructions that anyone can follow. Whether you’re new to Android or have been using it for years, this guide will help you get Spectrum email working seamlessly on your device.

So let’s get started!

The Benefits of Spectrum Email on Android

Spectrum offers reliable and fast email service with ample mailbox storage.

Setting up their email on your Android device unlocks several benefits:

  • Access your Spectrum email anywhere conveniently from your phone or tablet.
  • Stay on top of messages with push notifications when new mail arrives.
  • Sync your email, contacts, and calendar between your Android device and Spectrum account.
  • Customize the Spectrum Email app with your preferred settings.
  • Take advantage of spam and malware protection.
  • Enjoy the offline mode to read and respond to emails without an internet connection.
  • Link other accounts like Gmail for a unified inbox.

Overall, running Spectrum email on your Android device makes it much easier to stay connected and productive on the go.

Signing Up for a Spectrum Email Address

If you don’t already have a Spectrum email account, you’ll need to sign up for one before adding it to your Android device.

Here are the steps to create a new Spectrum email address:

  1. Go to Spectrum’s website and click on Account to access the sign-up page.
  2. Select Email as the service you want to order.
  3. Choose your desired email address name. Spectrum gives you options during signup.
  4. Create a secure password for your email account.
  5. Enter your billing information and home address.
  6. Confirm your email and agree to the Terms of Service.
  7. Spectrum will send a confirmation email to activate your new account. Click the link to complete the signup process.

And that’s it! You now have a working Spectrum email address that can be used to send and receive emails.

The next step is to download the Spectrum Email app on your Android device.

Downloading and Installing the Spectrum Email App

Spectrum has an official email app available for Android devices on the Google Play Store.

Here’s how to get it:

  1. Open the Play Store app on your Android device.
  2. Search for “Spectrum Email”. The app should be published by Charter Communication.
  3. Tap Install to download and add the app to your device.
  4. Once installed, open the Spectrum Email app from your list of apps.
  5. Allow the app to access your contacts, files, location, etc. when prompted. This allows full functionality.
  6. The app will open to a signup/login screen. We’ll complete the setup in the next section.

The Spectrum Email app helps optimize the email experience for your Android device.

It has useful features like push notifications, customizable swipes, and more.

Adding Your Spectrum Account to Android’s Email App

In addition to the dedicated Spectrum Email app, you can also add your Spectrum account to the built-in Android Email app.

Here are the steps:

  1. On your device, open the Settings app and select Accounts.
  2. Tap Add account > Email.
  3. Enter your full Spectrum email address and password when prompted.
  4. The Android Email app will attempt to auto-configure the settings using your email address.
  5. For Account type, make sure IMAP is selected.
  6. Enter the following IMAP server details provided by Spectrum:
    • Incoming server: mail.spectrum.com
    • Outgoing server: mail.spectrum.com
  7. Make sure to use SSL is enabled to encrypt your connection.
  8. Tap Next and your account will finish setting up.

The Android Email app will now display your Spectrum inbox and let you send messages.

It also provides push notifications, spam detection, and more generalized email features.

Having your Spectrum account in both apps allows you to use whichever you prefer for different situations.

Now let’s customize the settings.

Setting Up and Customizing the Spectrum Email App

Once installed, the Spectrum Email app needs to be configured to work properly with your account.

Here are the steps:

  1. Open the Spectrum Email app and enter your full email address and password.
  2. On the inbox screen, tap the Menu button (3 lines) and go to Settings.
  3. Under Account Settings, tap your email address to configure options:
    • Tap Sync frequency to choose how often the app checks for new messages.
    • Enable or disable spam detection.
    • Turn notifications on or off.
    • Adjust the number of emails displayed per conversation.
  4. Under App Settings, you can customize:
    • The swipe actions for messages in the inbox.
    • The email view theme and layout.
    • Which folders display and their notification settings.
    • Your preferred signature to add to outgoing messages.
  5. Under General Settings:
    • Set your name to display on outgoing messages.
    • Enable or disable read receipts.
    • Adjust additional notifications and sounds.

Take some time to explore all the settings to configure the Spectrum Email app to your liking.

The key options are notifications, sync frequency, and layout customization.

Syncing Your Email, Contacts and Calendar

A key benefit of adding your Spectrum account to Android is keeping your email, contacts, and calendar seamlessly synced across devices.

Here’s how to set this up:

Sync Email

  • This occurs automatically when you add your Spectrum account to the Email app and Spectrum’s app.
  • Adjust the sync frequency in the app settings based on your needs.

Sync Contacts

  • On your device, go to Settings > Accounts and open your Spectrum account.
  • Enable Contacts under Account Sync to allow contact syncing.
  • Contacts will now stay matched between your Android device and Spectrum account.

Sync Calendar

  • Follow similar steps as Contacts to enable Calendar syncing.
  • This will sync appointments and events between Spectrum and your Android calendar.
  • You can choose which Google Calendars to sync if you use multiple ones.

With syncing enabled, you can conveniently access the same up-to-date email, contacts, and calendar from any device.

Accessing Spectrum Email on the Go

The main reason to get Spectrum email on your Android device is to stay connected on the go.

Here are some of the top ways to access your email remotely:

  • Use the Spectrum and Android Email apps to manage your inbox, read messages, and respond.
  • Enable push notifications in the app settings to be alerted about new mail.
  • Mark messages as unread or flag them for follow-up when you don’t have time to respond right away.
  • Swipe left/right to archive messages or delete them from your inbox.
  • Search your inbox to quickly find messages.
  • Mark messages as spam or report phishing attempts.
  • View email conversations threaded together.
  • Sync your inbox to retrieve new messages sent to you.
  • Connect to public Wi-Fi or use mobile data to access email anywhere.

The key is setting up notifications and an efficient inbox workflow. This allows you to stay on top of important messages without being overwhelmed.

Troubleshooting Spectrum Email Issues on Android

Sometimes you may encounter issues getting Spectrum email working properly on your Android device.

Here are solutions for some common problems:

Can’t sign into the app

  • Double-check that your password is correct. Reset it if needed.
  • Make sure mobile data or Wi-Fi is enabled and try again.
  • Reinstall the Spectrum Email app if still failing.

Not receiving messages

  • Pull to refresh and sync your inbox to retrieve new data.
  • Check your spam folder. Invalid addresses sometimes get filtered.
  • Enable notifications and background syncing options.
  • Spectrum may be experiencing an outage so try again later.

Messages sending slow

  • Check your mobile data or Wi-Fi connection strength.
  • Disable battery optimization for the Spectrum app if needed.
  • Clear app cache and data to refresh the send queue.

Can’t sync contacts

  • Make sure syncing is enabled in your Spectrum account settings.
  • Check that contact syncing is permitted in your Google account settings.
  • Try rebooting your device to refresh the accounts.

Following these tips should get Spectrum email working properly again in most cases.

Always make sure to keep the Spectrum Email app updated as well.

Wrapping Up

That wraps up this guide on setting up and using Spectrum email on your Android device!

The key steps are:

  • Sign up for a Spectrum email account if you don’t have one.
  • Install the Spectrum Email app from the Play Store.
  • Add your Spectrum account to Android’s built-in Email app.
  • Configure app settings and enable email, contacts, and calendar syncing.
  • Use the apps to conveniently access Spectrum email on the go.
  • Troubleshoot issues like connection problems, missing messages, and sync failures.

With your account now added to Android, you can enjoy the benefits of Spectrum email while on the move. Let me know if you have any other questions!

How to Block Inappropriate Websites on Android Without an App

How to Block Inappropriate Websites on Android Without an App

As an Android expert with over 20 years of experience, I often get asked by parents how they can block inappropriate websites on their child’s Android device without installing a separate app.

In this comprehensive guide, I will walk you through all the different methods available to block adult content and restrict web access on Android.

Why You Should Block Inappropriate Sites on Your Child’s Android Device

There are a few key reasons why parents should take steps to limit access to adult content on their kid’s Android phone or tablet:

  • Protect Children from Explicit Material – The internet is filled with pornography, violence, gambling sites, and other content unsuitable for kids. Blocking this protects their innocence.
  • Focus Learning – Restricting distracting and inappropriate sites helps children focus on more productive activities like homework and reading.
  • Promote Healthy Development – Exposure at a young age to explicit material can negatively impact a child’s mental health and skew their perceptions about relationships and sex.
  • Monitor Browsing Habits – Blocking adult sites allows parents to better monitor and control where children are going online and discourage browsing habits that could lead to issues down the road.
  • Avoid Malware Risks – Inappropriate websites tend to be more likely to contain viruses, malware, and scams that could infect the device. Blocking access reduces these risks.

So in summary, blocking explicit websites on your kid’s Android device helps protect them from harm, keeps them focused on learning, and gives you greater oversight into their browsing behaviors.

The positive impact this can have on their development and future is significant.

How to Block Adult Sites on Android Using Google SafeSearch

One easy way to block inappropriate websites on Android is by enabling SafeSearch filtering through Google.

Here is how to do it:

  1. Open the Google app on your child’s Android device.
  2. Tap on the profile icon in the top right corner.
  3. Select Settings from the drop-down menu.
  4. Tap on General settings.
  5. Under “SafeSearch filters,” choose “Strict”. This will severely limit results for searches that contain explicit content.
  6. Exit back to the Google homepage.

With Strict SafeSearch enabled, any Google searches conducted on the device will have inappropriate sites and images blocked from results.

The advantage of using SafeSearch is it takes just a few taps to set up and works conveniently within the Google app that most Android users already have.

The drawback is that it only filters Google searches, so inappropriate content could still be accessed through direct website URLs not blocked by SafeSearch parameters.

But overall, it’s a handy first line of defense for filtering out explicit search results.

How to Use Android’s Built-In App Blocking and Restrictions

Android has built-in settings that allow you to block apps and restrict content right on the device itself:

  1. Open your Android’s Settings app.
  2. Scroll down and select Digital Wellbeing & Parental Controls (it may also just be called Screen Time).
  3. Tap on the Manage Restrictions option.
  4. Create a screen lock PIN or password if not already set up. This will be needed to make changes going forward.
  5. Under “Content restrictions”, choose the Apps and Websites restrictions option.
  6. Select the category for “Sex & nudity”. Android will automatically block any apps or sites in this category.
  7. You can also block additional inappropriate categories like gambling, alcohol, and tobacco.
  8. For even more control, tap “Add restricted website” to manually block specific URLs from being accessed.
  9. Under “App restrictions”, choose which apps to disable if you want to fully block select non-web apps too.

The advantage here is all the customizable restrictions built directly into Android.

But the drawback is it takes more time to set up, and your child could try entering a blocked site’s URL directly to access it if they figure out how to get around the category blocking.

How to Block Websites on Android Using Norton Family

For parents who want a dedicated app for blocking sites and monitoring Android activity, Norton Family is an excellent choice.

Here’s how to use it:

  1. Download and install the Norton Family parental control app on your child’s Android device.
  2. Create an account and register the device to your Norton Family account.
  3. Select the child’s profile that you want to manage restrictions for.
  4. Under “Web Supervision”, choose “Blocked Web Sites”.
  5. Enter specific websites you want to block access to and click “Block”.
  6. Alternatively, you can block by category such as pornography, violence, etc.
  7. Enable SafeSearch for Google and YouTube to limit explicit results.
  8. If needed, shut off web access altogether with the “Pause Web” button.
  9. View detailed reports on your child’s browsing behavior and attempts to visit blocked sites.

Norton Family makes it super simple to implement a complete web filtering system on your kid’s Android device.

The significant advantage is that it works across all browsers, not just Google.

The only downside is the $50 annual subscription fee. But for most parents, it is worth it for the amount of control and visibility Norton Family provides over a child’s browsing habits.

How to Set Up Parental Restrictions on Your WiFi Router

Another effective approach is to block inappropriate sites at the network level on your WiFi router admin console.

Here is how:

  1. Login to your WiFi router admin console from a web browser (enter router IP address).
  2. Look for any Parental Controls or Content Filtering settings (may vary by router brand).
  3. Select website categories you want to block like pornography, gambling, drugs, etc.
  4. Add any additional URLs you want to restrict access to.
  5. Save your filtered categories and URL list.
  6. Enable the router’s content filtering feature.

Now any device connected to your home WiFi network will have those websites automatically blocked.

This takes more technical know-how to set up directly on the router, but it successfully blocks sites on every device connected to the network.

So it’s a good option if you have multiple kids with different Android devices.

How Parents Can Monitor Browsing History on Android

In addition to website blocking, it’s a good idea for parents to monitor their child’s web activity on Android.

Here are a few ways to check browsing history:

  • Open the Chrome app > Tap the 3 dot menu > Go to History to view visited sites.
  • In Settings, go to Google > Manage your Google Account > Data & personalization > Web & App Activity to see a detailed audit log.
  • Install a parental control app like Norton Family that records browsing history and makes reports available to parents.
  • Set router parental controls to generate history reports.
  • Search Android file directories for browser history and cache files (requires USB debugging).

Monitoring browsing data helps ensure your child isn’t finding ways to circumvent the site blocking.

It also identifies potential issues early before they become bigger problems.

Explaining Website Restrictions to Your Child

When blocking website access on a child’s device, it’s important parents clearly explain why certain restrictions are in place:

  • Note that not everything on the internet is appropriate for kids.
  • Explicit content can be psychologically and emotionally harmful if seen at a young age.
  • Preventing access to adult material protects them and allows them to focus on positive activities.
  • Monitoring is for their safety and is not intended as an invasion of privacy.
  • Reassure them you are happy to answer any questions they have.
  • Make sure restrictions are age-appropriate and offer some flexibility where possible.

Having an open and honest conversation prevents confusion and makes it more likely for children to buy into the rules.

As kids get older, gradually lift limitations as they demonstrate responsible browsing behavior.

What to Do If Your Child Circumvents Website Blocking

No blocking system is foolproof, so children may eventually find ways around the restrictions:

  • Make sure device settings and filters do not get changed or disabled.
  • Check that the child isn’t using any browser in “incognito mode” to avoid logging history.
  • Enable advanced GPS and screen time tracking via parental apps to monitor usage.
  • Restrict installation of new apps without parental approval.
  • Set up router-level keyword blocking to flag concerning terms.
  • Frequently check browser history and bookmarks for flagged sites.
  • Have another open talk about internet safety and reiterate your expectations.
  • As a last resort, enable complete lockdown of web access through whitelisting only approved sites.

Dealing with a child who finds loopholes requires enhancing restrictions while also fostering trust through conversation.

Avoid total removal of the device as punishment, as that harms open communication.

FAQs About Blocking Websites Without an App on Android

Here are answers to some frequently asked questions that parents have about restricting web access on their kid’s Android device:

Can I block sites without downloading a separate Android app?

Yes, enabling SafeSearch and using Android’s built-in Digital Wellbeing settings allows basic website blocking without a third-party app.

What’s the best free option for blocking adult content?

Setting Strict SafeSearch on the Google app provides a free and quick way to filter explicit website results on Android.

Will website blocking slow down my child’s Android device?

There is negligible impact on performance. The only exception is using very heavy parental control apps with continuous background monitoring and logging.

Can I block websites on Android tablets too?

Yes, the methods in this guide work equally well on any Android smartphone or tablet. The same built-in settings and apps can be used.

What happens if my child deletes the blocking app from their Android?

Install parental control apps like Norton Family in complete stealth mode. This prevents them from being disabled or deleted by kids.

Is it possible to block only during certain times of day on Android?

Yes, most parental control apps allow you to set time limits for web access. You can block sites during school or bedtimes for example.

Can I block HTTPS websites on my child’s Android?

Yes, most website blocking methods in this guide also restrict access to HTTPS pages. However, the Android SafeSearch setting does not block HTTPS.

Conclusion

Blocking inappropriate content is critical for keeping kids safe online.

For Android devices, this guide covers all the essential tools and techniques parents need, without requiring a third-party app in every case.

Be sure to also have open conversations with your child about internet safety as part of a comprehensive approach.

With the right combination of technology and communication, you can successfully shield children from adult content on their Android phones or tablets.

How to Hide Your Number on Text Messages on Android

How to Hide Your Number on Text Messages on Android

Hiding your phone number when sending text messages can be useful for maintaining your privacy.

Many Android users want to keep their personal phone numbers private when texting.

There are a few different reasons for this:

  • Avoid getting unwanted calls or texts from people you give your number to.
  • Prevent your contacts from seeing your mobile number when you don’t want them to.
  • Stop companies or services from getting access to your number if you text them.

The good news is Android provides built-in settings to hide or mask your number on text messages.

There are also third-party apps that offer additional ways to hide your caller ID.

In this comprehensive guide, I’ll outline the steps to hide your mobile number on SMS messages using Android’s default settings.

I’ll also cover some of the best apps to use for hiding your number when texting on Android.

Hiding Your Number via Default Android Settings

Android has a simple settings menu that allows hiding your phone number for individual text messages or all texts you send.

Here’s how to use the default Android settings to hide your number:

Hiding Your Number on a Single Text

  1. Open the Messages app on your Android device and start a new message thread.
  2. Enter the recipient’s phone number or name at the top and type out your text message.
  3. Tap the More Options icon (it looks like three vertical dots).
  4. Select “Settings” from the popup menu.
  5. Toggle the switch next to “Hide number” to enable it. This will hide your number for just this text message.
  6. Tap “OK” to confirm.
  7. Send your text message normally. The recipient will see your number displayed as “Hidden” or “No ID” instead of the actual number.

Hiding Your Number for All Texts

To hide your number for all text messages you send:

  1. Open the Messages app on your Android.
  2. Tap the More Options icon (3 dots) > Settings.
  3. Tap “Advanced”.
  4. Check the box next to “Hide number” under “Call and text”.
  5. Confirm by tapping “OK”.

Now your phone number will be hidden by default whenever you send SMS messages from your device. Recipients will see “No ID” or “Hidden” instead.

To show your number again for a single text, follow the same steps but make sure “Hide number” is toggled off before sending.

To unhide your number completely, go back to Advanced settings and uncheck “Hide number”.

Pros and Cons of Default Android Number Hiding

Using Android’s built-in settings to hide your number has a few notable advantages:

Pros:

Cons:

  • Only hide the number, and your recipient can still see your name.
  • Doesn’t work in all third-party texting apps.
  • Not available on all Android devices and OS versions.

Overall, the native Android settings provide an easy way to quickly hide your number as needed.

However, it lacks some privacy features compared to third-party apps.

Hiding Your Number with Third-Party Android Apps

In addition to the default settings, many apps on the Google Play Store offer enhanced features to hide or change your caller ID for texting.

Here are some of the top options:

Text+ App

Text+ is a popular app made specifically for hiding your phone number when texting.

Here’s how it works:

To get started, download and install Text+ from the Play Store. Open the app and sign up for a free account.

When composing a new text in Text+, you can choose from the following number-hiding options:

  • Private Number – Sends your texts with “Private Number” instead of your real number.
  • Custom Number – Allows you to set a fake number to display when texting.
  • Text+ Number – Gives you a free Text+ number to use.

Text+ also includes other helpful features like scheduled texts, text templates, group messaging, and more.

Pros

  • More hiding options compared to Android’s default settings.
  • Can fully customize what number gets displayed.
  • Extra texting features like schedules, templates, etc.

Cons

  • Need to sign up for a Text+ account.
  • Contains ads (paid version to remove).
  • Doesn’t work directly with your default texting app.

Burner App

Burner is another top-rated app for hiding your real number. Like Text+, it gives you a custom Burner number to use when texting instead of your mobile number.

To use Burner:

  1. Download the Burner app from the Play Store.
  2. Create a new Burner number.
  3. Buy credits to activate your Burner number.
  4. Start texting with your Burner number to keep your real number private.

You can switch between different Burner numbers on the fly from the app. You can also set auto-reply messages for your Burner number when offline.

Pros

  • Get a custom number separate from your real number.
  • Auto-reply features.
  • Frequently change to different Burner numbers.

Cons

  • Need to purchase credits to use a Burner number.
  • Doesn’t support MMS picture/group texts.
  • The app lacks some texting features.

Hushed App

Hushed is a popular paid app that offers complete caller ID customization for hiding your number when texting.

With Hushed, you can choose a new phone number or even multiple numbers. You can display any number you want as your caller ID when texting.

Other key features include:

  • Encrypted messaging
  • Voicemail transcriptions
  • Unlimited storage
  • Online texting

Pros

  • Fully customize caller ID number for texting.
  • Extra security features like encrypted texts.
  • Unlimited number switching.

Cons

  • A paid subscription required starting at $3.99/month.
  • VoIP numbers may be blocked by some carriers.
  • No free trial.

How Android Number Hiding Works

You might be wondering about the technical details behind how hiding your phone number on Android functions:

  • Your mobile carrier assigns your phone its real SIM card number. This allows you to make calls and send texts.
  • Android and third-party apps utilize your data connection to mask your actual number when you hide it.
  • They replace your real number with a fake number or text like “Hidden”, which gets displayed to the recipient.
  • Your mobile carrier allows this override of your caller ID by the Android system and apps.
  • So your number gets hidden from the recipient’s end, but your texts still get delivered normally through your carrier.
  • Your mobile carrier billing and logs will still record your real number for internal use as normal.

So in essence, number-hiding apps leverage Android and mobile data connections to mask your number from being displayed. But they don’t change how texts get sent by carriers.

Common Questions about Hiding Your Number on Android

Here are answers to some frequently asked questions about how to hide your phone number on Android:

Does hiding your number on Android work for both SMS and MMS?

In most cases, yes. The Android settings and apps above will hide your number for regular SMS texts. Most will also hide your number when sending MMS group texts or media messages.

However, some apps may only support SMS. Be sure to check the app’s compatibility before using it for MMS.

Can you hide your number temporarily?

Yes, Android’s built-in number hiding can be toggled on or off at any time as needed. Third-party apps also allow you to change settings at any time to hide or unhide your number.

Is hiding your number free?

Using Android’s default method is free. Some third-party apps offer free limited trials or basic features for free. But most require a paid subscription for full access to all number hiding features.

What appears instead of your hidden number?

When your number is hidden, recipients will usually see something generic like “No ID”, “Unknown”, “Blocked”, or “Private Number” instead of your real mobile number.

Can you text from a computer and still hide your number?

Yes, many third-party apps allow you to text from a computer while keeping your phone number hidden. As long as the computer texting syncs through the app, the number-hiding features will work.

Will hiding your number affect your texting signal or quality?

Hiding your mobile number does not directly impact your texting signal strength or quality. It only changes what your recipient sees for your caller ID, your texts will be delivered normally.

Can you get in trouble for hiding your number?

In most cases, hiding your number is not illegal. However, some countries or states may prohibit spoofing or masking your number for fraudulent purposes. Always comply with local laws and regulations.

Final Tips for Hiding Your Android Number

To wrap up, here are some final tips to follow when hiding your number on Android:

  • Be ethical about using number hiding and respect others’ privacy.
  • Check if your carrier allows number masking; some prohibit it.
  • Try both Android’s default method and third-party apps to see which you prefer.
  • Consider occasionally texting without hiding your number so friends/family have it.
  • Know that authorities can trace your real number if necessary.
  • Switch back to your real number when not needing to hide it.

Hiding your phone number on Android is easy and helpful for maintaining your privacy.

With this guide, you now have all the information needed to keep your mobile number anonymous on text messages from your Android device.

Just be thoughtful about when and how often you hide your caller ID.

Conclusion

Your phone number contains private, identifiable information that you may wish to keep anonymous in certain situations. Thankfully, Android and third-party apps offer easy ways to hide your caller ID when sending texts.

The key is understanding the different options available:

  • Android settings – Simple and quick, but limited.
  • Third-party apps – More customizable, but often require a paid subscription.

Take the time to explore both default and app-based methods. Look for an option that suits your specific needs in terms of features, customization, cost, and ease of use.

With the steps provided in this guide, you should now be equipped to keep your mobile number hidden on SMS messages as needed. U

se this newfound knowledge to maintain your privacy without sacrificing texting capabilities on your Android device.

How to Share AirTag Location with Android Devices

How to Share AirTag Location with Android Devices

Learn how to share AirTag location from your iPhone with Android devices. This step-by-step guide covers setting up AirTag sharing via iCloud and using the Tracker Detect app in 2024.

Apple’s AirTag item trackers have become immensely popular since their launch in 2021.

AirTags help you keep track of your belongings like keys, wallets, bags, and more using Apple’s Find My network and precision finding features.

While AirTags are designed to work seamlessly for iPhone users, sharing your AirTag location with Android devices is a bit more complicated.

Since Android devices can’t connect directly to the Apple Find My network, you need to use AirTag sharing via iCloud or the Tracker Detect app.

In this comprehensive guide, we’ll cover everything you need to know about sharing AirTag locations from an iPhone with Android in 2024.

Here’s what we’ll cover:

  • How AirTag Sharing with Android Works
  • Requirements for Sharing AirTags with Android
  • Setting Up AirTag Sharing via iCloud
  • Using AirTag Sharing Notifications on Android
  • Downloading the Tracker Detect App
  • Using Tracker Detect to Find AirTags
  • AirTag Sharing Limitations on Android
  • Tips for Using AirTags with Android Devices
  • Frequently Asked Questions

So if you want to share the location of your AirTag tracker with friends or family who have Android phones, read on for a complete step-by-step guide.

How Does AirTag Sharing with Android Work?

To understand how AirTag sharing works for Android devices, you first need to know how AirTags are designed to function.

AirTags connect to Apple’s Find My network using Bluetooth LE connections. When in range, they pair with nearby Apple devices also signed into the Find My network. These connections allow AirTags to update their location securely through encrypted communication.

Android devices cannot connect directly to the Apple Find My network. So sharing AirTag locations relies on two main methods:

  1. iCloud Sharing – You can share the location of an AirTag with an Android user via iCloud. This allows them to view the AirTag’s location on a map.
  2. Tracker Detect App – Android users can download Apple’s Tracker Detect app to scan for AirTags that may be traveling with them and see location information.

While not as seamless as the native Find My integration on iPhone, these two options provide relatively simple ways to share AirTags cross-platform.

Requirements for Sharing AirTags with Android

To share the location of an AirTag tracker with an Android device, you’ll need:

The Apple device can be an iPhone, iPad, or iPod Touch running iOS/iPadOS 13.0 or later. This is required to configure AirTag sharing via iCloud.

On the Android side, the user will need an Apple ID logged into their iCloud account. This allows them to receive AirTag sharing notifications. Their Android device will need to be relatively modern – Android 8 or later is recommended.

Optionally, for precision finding where the Android phone can lead you directly to the AirTag, the Android device will need ultra-wideband (UWB) hardware support. Currently, only a handful of newer Samsung phones have UWB chips.

Setting Up AirTag Sharing via iCloud

If you want to share the location of an AirTag with an Android user, you’ll first need to get set up with iCloud sharing. Here are the steps:

Open the Find My App

On your iPhone, iPad, or iPod Touch, open the Find My app. This is where you manage to find people as well as items tracked with AirTags.

Select the AirTag

In the Items tab, select the AirTag you want to share the location of. This will bring up the AirTag location and details.

Tap Share AirTag

At the bottom, tap on Share AirTag. This will allow you to share the selected AirTag via iCloud.

Enter the Apple ID

You’ll be prompted to enter the Apple ID/iCloud account for the person you want to share with. Type in their complete Apple ID email address.

Choose Sharing Permissions

Next, you’ll need to configure the sharing settings. You can choose to share the AirTag’s location indefinitely, or for a specific 1 hour, 1 day, or 3 day time period.

You can also configure whether the user will receive notifications when the AirTag is detected as left behind or moved from its location.

Send the Invitation

Once the settings are configured, tap Send to transmit the iCloud sharing invitation. This will be sent to the Apple ID email address you entered.

The Android user will now be able to start viewing the AirTag location and get notifications based on the sharing settings you configured.

Using AirTag Sharing Notifications on Android

Once AirTag sharing is set up, the Android user will be able to see notifications and find the AirTag location. Here’s how they can utilize AirTag sharing on Android devices:

Accept the iCloud Sharing Invitation

The invitation to share the AirTag will be received as an email to the Apple ID. Open the email on the Android device.

Tap or click Accept to accept the AirTag sharing invitation. This links the Apple ID with that AirTag’s location access.

View AirTag Location

Open the Find My app on the Android device. After accepting the invitation, the app will now display the shared AirTag.

Tap on the AirTag to see its current or last known location on the map. This will be updated periodically when in range of Apple devices detect it.

Configure Notifications

In the AirTag’s details screen, the Android user can turn notifications on or off. This includes alerts for when the AirTag is left behind or detected far from its owner’s location.

Configure notifications based on whether you want to be alerted if that specific AirTag moves or gets left somewhere.

The shared AirTag location and notifications will be available until the sharing period expires. The iPhone owner can extend or revoke access at any time.

Downloading the Tracker Detect App

In addition to iCloud sharing, Android users can also utilize Apple’s Tracker Detect app to scan for AirTags traveling with them.

Tracker Detect allows receiving notifications if an unknown AirTag is moving with you and potentially tracking your location. Here’s how to use it:

Install Tracker Detect

On the Android device, go to the Google Play Store. Search for “Tracker Detect” and install Apple’s app.

Receive Notifications

Once installed, Tracker Detect will run in the background and send notifications if an unknown AirTag is detected moving with you over time.

Play Sound on AirTag

When you receive an alert about an unknown AirTag, you can force it to play a sound to help locate it. The notification will include an option to “Play Sound”.

View AirTag Details

If you locate the unfamiliar AirTag, you can view its serial number and see if it is marked as lost by the owner. This helps identify if it is intentionally tracking you.

Scanning for AirTags

You can also open Tracker Detect at any time and tap “Scan” to actively search for AirTags that may be with you. It will notify you if any are detected.

Tracker Detect provides a privacy-focused complement to iCloud sharing for finding unknown AirTags. It also allows Android users to scan for AirTags pairs with their devices.

Using Tracker Detect to Find AirTags

When paired with iCloud sharing, Tracker Detect can help you find shared AirTags using an Android phone.

Here are some ways to utilize the two together:

  • Get an alert from Tracker Detect about a shared AirTag you are expecting to receive location for. You can tap the notification to view details about the AirTag.
  • If the found AirTag is showing as lost in Tracker Detect, open Find My and you will see the AirTag’s location shared via iCloud. This confirms it is not tracking you.
  • When the AirTag is showing as near you in Find Me, you can use Tracker Detect’s “Play Sound” to trigger the speaker and help locate it. The closer you are, the louder it will ring.
  • Utilize Tracker Detect’s scan function to actively look for a shared AirTag you want to find the physical location of. When it detects the AirTag, switch to Find My to view live updates.

The integration between the two apps provides a robust set of tools for finding shared AirTags cross-platform.

AirTag Sharing Limitations on Android

While AirTag sharing on Android works relatively smoothly, there are some limitations to be aware of:

  • Precision finding guidance is only available on select newer Android phones with UWB chips. Without UWB, you only see the AirTag’s location on a map.
  • AirTag sharing could be delayed compared to native Find My on iPhone. Locations on Android rely on iCloud syncing.
  • Background location updates may be slower if Android battery optimization is enabled. This can impact live tracking.
  • Find My on Android lacks some features available on iOS like augmented reality directions.
  • AirTag sharing expires after the selected 1 hour, 1 day, or 3 day period. The iPhone owner has to extend the sharing invitation for it to continue.
  • AirTags shared via iCloud do not show up in Tracker Detect scan results. Only unknown AirTags will appear.

Despite a few limitations, AirTag sharing with Android provides the essential features for tracking items cross-platform. But the experience will not be as seamless as using AirTags between Apple devices.

Tips for Using AirTags with Android Devices

Here are some handy tips to get the most out of sharing and finding AirTags with Android devices:

  • Set up sharing initially when you are with the Android user so you can immediately test that the AirTag appears in their Find My app.
  • Advise the Android user to keep Find My open and background app refresh enabled for quicker updates.
  • Extend the iCloud sharing invitation duration to a maximum of 3 days so you don’t have to constantly re-share.
  • Select the “Notify when found” and lost item notifications to provide alerts if the AirTag is left behind or moved.
  • If possible, look for Android devices with UWB support to get precision finding directions. This helps most when physically retrieving a lost item.
  • Use a clear naming convention like “keys” or “wallet” for your shared AirTags so Android users can easily identify them.
  • Utilize Tracker Detect scanning features if you expect an unknown AirTag to be present to confirm it is not secretly tracking an Android user.

Following these tips will help maximize the AirTag finding capabilities for Android users and ensure the tracking and notification features work reliably cross-platform.

Frequently Asked Questions

Here are answers to some common questions about sharing AirTag locations with Android devices:

Do AirTags work with Android phones?

AirTags don’t directly pair and connect with Android devices. But iPhone users can share the location of AirTags with Android phones using iCloud sharing and the Tracker Detect app.

Can I use AirTags to track Android devices?

No, you cannot actively track an Android device using AirTags since they cannot pair together. AirTags are designed to track belongings paired with Apple devices.

Do I need an iPhone to set up AirTag sharing?

Yes, you will need a compatible iPhone, iPad, or iPod Touch running the latest iOS/iPadOS to initially configure iCloud sharing of an AirTag with an Android user.

What do I need to share an AirTag location on Android?

The Android user will need an Apple ID added to their device and logged into their iCloud account. Their phone will need to be running Android 8 or later to use Find My and Tracker Detect.

Can Android devices detect AirTags?

Yes, Android devices running Tracker Detect can scan to detect nearby unknown AirTags that may be traveling with you and notify you if one is detected.

How do I find a shared AirTag on Android?

Open the Find My app, go to the Items tab, select the shared AirTag, and tap on it to see its current or last updated location on a map. Use Tracker Detect to play a sound to help locate it.

Is AirTag precision finding available on Android?

Precision finding directions to lead you to the AirTag is only available on select newer Samsung Galaxy phones with UWB support. Most Android devices will only see the AirTag location on a map.

How long does AirTag sharing work for Android?

The AirTag owner can share locations via iCloud for 1 hour, 1 day, or 3 days at a time. They will need to extend the invitation in the Find My app for sharing to continue beyond the original duration.

What are the limitations of AirTag sharing on Android?

Limitations include potentially delayed updates, lack of augmented reality directions, and sharing durations expiring. But tracking locations via a map and basic notifications still works reliably.

Conclusion

While not as seamless as the native Apple integration, sharing AirTag locations from iPhone to Android devices is possible and relatively straightforward.

With just a few steps to set up iCloud sharing and utilizing Apple’s Tracker Detect app, Android users can now also benefit from locating and finding shared AirTags.

Following this guide, you should have a complete understanding of how to share your AirTags cross-platform. You can leverage the tracking capabilities, notifications for lost items, and scanning features to ensure your Android family and friends can also locate your important belongings tagged with AirTags.

How to Calibrate Touch Screen Android

How to Calibrate Touch Screen Android

Is your Android touchscreen not responding properly to taps and swipes? Finger presses not registering accurately or are buttons difficult to press?

Don’t worry – with just a few steps you can recalibrate your touch screen to have it working like new again.

Calibrating your Android device’s touch screen helps remap and improve its responsiveness by relearning the precise points it needs to react to.

It’s an essential troubleshooting step if you notice any inaccurate reaction to taps, swipes, and gestures.

Follow this straightforward 2024 guide to properly calibrate the touch screen on any Android smartphone or tablet.

We’ll cover how to access the correct calibration setting menu across Android versions like Android 13 and older ones like Android 10 too.

What Causes Touch Screen Misalignment on Android?

There are a few common reasons your Android touchscreen can become misaligned or inaccurate over time:

  • General wear and tear
  • Damaged digitizer
  • Buggy firmware or app
  • The buildup of dirt, debris, and grime
  • Magnets or cases interfering with the screen

Thankfully recalibration is a straightforward process that often resolves these touch screen issues.

Just be patient as it may take a few attempts for the best results.

How to Access Touch Screen Calibration Menu on Android

The calibration setting menu is built right into Android, but accessing it varies slightly across manufacturers and OS versions:

Android 13

On Android 13 open Settings > System > Gestures and touch > Touch sensitivity calibration

Android 12

For Android 12 open Settings > Display > Touch sensitivity calibration

Android 11

On Android 11 tap Settings > System > Gestures and touch > Touch sensitivity calibration

Android 10

Android 10 calibration is in Settings > System > Gestures and touch > Touch sensitivity calibration

Older Android Versions

If running older Android open Settings > Display > Touch calibration or Settings > General > Accessibility > Dexterity and interaction > Touch calibration

Manufacturer Specific Calibration Screens

Some manufacturers include additional calibration and touchscreen optimization screens:

  • Samsung – Search for ‘touch sensitivity’ or ‘screen calibration’ in Settings
  • LG – Tap Settings > General > Gestures > Touch calibration
  • Motorola – Tap Settings > Display > Touch sensitivity > Recalibrate touchscreen

If unsure check your device manufacturer’s support site for exact details on accessing calibration.

How to Calibrate Android Touch Screen

Once you access the calibration menu the process is very straightforward on all Android devices:

  1. Open your device calibration menu from the steps above
  2. Tap ‘Calibrate’ or ‘Recalibrate touchscreen’ to begin
  3. Use your fingertip to gently press the center of the target as it moves around the screen
  4. Hit each target button as accurately as possible
  5. Repeat for all target prompts until calibration is complete
  6. Test and confirm screen is now properly responding
  7. Retry calibration if issues persist

Here is a more detailed walkthrough for calibrating Android touchscreen response:

1. Start Touch Screen Calibration

Navigate to the calibration setting screen specific to your Android OS version or device.

Look for options like ‘Calibrate’, ‘Recalibrate touchscreen’, ‘Touch sensitivity calibration’, or similar, and give it a tap.

2. Follow On-screen Calibration Prompts

You’ll now be greeted with an on-screen prompt asking you to firmly press and hold until calibration begins.

Keep holding down until colorful crosshair targets appear.

The targets work by mapping precise points your touchscreen needs to learn.

3. Touch Targets

As color targets move around and change size pay close attention to their centers.

When each new target spawns gently but firmly touch directly in the middle with your fingertip.

Try to precisely hit the exact center point of each target as they appear randomly across the touchscreen surface.

Target accuracy is important for proper calibration.

4. Repeat As Necessary

Patiently keep softly pressing the centers of new targets as they spawn until calibration is complete.

The process may take a few minutes to complete while your screen maps response points.

Just keep gently hitting target centers whenever prompted across the whole display from top to bottom side to side.

5. Confirm Proper Calibration

Once the touch screen calibration process finishes double check finger presses, taps, swipes, and gestures are now registering accurately.

Try some basic navigation like opening apps, scrolling webpages, and typing to confirm improved precision.

If any inconsistencies like missed presses or inaccurate typing remain recalibrate again until satisfied.

Troubleshooting Android Touch Screen Calibration

While calibration works in most cases, sometimes issues with touch accuracy and control can persist on Android.

Here are some steps to try if display problems continue after attempted recalibration:

  • Clean display – Remove any oil, dirt, and debris with a microfiber cloth
  • Check for screen protector issues – Remove if installed
  • Verify latest system updates are installed
  • Try calibration again restarting the device afterwards
  • Boot the Android device in safe mode then re-calibrate
  • Back up data and consider factory reset if needed
  • Inspect the device for possible hardware damage requiring repair

Getting touch screen calibration consistently right may take 3 to 5 retries.

Be patient targeting each screen point during the process for best end responsiveness.

For advanced customization, some devices also allow adjusting touch sensitivity levels in the calibration menu for light or firm presses too.

Android Touch Screen Still Unresponsive?

If accuracy issues continue even after repeated calibration your Android device may have a faulty digitizer requiring hardware-level repair or replacement.

On some phones, the pressure-sensitive layer can become delaminated or cracked from age and wear requiring complete touchscreen part replacement.

For software crashes preventing access to the calibration menu a full factory data reset may help restore functionality.

But if physical or water damage is causing the problems a trip to a reputable repair shop is probably to swap the physical display.

Preventing Recalibration Needs

While convenient being able to recalibrate, avoiding the need in the first place is ideal for keeping your Android touch screen performing its best.

Here are some useful tips to help prevent accuracy and responsiveness degradation over time:

  • Use the lightest possible touch when tapping and swiping
  • Keep the screen clean and smudge-free
  • Prevent drops and physical cracks or scratches
  • Only use touch screen-friendly styluses
  • Avoid sticking hand magnets or magnetized cases on the device
  • Watch for signs of responsiveness degradation
  • Recalibrate as soon as issues appear – don’t wait!

Catching problems early better allows calibration to remap touch points before accuracy suffers too far or hardware damage occurs.

With proper preventative care you can keep your Android screen properly responding requiring less recalibration needs overtime.

Regularly Clear System Cache

An easy way to keep touch screen performance crisp over time is clearing accumulated operating system cache regularly.

Over months cached data can pile up causing sluggish interface response. Wiping it manually prevents system slowdowns.

On most Android devices all it takes is opening device storage settings and tapping ‘Clear Cache’ to free up resources.

Give this a try about once a month or anytime a system update is installed. The performance boost is worth the quick effort!

FAQs: Android Touch Screen Calibration

Does recalibrating void phone warranty?

No, the built-in Android calibration utility accessing via device Settings will not void factory warranties or terms.

Manufacturer tools are provided specifically for improved responsiveness when required.

Can you calibrate Android without the special app?

Yes! The touchscreen calibration setting is built right into core Android software and accessible from within the Settings menu.

No 3rd party app is required for recalibration.

Why does my touchscreen keep recalibrating itself?

If Android touch accuracy seems to degrade requiring frequent recalibration a hardware fault may be developing.

Back up data and visit a qualified repair center to diagnose possible digitizer issues.

How often should you calibrate a phone screen?

Only re-calibrate when noticing degraded responsiveness issues arise.

There is no set interval required if your touchscreen performs accurately day-to-day.

Recalibrate as soon as possible when taps and gestures become inconsistent.

Can a cracked screen be recalibrated?

It’s possible but unlikely a badly cracked display can successfully calibrate.

The digitizer tracks finger presses via the glass itself.

Any obstruction prevents accurate mapping during calibration prompts.

How to Deactivate Voicemail on Android

How to Deactivate Voicemail on Android

Do you find voicemail messages filling up your Android phone’s storage? Or perhaps you simply want to disable the voicemail feature altogether.

Deactivating voicemail on Android is easy once you know the steps.

In this comprehensive guide, we will show you how to turn off voicemail on popular Android phones from brands like Samsung, Google Pixel, LG, Motorola, and more.

What Happens When You Deactivate Voicemail on Android

When you disable voicemail on your Android device, any incoming calls that you miss will no longer go to voicemail and allow callers to leave a message.

Instead, the calls will simply continue ringing until the caller hangs up.

Some key effects of deactivating voicemail on your Android phone include:

  • Callers will no longer be able to leave voicemail messages when you don’t answer
  • You won’t have to manage or clear out old voicemail messages
  • Your phone’s storage will free up space that voicemails would have occupied
  • You won’t see any notifications about new voicemail messages

However, missing important calls could become an issue.

So weigh the pros and cons before disabling voicemails on your device.

How to Turn Off Voicemail on Android

Disable Voicemail on Samsung Galaxy Phones

Follow these simple steps to deactivate voicemail on your Samsung Galaxy Android device:

  1. Open the Phone app on your Samsung phone
  2. Tap the three-dot Menu button in the top right corner
  3. Select “Settings” from the menu
  4. Tap “Voicemail” settings
  5. Disable the “Voicemail” option by tapping the switch

That’s it! Voicemail is now turned off on your Samsung Galaxy phone.

Repeat the steps and toggle the switch on to re-enable voicemails anytime.

Turn Off Voicemail on Google Pixel

Here is how to disable voicemails on Google Pixel and other Android One phones:

  1. Open the “Phone” app on your Pixel
  2. Tap the three-dot menu icon in the top right corner
  3. Select “Settings” from the menu
  4. Tap “Voicemail”
  5. Disable the “Voicemail” option by tapping the switch

These steps will successfully deactivate voicemails on any Pixel phone as well as other Android One devices.

Disable Voicemail on LG Android Phones

If you have an LG phone running Android, use these steps to turn off voicemail:

  1. Launch the Phone app on your LG phone
  2. Tap the “Menu” icon in the top right corner
  3. Choose “Settings” from the menu
  4. Select “Voicemail”
  5. Turn off “Voicemail” by tapping on the toggle switch

Turn Off Voicemail on Other Android Brands

Most other Android manufacturers also allow toggling voicemail on or off right from the built-in Phone app.

Here is a generic guide you can try:

  1. Open the default “Phone” or “Phone Dialer” app
  2. Look for the Menu or Settings icon
  3. Choose “Settings” from there
  4. Scroll down and select the “Voicemail” option
  5. Disable “Voicemail” using the toggle switch

This method should disable voicemails on Motorola, Sony, Nokia, Xiaomi/Redmi/POCO, OnePlus, and most other Android phones.

Some carriers also allow managing voicemail via special dialer codes, but the Phone app method works universally.

Troubleshooting Tips

If you are unable to turn off voicemail using the above steps, try these troubleshooting suggestions:

  • Check if you have the latest software update installed
  • Restart your Android device
  • Clear cache and data for the Phone app
  • Contact your mobile carrier for help

Certain carriers may override the voicemail settings options on Android.

Please check with them if required.

Understanding Visual Voicemail on Android

Some Android devices from Samsung, Google Pixel, and other brands also offer a “Visual Voicemail” feature alongside regular voicemails.

Visual Voicemail displays a list of your voicemail messages and allows playing or managing them right within your Phone app or other messaging apps.

Even with Visual Voicemail activated, you can disable regular voicemails by using this guide.

This stops new voicemails but still lets you access existing messages via Visual Voicemail.

Conclusion

We have shown detailed, step-by-step instructions to successfully deactivate voicemail on all the top Android phones.

Whether you have a Samsung Galaxy, Google Pixel, LG phone, or any other Android device – you can easily turn off voicemails using the built-in Phone app.

Disabling voicemails prevents callers from leaving voice messages when you miss their call.

Carefully consider the pros and cons before turning off this potential communication and notification channel.

We hope this guide has helped you understand how to disable voicemail on your Android smartphone or tablet.

Just reverse the steps outlined to reactivate voicemails anytime!

FAQs

Can I turn off voicemail completely on my Android phone?

Yes, this guide has shown how to fully deactivate the voicemail feature on any Android phone for all calls to stop going to voicemail when you don’t answer.

What happens if I disable voicemail on Android?

With voicemail turned off, callers will no longer be able to leave a voice message when you miss their call. Your phone will keep ringing on missed calls until stopped.

How to Save GIFs on Android: A Step-by-Step Guide

How to Save GIFs on Android

Learn the easy methods to save GIFs on your Android device. Follow our step-by-step instructions to download and save GIFs from any app or website to your Photo gallery or other folders.

Why You Should Save GIFs on Your Android Phone

GIFs are popular animated images that often convey emotions or reactions better than static photos.

Here are some reasons why you may want to save GIFs on your Android phone or tablet:

  • To easily share funny or interesting GIFs with friends and family
  • To reuse the same GIFs in future conversations instead of searching for them again
  • To create memes or other content by adding text or images to GIFs
  • To build up a collection of your favorite reaction GIFs over time

By saving GIFs directly on your device rather than a cloud-based app or website, you’ll have instant offline access to all your saved GIF content.

How to Save a GIF in Android’s Photos App

If you come across a great GIF while browsing the web or messaging apps, here is how to easily save it using the built-in Photos app on Android:

Step 1: Long press the GIF to bring up the context menu

In most cases like Gmail, Twitter, etc. you can long-press the GIF and a menu will pop up.

Step 2: Tap “Download image” or “Save image”

This may be labeled differently in some apps but you are looking to download or save the GIF.

Step 3: Go to Photos app > Saved Pictures folder

After downloading, you can find the saved GIF in the Saved Pictures folder of your Android Photos app so you can easily reuse it later.

Using Third-Party Android Apps to Save GIFs

While the method above utilizes Android’s built-in tools, you can also check out apps designed specifically for collecting, creating, and sharing GIFs.

Here are some top options:

GIPHY

GIPHY is the internet’s top source for GIFs and their Android app makes it easy to save any GIF from their massive library.

Just tap the heart icon on any GIF and it gets added to “My GIFs” for quick access later.

Tenor

Similar to GIPHY, Tenor features an endless scroll of trending GIFs.

Saving here is also a heart tap away. It also lets you upload videos to turn them into shareable GIFs.

Imgur

Top meme community Imgur has its own GIF maker and library.

You can browse their selection and download any you like right to your Android device pretty easily.

How to Save GIFs in Specific Android Apps

Facebook Messenger

To save GIFs from Facebook Messenger chats:

  1. Long press the GIF to select it
  2. Tap the download icon in the top right
  3. The GIF will be saved to your camera roll

WhatsApp

WhatsApp also lets you save received GIFs:

  1. Tap and hold the GIF to select it
  2. Tap the Save icon (download arrow)
  3. The GIF will be saved to your Photos app

Pro Tip – Organize Your Saved GIF Collection

To avoid clutter and easily find all your favorite saved GIF reactions, you can create a dedicated GIF album in your Android’s photo gallery.

Just tap and hold any saved GIFs, select “Add to album” and choose “New album” to keep them organized in one place.

GIF Saving Troubleshooting

If you are having issues getting an option to save GIFs from certain apps or sources, here are some troubleshooting tips:

  • Update the app – There may be a new version with better GIF support
  • Use a third-party Android app like GIPHY instead
  • Screen record the GIF and then convert the video to a GIF with an app
  • On mobile sites, try opening it in your browser instead of the app

Frequently Asked Questions

Where are saved GIFs stored on Android?

By default, any GIFs you save will go into your Photos app under the Saved Pictures folder or into a GIF album if you created one.

Can you save GIFs to an external SD card on Android?

Yes, in your camera settings, you can change the storage location to save photos and videos to either internal device storage or an external SD card if you have one.

Why can’t I save GIFs on Android?

Some common issues that prevent saving GIFs include outdated apps lacking support, buggy Android OS software, incorrect photo app permissions disabled, or low device storage space.

Saving great GIFs to reuse or share later is handy. We hope these Android tips help you easily download any fun GIFs you find to your phone or tablet galleries.

How to Call an Extension on Android: A Step-by-Step Guide

How to Call an Extension on Android

Calling an extension on Android can seem tricky if you’ve never done it before. Unlike the iPhone, there’s no dedicated extension dialing feature built into Android.

But with the right tricks, you can easily reach any extension number right from your Android smartphone.

In this comprehensive guide, we’ll explain multiple methods to call extensions on Android depending on your specific needs.

Whether you want to call an extension number saved in your contacts, dial extensions ad-hoc during a call, use third-party apps, and more – we’ve got you covered.

Calling Extension in Contacts

The easiest way to call extensions on Android is by saving them directly in your contacts.

Here are the steps to save and call an extension number from Contacts:

  1. Open the Contacts app and select a contact to add an extension.
  2. Tap on the phone number field and enter the extension after the main number separated by a comma. For example: 555-1234,456
  3. Tap Done once you’ve entered the extension.
  4. To call this contact’s extension, simply tap on their name in the Contacts app.
  5. On the dialer screen, tap the phone icon with ‘1 Ext.’ to directly dial the main number and connect to the extension.

This approach saves you from re-entering or remembering extensions every time.

Just tap on the contact once and you’ll be connected to their extension automatically.

Dialing Extensions Mid-Call

If you forgot to add an extension to your contacts, you can still reach it during a call using your Android dialpad.

Follow these instructions to dial an extension once on call:

  1. While on call with the main number, open your dialpad.
  2. Key in the extension number you’re trying to reach.
  3. Tap on the call icon to dial the entered extension.
  4. You will hear a new dial tone once connected to the extension.

This method works reliably across all Android devices. Just remember the extension number you need to reach mid-call.

Calling Extensions with Plus Code Dialing

Modern business phone systems often use plus codes (+ code) along with extension numbers. Here’s how to dial extensions with plus codes on Android:

  1. Open the phone dial pad and enter the main number
  2. Long press * key on the dial pad to enter ‘+’ symbol
  3. After the main number, enter the extension number prefixed with the plus code
  4. Tap the call icon to dial the number + extension

As an example, to dial 555-1234 Ext. 456 with plus code 149*, you’ll enter: 5551234 149*456

The steps remain the same for any local or international numbers you’re trying to reach.

This comes in handy especially when calling company extensions abroad.

Using Third-Party Apps to Call Extensions

Besides the native phone dial pad, third-party apps provide even more options to dial extensions easily.

Some popular Android apps for calling extensions include:

  • Ext Number Dialer – Standalone app solely focused on extension dialing. Supports plus code dialing.
  • Skype – Make low-cost calls with extensions using Skype credits.
  • Google Voice – Integrates with your carrier number and provides features to store and dial extensions.

The advantage of using such apps is that they simplify extension management and save you money, especially on international extension calls.

Pros and Cons of Calling Extensions on Android

Here’s a quick rundown of some of the key advantages and limitations of using extensions on your Android device:

Pros

  • Direct access to specific contacts using dedicated extension numbers.
  • Bypass automated attendants and reach the correct department faster.
  • No need to memorize long extension numbers when saved directly in Contacts.

Cons

  • No native support for storing extensions in the Contacts app.
  • Dialing extensions mid-call can be tricky without the number handy.
  • International extension numbers may incur additional long-distance charges.

Frequently Asked Questions

Can I save extensions in Contacts on Android?

Yes, you can save numbers with extensions in the default Contacts app on Android. Simply enter the main number with the extension separated by a comma as shown: 555-1234,456

Do extensions work with VoIP calls?

Yes, extensions will work reliably with Voice over IP (VoIP) calls made using apps like Skype, WhatsApp, Google Voice, etc. The steps to dial the extensions remain the same.

Can I call international extensions?

You can call international extensions from your Android device using plus code dialing. However, charges may apply depending on the destination country and your cellular plan.

How to Send a Video via Text Message on Android

How to Send a Video via Text Message on Android

Sending videos through text messages on Android can be very useful for quickly sharing moments with friends and family.

However, there are some things you need to know to send videos successfully via text message.

Sending Video Text Messages on Android

Using MMS vs SMS for Video Texting

Android devices send text messages using either MMS or SMS technology.

SMS can only handle basic text, while MMS allows you to attach photos, videos, audio files, contact cards, and more.

Here’s a quick rundown:

  • SMS – Stands for Short Message Service. Limited to 160 text characters.
  • MMS – Stands for Multimedia Messaging Service. No character limits. Supports media attachments.

To send videos in text messages on Android, you’ll need to use MMS.

Let’s look at how to configure your device for MMS next.

Enabling MMS Messaging on Android

Most Android devices have MMS enabled by default.

However, some carriers require you to enable the feature manually:

  1. Open your Android Settings app.
  2. Tap Network & Internet > Mobile Network.
  3. Ensure Mobile Data is enabled.
  4. Scroll down and check if MMS messaging is enabled. If not, tap to enable.

If you run into any issues with MMS messaging, contact your cell carrier to confirm everything is properly activated on your plan.

Sending Video Files via Text App

The most straightforward way to attach and send videos via text on Android is by using your default Text Messaging app (the app may be named Messages, Text Messaging, Messenger, etc depending on your device).

Here’s how it works:

  1. Open your text messaging app.
  2. Start a new message thread or open an existing thread.
  3. Tap the Attach button (a paperclip icon).
  4. Select Video from the attachment menu.
  5. Browse and tap the video file you want to attach.
  6. Tap Send to deliver the video.

That’s all there is to it! As long as MMS messaging is enabled, your recipient will receive the video attachment.

Next, let’s go over some file size considerations when texting videos.

Video File Size Limitations

MMS has file size restrictions that prevent overly large video files from being sent.

The maximum file size varies by cell carrier, but videos over 2-3 MB may fail to send via MMS.

If your video exceeds the size limit, try the following fixes:

  • Use video compression software to shrink the file size without losing too much quality.
  • Upload the video to cloud storage like Google Drive or Dropbox, then share the link in a text instead of the file itself.
  • Use a messaging app with larger file size limits, covered next.

Messaging Apps for Sharing Videos

Third-party messaging apps often support larger file attachments compared to standard carrier MMS limits.

Popular options include:

  • WhatsApp – Supports video files up to 100 MB.
  • Facebook Messenger – Allows videos up to 1024 MB (1 GB).
  • Telegram – No explicit limit, but recommends staying under 1.5 GB per file.

The advantage of messaging apps is that they use data channels instead of the MMS protocol.

As long as both parties have the app installed, you can enjoy high file size limits for video messaging.

Troubleshooting Video Texting Issues

Can’t get your video text message to send?

Try these troubleshooting tips:

  1. Confirm that Mobile Data/Cellular Data is enabled on your Android device.
  2. Enable Airplane Mode for 15-30 seconds, then turn off Airplane Mode.
  3. Force stop the messaging app and clear cache/data before restarting.
  4. Try switching cellular networks between 3G/4G/5G as needed.
  5. Make sure you have sufficient phone storage space for MMS data.

As a last resort, ask the recipient to send a basic text message first – receiving an SMS before an MMS can help activate messaging capabilities.

What is the maximum video size for texting on Android?

The maximum video size for MMS messaging varies by carrier but is typically 1-3 MB. Using a 3rd party messaging app can allow much larger videos up to 100 MB or 1 GB.

How do I enable MMS messaging on my Android phone?

To enable MMS messaging, open your Android Settings > Network & Internet > Mobile Network. Make sure Mobile Data is on and enable the MMS messaging option.

How to Put Music on an MP3 Player from an Android Phone

Step-by-step guide on transferring music files from an Android phone to an MP3 player using different methods like Bluetooth, USB cable, cloud storage apps, etc.

Getting Music from Your Android Phone to MP3 Player

Having an MP3 player allows you to listen to music on the go without having to drain your phone’s battery.

While most MP3 players come with some built-in music, you’ll likely want to add your songs and audio files at some point.

The good news is that it’s easy to load music onto an MP3 player from your Android smartphone. You just need to know the right method for your particular devices.

Here, we’ll outline several ways to transfer music files from an Android phone over to an MP3 player so you can start enjoying your tunes.

1. Transfer Music Over Bluetooth

One of the fastest and most convenient ways to put music onto your MP3 player is by using Bluetooth.

Most modern Android phones and MP3 players support Bluetooth connectivity.

To transfer music via Bluetooth, first pair your Android phone with your MP3 player by turning Bluetooth “On” on both devices and having them detect one another.

Once paired, you can browse the files on your Android phone from your MP3 player and transfer music tracks wirelessly.

The benefits of using Bluetooth include not having to use any cables and being able to transfer files quickly.

Just note that Bluetooth tends to drain battery life faster on both devices.

2. Use a USB Cable to Sync Music

If you don’t want to use Bluetooth, you can also sync music from your Android smartphone to your MP3 player using a USB cable.

This method works with most MP3 players.

To sync music over USB, first connect your Android phone to your MP3 player using an appropriate USB cable.

Once connected, your phone may prompt you to allow data transfer capabilities.

Enable this, then find the connected MP3 player from your Android phone’s file manager app.

From there, you can browse the MP3 player’s folders and drag and drop music files you want transferred from internal storage or SD card over to the MP3 player’s music folder.

USB transfers are generally fast and don’t use battery life like Bluetooth.

Using Cloud Storage Apps to Transfer Music

You can also upload music from your Android phone to cloud storage services like Google Drive or Dropbox, then download the files onto your MP3 player.

This method works well if your MP3 player doesn’t connect directly to your phone.

Start by installing the cloud storage app both on your Android phone and MP3 player.

Then upload the music files from your phone to cloud storage.

Lastly, access that storage from your MP3 player and download the music.

Cloud storage transfers can be slower with large music libraries but are convenient since you don’t need a direct device connection.

Pros and Cons of Transferring Music to MP3 Players

Pros:

  • Listen to music anywhere without using your phone’s data or battery
  • MP3 players tend to have better audio quality
  • You can take your full music library on the go
  • Music won’t interrupt phone calls or notifications

Cons:

  • Managing another device to keep charged
  • Slower to switch playlists/stations vs. phone apps
  • Smaller music libraries unless high capacity MP3 player
  • Don’t have access to music streaming apps

Can I transfer music from Spotify or other streaming apps?

No, streaming apps don’t allow transferring music to MP3 players.

You’d need to first download the songs/playlists through the app for offline listening on your phone before transferring to the MP3 player.

What cable type do I need for USB transfer?

Most MP3 players accept a standard micro USB cable like those used with many Android phones.

Some devices may require a proprietary cable or 30-pin Apple cable.

Can I edit ID3 tags after transferring to an MP3 player?

Some high-end MP3 players allow you to edit the metadata like song title, artist, album, etc. after transferring music.

Lower-end models won’t permit changing ID3 tags.

Listen to Your Tunes Anywhere

Whether you prefer wireless Bluetooth transfers, connecting directly over USB, or uploading your music library to the cloud first, it’s simple to get all your songs and audio files from an Android phone to an MP3 player. Just pick the method that best suits your devices.

Once you’ve loaded up your MP3 music player, you’ll be able to enjoy ad-free, uninterrupted listening anywhere with your headphones. So grab your favorite playlists off your phone and take them on the go.

How to Clean Charging Port Android

How to Clean Charging Port Android

Learn simple steps to clean and fix an Android phone’s charging port if it’s not charging properly.

Effective cleaning methods using toothpicks, compressed air, etc.

Why You Need to Clean Your Android’s Charging Port

Over time, dirt, dust, and other debris can build up in your Android phone’s charging port, causing problems like:

  • Loose cable connection
  • Slow or intermittent charging
  • Not charging at all

Cleaning the port can often fix these charging issues and allow your phone to charge normally again.

Materials Needed for Cleaning

You’ll need the following items:

  • Toothpick or thin non-metallic tool
  • Compressed air canister
  • Clean microfiber cloth
  • Flashlight

How to Clean Charging Port

Step 1: Check for Obstructions

Use a flashlight to look inside the charging port and see if any debris, lint, or dust is obvious.

If you can see a blockage, try carefully removing it with a toothpick.

Step 2: Use Compressed Air

Spray compressed air in short bursts into the charging port.

This will help dislodge and blow out any loose dirt or particles.

Step 3: Use a Toothpick

Gently move a toothpick around the port to scrape and pull out any stubborn debris stuck to the walls of the port.

Step 4: Dry the Port

Use a clean microfiber cloth to wipe away any moisture or debris around the port opening.

Step 5: Check the Charging Function

Plug in your phone’s charger and verify it can charge smoothly again.

Tips for Cleaning Charging Port

  • Avoid using metal tools to prevent damaging pins in the port.
  • Don’t force anything into the port to avoid damage.
  • Dry the port well after cleaning before charging.
  • Clean the port regularly to prevent buildup.

When to Get Professional Help

If you’ve cleaned the charging port thoroughly but your Android still won’t charge properly, the issue could be a hardware problem.

It’s best to take it to a repair shop.

Technicians have the proper tools and expertise to inspect the port and make any repairs needed.

FAQs

Why does my phone’s charging port need cleaning?

Dust, pocket lint, moisture, and normal wear and tear can cause buildup in the port over time.
This debris can block proper contact between the charger and port terminals.

How can I avoid damaging the charging port?

Use non-metallic, non-abrasive tools like toothpicks or soft plastic picks.
Don’t force anything into the port or scrape too aggressively.
Be very gentle cleaning around the port pins.

What if cleaning doesn’t fix my charging issues?

The problem could be caused by hardware damage due to normal wear and tear over time.
Consider getting a professional repair service for any persistent charging problems.

How to Hide Certain Text Messages on Android

How to Hide Certain Text Messages on Android

If you want to keep certain text messages private on your Android phone or tablet, there are a couple of different options you can use.

With just a few taps, you can hide sensitive SMS conversations so they don’t show up in your main messaging app.

Hide Texts Using App Lock

One of the easiest ways to hide text messages on Android is by using a lock screen app.

These apps allow you to lock down specific apps with a PIN, pattern, or fingerprint lock.

Here’s how to hide messages using App Lock:

  1. Download and install an App Lock app like Norton App Lock from the Google Play Store.
  2. Open the app and enable locks for your messaging app(s).
  3. Set a PIN, pattern, or fingerprint lock to secure the apps.

Once you set up locks, your messaging apps will only be accessible after authenticating with your chosen lock method.

This allows you to quickly hide texts from prying eyes.

Hide Individual Text Threads

Alternatively, you can hide specific text message threads right within your default messaging app:

  1. Open the text conversation you want to hide.
  2. Tap and hold the conversation.
  3. Select “Hide alerts” or “Hide conversation.”

Hidden conversations won’t show up in your main messages list, but remain saved in the app.

To view them, open your messaging app menu and look for an option like “Archived,” “Hidden,” or “Blocked conversations.

Permanently Delete Texts

If you want to completely remove a text conversation, you can delete the messages instead of just hiding them:

  1. Open the conversation you want to delete.
  2. Tap and hold the conversation.
  3. Choose “Delete conversation.”

The texts will be permanently erased from your messaging app.

This is ideal if you no longer want any record of the conversation on your phone.

FAQs

Can hidden texts be recovered?

In most cases, hidden conversations can be unhidden later if you need to access them again.
However, deleted texts cannot be recovered.

Will hiding texts delete them?

No, hiding text conversations simply archives them and removes them from view.
The texts remain saved in your messaging app.

Conclusion

Hiding private messages takes just a few taps and helps keep your sensitive conversations truly private.

Try using a lock screen app or your messaging app’s built-in archive features to hide texts on your Android device.

How to Text More Than One Person on Android

Learn How to Text More Than One Person on Android in easy steps.

Ways to Group Text on Android

Texting multiple people at once on Android phones is easy with the right apps and messaging services.

Here are some of the top ways to group text on Android:

Use Android’s Built-In Messaging App

Android’s default messaging app has a group messaging feature that lets you text multiple contacts at once. To use it:

  1. Open the Messaging app and tap the 3-dot menu icon in the top right
  2. Tap “New group”
  3. Select the contacts you want to message
  4. Name the group and tap “OK”

You can now text everyone in the group conversation. All replies will be seen by the entire group.

Try a Group Messaging App

There are lots of apps made specifically for group texting. Popular options include GroupMe, WhatsApp, Telegram, and Signal. These apps have features like:

  • Create open groups or private chats
  • See who has read each message
  • Share photos, videos, documents
  • Set up events and calendars

Group messaging apps provide more features beyond basic group texts.

Use Social Media Messaging

Many social media platforms like Facebook Messenger, Instagram Direct, and Snapchat allow group messaging. If you and your friends are already on one of these social networks, you can easily chat in a group.

SMS vs Internet-Based Messaging

When considering group texting apps, there are two main types:

SMS Text Messaging

SMS (short message service) is basic cellular text messaging over your phone carrier network. The built-in Android Messages app uses SMS. Pros:

  • Uses your current phone number and contacts
  • No need for separate accounts
  • Works for recipients without data or the app

Cons:

  • Size limits on messages and group chats
  • No extra features like read receipts

Internet-Based Messaging

Apps like WhatsApp use your phone’s Internet connection instead of SMS. Pros:

  • Feature-rich apps with lots of options
  • Send high-quality photos, videos, and files
  • See when messages are read
  • Works internationally

Cons:

  • Requires all users to have the app installed
  • Uses data instead of SMS

Step-by-Step Guide

Here is a quick step-by-step guide to getting started with group texts on Android:

  1. Choose a group messaging app – either use the built-in Android app or download a third-party option like WhatsApp.
  2. Create a group chat by selecting the contacts you want to include.
  3. Type and send your first group message!
  4. The recipients will receive it as a group conversation.
  5. They can reply and all messages will be visible to everyone in the group.

It’s easy to have group conversations on Android. Give it a try with your friends, family, or work teams!

Frequently Asked Questions

Can I add or remove people from a group text?

Yes, on most messaging apps you can edit the group participants at any time. Just open the group chat and look for an Add Member or Edit Group option.

What’s the limit on Android group text size?

The maximum size varies by app. SMS group messages may be limited to 10 or 20 participants, depending on your carrier. Internet-based apps like WhatsApp can support up to 256 participants in a single group.

Will group messages use my SMS text limits?

Messages sent in the built-in Android app will count against your monthly SMS text limits. Internet-based messaging apps like WhatsApp or Telegram use data rather than SMS, so they don’t impact your text limits.

How to Check Microphone Usage on Android

Learn how to check microphone usage and see which apps access your microphone on Android phones and tablets.

Why Check Microphone Access

Checking microphone usage on your Android device is important to know which apps are accessing your microphone. This allows you to monitor privacy and security.

Some apps may access the mic unnecessarily, consuming battery life or gathering data without your knowledge.

Check Microphone Usage in Settings

The easiest way to see which apps are using your Android microphone is to check the App Permissions in Settings:

  1. Open the Settings app on your Android.
  2. Scroll down and tap Apps & Notifications.
  3. Select App Permissions.
  4. Tap Microphone.

This will show all apps that have requested and been granted microphone access. Apps that have used the mic recently will be at the top.

Disable Microphone Access

You can revoke microphone access for any app here. Just tap the app and toggle the Microphone switch off. The app will no longer be able to access your mic.

See Microphone Usage in Android 11 & Newer

For Android 11 and newer, there is a microphone indicator that appears when an app is actively using your mic:

  1. Pull down the notification shade at the top of the screen.
  2. Look for the microphone icon in the top status bar or quick settings.
  3. Tap the mic icon to see which app is using the microphone.

You can disable the app’s mic access from here if desired.

Check Logcat for Microphone Activity

You can use Logcat to see real-time logging information from your Android system. This will show microphone usage by apps.

To view Logcat:

  1. Enable Developer options on your device in Settings > System > Advanced.
  2. Open the Logcat app, available in Developer options or Android Studio.
  3. Search or filter Logcat for the mic tag to see microphone access events.

This method provides more technical details than the basic Settings app permissions page.

Frequently Asked Questions

Can apps use the microphone without permission?

No, apps must be explicitly granted microphone permission in order to access the mic. Android will prompt the user to allow mic access the first time the app tries to use it.

Are there microphone indicators on stock Android?

Stock Android did not have mic indicators until Android 11. Now there is an icon that appears allowing you to see which app is using the mic.

Does microphone use drain my battery?

Yes, microphone use does consume additional battery, especially for long durations. Checking and disabling unnecessary mic access can improve battery life.

How to Retrieve Deleted Contacts on Android Without Backup

Accidentally deleting important contacts on your Android phone can be frustrating. Thankfully, there are a few ways to retrieve recently deleted contacts even if you don’t have a backup.

In this guide, we will show you some easy methods to recover deleted contacts on Android without backup using call logs, WhatsApp, SIM card, and third party apps.

Check Call Logs to Find Deleted Numbers

If you have called or received calls from the deleted contact recently, you can find their number in the call logs.

Go to Phone app > Call History. Browse through the list of incoming, outgoing, and missed calls. If you can find the number here, just save it again as a new contact.

Lookup WhatsApp Chat History

WhatsApp stores all your chat history including contacts. Open WhatsApp and go to the Calls tab. Here you can find the recently called numbers.

Also go to Chats tab and scroll through your chat history to find the deleted contact’s number or name.

Retrieve Contacts from SIM Card

If you had saved contacts on your Android phone’s SIM card, you can retrieve deleted numbers from there.

Go to Contacts app > Settings > Import > select SIM card. Here turn on the contacts you want to import again.

Use a Contacts Recovery App

A good contacts recovery app can scan your phone and restore accidentally deleted contacts easily.

Some top recommended Android contact recovery apps include:

  • FoneDog Toolkit
  • dr.fone – Recover (Android)
  • DiskDigger

These apps dig deep into your phone memory and storage to find residual data of deleted contacts. You can preview and selectively recover required contacts back.

Frequently Asked Questions

How soon can I recover deleted contacts?

It’s best to use contact recovery methods as soon as possible after deletion. The more you use the phone, the higher the chance of deleted data being overwritten.

Can I recover contacts after factory reset?

If you have reset your Android phone to factory settings, it becomes almost impossible to recover deleted contacts. Your best chance is to use a professional data recovery service.

Are deleted contacts gone forever?

In most cases, regular deleted contacts are not gone completely. Residual data remains in different storage areas like call logs, chat apps, SIM card, etc. But if you clear this data, contacts may be permanently deleted.

How to Unlock SIM Card on Android

A step-by-step guide to unlocking your SIM card on Android phones and tablets. Learn how to get the unlock code and complete the network unlock process.

What is a SIM Lock?

A SIM lock prevents a SIM card from being used on any device other than the one it was originally registered to.

Mobile carriers use SIM locks to restrict which devices can be used on their networks.

Why Unlock Your SIM Card?

Unlocking your SIM card allows you to use it in any compatible device, regardless of carrier.

Here are some benefits of unlocking your Android SIM card:

Requirements for Unlocking

Before starting the unlock process, make sure:

  • Your contract with the current carrier has ended
  • Your account is in good standing and bills are fully paid
  • You have the 8 or 16-digit SIM unlock code

How to Get the SIM Unlock Code

To unlock your SIM card, you’ll need a code provided by your carrier.

Here’s how to get it:

  1. Contact your carrier’s customer support
  2. Request for the SIM unlock code
  3. Provide required info (IMEI, account number etc)
  4. Carrier will provide the code within 24-48 hours

Entering the SIM Unlock Code

Once you have the code, follow these steps to complete the unlock process:

  1. Insert an unapproved SIM card into your Android phone
  2. You’ll get a prompt to enter the unlock code
  3. Enter the code provided by the carrier
  4. If correct, SIM will be fully unlocked
  5. Reboot device and you’re all set!

Troubleshooting Tips

  • Double check the code is entered correctly
  • Try rebooting your device and retry
  • Contact carrier support if issues persist

Frequently Asked Questions

Is unlocking my SIM card legal?

Yes, unlocking your SIM is legal in most parts of the world, as long as you own the device and have completed all contract terms.

Will unlocking void my warranty?

No, unlocking itself does not void factory warranty. However, any damage caused during the process may not be covered.

Can all Android devices be unlocked?

The vast majority of Android devices can be unlocked, including phones from Samsung, LG, Motorola and more. Some carrier branded phones may have permanent locks though.

How to Make Your Android Phone Charge Faster

Is your Android phone taking forever to charge? With heavy use, all smartphone batteries slow down over time.

Luckily, there are some simple tricks you can try to make your Android charge faster.

Use the Right Charger and Cable

Charging speed depends largely on the charger and cable you use. The best way to fast charge an Android phone is with the charger that came in the box. These are often higher wattage “fast chargers.” You’ll also want to use the cable that came with your phone, as lower quality cables can’t deliver power as quickly.

Look for a charger labeled as a “fast charger” with an output of 15 watts or higher. Chargers that support Qualcomm QuickCharge or USB Power Delivery standards will charge your phone the fastest.

Disable Battery-Draining Features

Certain settings on your phone can slow down charging speed. Turn these off to maximize charging rates:

  • Bluetooth
  • WiFi
  • Location services
  • Syncing apps
  • Brightness level

You can also put your phone in airplane mode while charging to disable all connections and transmissions.

Close All Apps

Having many apps running in the background takes power, which slows charging. Close out of all apps before plugging your phone in to charge for faster powering up.

Alternatively, you can restart your phone before charging. This will force close all apps so none are running in the background.

Use a Wall Charger Instead of a Computer

Charging from a USB port on your computer will be much slower than using a wall charger. Computer USB ports typically only output 5W, while wall chargers can be 15W or higher.

What is the fastest charging method?

Using the factory fast charger and cable that came with your phone is the fastest charging method. Look for chargers rated at 15W or more.

Will wireless charging be as fast?

No, wireless charging is typically slower than wired charging. Use a wired connection for the fastest charging speeds.

How to Disable Message Blocking on Android

Has your Android phone been blocking messages from certain contacts? Message blocking can be useful to stop spam or harassment, but sometimes you may want to disable it and allow messages from all senders again.

Here is a guide on how to disable message blocking on Android.

Steps to Disable Message Blocking

Follow these steps to disable blocking and allow all messages on your Android phone:

Open Messaging App Settings

Open the Messaging or Messages app on your phone and go into the app settings. There should be a Settings or Options menu accessible from the app’s main screen.

Go to Blocking Settings

From the Messaging app settings, look for an option named Blocked, Blocking, Spam Protection, or something similar. Tap on this option.

Unblock Contacts

You will see a list of all blocked contacts and numbers here. Tap on each one and select Unblock to remove them from the blocked list.

Disable Blocking

Once all contacts are unblocked, look for a setting to disable blocking altogether. It may be a simple on/off toggle. Turn blocking off or disable it.

Message blocking is now disabled on your Android. You should start receiving messages from all senders again.

FAQs

Why am I not getting messages from certain people?

If you are missing messages from some contacts, it is likely because you have message blocking enabled and those senders are on your block list. Follow the steps above to unblock contacts and disable message blocking.

Pros of Disabling Message Blocking

  • Receive messages from all your contacts
  • Avoid missing important messages
  • No longer have to manage block list

Cons of Disabling Message Blocking

  • May receive unwanted spam messages
  • Harassing contacts can message you again

How to Create an Android App

Developing an Android app may seem complicated, but it can actually be quite simple using the right tools.

In this guide, we’ll walk you through the step-by-step process of building an Android app without writing any code.

Prepare Your Content

Before you begin building your app, you need to have your content ready. This includes text, images, videos or anything else you want to include in your app. Organize your content into a structure that makes sense for an app.

Choose an App Building Platform

There are a variety of platforms available that allow you to build an Android app without coding. Some popular options include:

  • Appy Pie
  • AppInventor
  • Thunkable
  • App Builder

Research different platforms to choose the one that best fits your needs and skill level.

Use the Visual Editor

Most app builders use a drag-and-drop visual editor that allows you to design your app visually. Just drag and arrange elements like images, text boxes, buttons where you want them to go.

Add Functionalities

Use the platform’s features to add functionalities like social media integration, push notifications, chatbots and more. These will make your app interactive and engaging.

Connect to a Database

If your app requires a database to store and retrieve data, you can connect to a database like Firebase without coding.

Test Your App

Preview your app and test all features to identify any bugs or issues. Fix these before you publish your app.

Publish on Google Play

Once your app is ready, you can publish it on Google Play and make it available for download. The app builder platforms make this process simple.

Promote Your App

After publishing on Google Play, promote your Android app through both paid and organic means. This includes social media marketing, influencer outreach, paid ads, SEO and more.

Pros & Cons

Pros

  • No coding required
  • Quick and easy to build app
  • Cost effective
  • Great for simple apps

Cons

  • Limited customization options
  • Not suitable for complex apps
  • Ongoing costs for enterprise features
  • Still need technical knowledge

How to Call Back a Private Number on Android

Getting a missed call from a private or unknown number on your Android phone can be frustrating.

You want to call the number back but don’t have the actual digits.

Fortunately, there are a few methods you can use to return calls to private numbers on Android devices.

Methods for Calling Back Private Numbers on Android

Using Your Call History and Callbacks

Many Android phones will log private calls in your call history, even if the number is hidden. You can return these calls through your normal call history. If callbacks are enabled, you can simply tap the “Call Back” button to redial the private number.

Using Third-Party Apps

Several apps on the Google Play Store can identify private numbers. Apps like TrapCall and Caller ID by Whitepages maintain large databases of phone number information. These apps will name the caller even if your Android phone does not. You can then directly call back the private number from within the app interface.

Using Your Phone’s Network Features

Some Android phones have network features that can identify anonymous callers. For example, Verizon offers Name ID for Android which identifies private numbers from the network side. Check with your carrier to see if any services are available to detect unlisted numbers on your device.

Pros and Cons of Calling Back Private Numbers

Pros

  • Lets you return important calls
  • Prevents missing calls from unknown numbers
  • Helps identify prank or malicious callers

Cons

  • Risk of unwanted solicitation calls
  • Could be telemarketers or scammers
  • Private number may call back repeatedly

FAQs

Is it illegal to call back a private number?

No, it is not illegal to call back a private or unknown number, as long as you are not making harassing calls. The other party may have their reasons for blocking their number, but you have a right to return a call you received.

Can I block private numbers on my Android?

Yes, most Android devices allow you to automatically reject incoming calls from private or unknown numbers in the phone app settings. This will send these calls directly to voicemail.

What if a private number won’t stop calling me?

If a private or blocked number is repeatedly calling you, you can report this to your local law enforcement. Telemarketers may also be fined for violating the National Do Not Call Registry.

How to Remove Widgets from Android

If your Android home screen is getting cluttered with widgets you no longer need, you can easily remove them.

Clearing widgets frees up space for apps and shortcuts you actually use.

Here’s a step-by-step guide to deleting widgets from your Android device.

Removing a Single Widget

To remove a specific widget from your Android home screen:

  1. Press and hold on the widget you want to delete.
  2. Drag the widget up to the Remove option at the top of the screen.
  3. Drop the widget on Remove to delete it.

The widget will disappear from your home screen immediately. This clears up space for other app shortcuts or widgets.

Clearing All Widgets

You can also start fresh and clear all widgets from your Android home screen:

  1. Press and hold on an empty area of your home screen.
  2. Tap Home settings.
  3. Tap Remove widgets.
  4. Confirm that you want to remove all widgets.

This will delete all widgets on your primary home screen page. Repeat these steps to clear widgets from additional home screen pages.

Widgets in the App Drawer

Removing a widget from your home screen doesn’t delete the widget entirely. You can still find all your available widgets in the app drawer.

To add a widget back to your home screen, open the app drawer and press and hold on the widget you want to add. Then drag it to your home screen.

FAQs

Can I delete widgets from the lock screen?

Yes, you can remove widgets from your Android lock screen in the same way. Press and hold on a lock screen widget and drag it up to Remove.

Will deleting a widget also delete the app?

No, removing a widget does not delete or uninstall the app it came from. It just removes that widget from your home screen. The app will remain installed.

How do I add widgets back?

You can add widgets back by opening the app drawer, press and holding a widget, and dragging it back onto your home screen. Position it wherever you want.

How to Transfer Text Messages to New Phone Android

When getting a new Android phone, you’ll likely want to transfer all your data from your old device, including your text messages.

Thankfully, transferring text messages between Android phones is easy with the right apps and tools.

Use Android’s Built-in Backup and Restore

If both your old and new phones run Android Marshmallow or newer, you can use Android’s built-in backup and restore process:

  1. On your old phone, go to Settings > System > Backup and tap Back up to Google Drive.
  2. On your new phone, log into the same Google account and during setup it will restore apps, settings, and SMS messages.

Use a Transfer Cable

Another option is to use a transfer cable to connect your old and new Android phones and transfer data directly between them.

  1. Connect your phones with the transfer cable.
  2. On the new phone, open Smart Switch and follow the on-screen prompts.
  3. Select the data like text messages you want to transfer.
  4. Confirm the transfer on both phones.

Use a Cloud Service

You can also backup your text messages to a cloud service like Google Drive from your old phone, and then restore them to your new phone.

  1. On your old phone, backup messages to Google Drive.
  2. On your new phone, restore messages from Drive during setup.

Use Third-Party Apps

If the above options don’t work, you can use apps like SMS Backup & Restore or SyncMe to wirelessly transfer SMS messages between devices.

Pros

  • Easy process if both phones use Android 6.0 or above.
  • Doesn’t require any extra equipment.
  • Syncs all text messages seamlessly.

Cons

  • Older Android versions may not support built-in transfer.
  • Transfer cables not always included with new phones.
  • Third-party apps may have bugs or ads.

FAQs

How do I backup text messages to Google Drive?

Open your Android’s Settings app. Go to System > Backup. Turn on Back up to Google Drive. Check that Messages is included in the list of apps being backed up. Tap Back up now.

Will I lose text messages when switching phones?

You can transfer and backup your text messages when switching Android phones so you do not lose any messages. Be sure to complete the transfer or backup before setting up your new phone.

Can I transfer texts from Android to iPhone?

There is no direct method to transfer texts from an Android phone to an iPhone. You will need to backup your texts on your Android, then restore them to an app like WhatsApp or Google Voice on your iPhone.

How to Read Encrypted Text Messages on Android

Learn techniques to read encrypted text messages on your Android device, including using apps to decrypt messages and accessing decrypted backup files.

Use a Decryption App

One of the easiest ways to read encrypted text messages on Android is to use a decryption app.

There are several apps available on the Google Play Store that can decrypt messages from popular messaging apps like WhatsApp, Telegram, Signal, etc.

The apps work by accessing encrypted backup files on your device and decrypting them.

Pros of Using a Decryption App

  • Simple to use – just install the app and follow prompts
  • Works for many messaging apps
  • Often free or inexpensive

Cons of Using a Decryption App

  • May require root access
  • Ethical/legal concerns around decrypting others’ messages
  • May not work on latest Android versions

Access Encrypted Backups

Many messaging apps create encrypted backups of messages on your device or in the cloud.

With the right tools, you can decrypt these backup files to view encrypted messages.

Pros of Accessing Backups

  • Works even without a decryption app
  • Allows bulk access to all messages

Cons of Accessing Backups

  • Requires technical knowledge of backup systems
  • Backups may be deleted over time
  • Unethical to access others’ backups without consent

Frequently Asked Questions

Is it legal to decrypt text messages?

In many regions it is illegal to intercept and decrypt private communications without the consent of the sender and recipient. Proceed with caution.

Will decryption work on iPhone messages?

The techniques covered in this article only work for Android devices. Encrypted iPhone messages require different methods.

Can apps decrypt Signal messages?

Most decryption apps cannot reliably decrypt Signal messages due to the protocol’s strong encryption.

How to Turn Off Text to Speech on Android

A step-by-step guide to disabling text-to-speech features on your Android device.

What is Text to Speech?

Text-to-speech (TTS) is a feature on Android devices that allows text on the screen to be read aloud. This can be useful for accessibility, allowing users with vision impairments to hear content instead of reading it.

However, some users may find the automatic reading aloud distracting or unnecessary. Fortunately, Android allows you to fully disable TTS.

Steps to Turn Off Text to Speech on Android

Via Settings App

The easiest way to turn off text-to-speech is through the Settings app on your Android device:

  1. Open the Settings app.
  2. Select “Accessibility” or “System.”
  3. Choose “Text-to-speech output.”
  4. Toggle the “Text-to-speech output” switch off.

This will disable TTS globally on your device.

Via Individual Apps

You can also disable TTS on a per-app basis:

  1. Open the app in which you want to disable TTS.
  2. Go to its settings or accessibility settings.
  3. Look for a “Text-to-speech” or “Read aloud” option.
  4. Toggle this off.

Repeat this process for any apps where you want to disable reading text aloud.

Other Ways to Customize Text to Speech

If you don’t want to completely disable TTS, there are other customization options:

  • Adjust the speech speed.
  • Change the default language.
  • Pick a different voice.
  • Set specific apps to not read aloud.

Explore your TTS settings to optimize the experience to your liking.

The Benefits of Disabling Text to Speech

Here are some of the benefits of turning off TTS on your Android device:

Increased privacy

Your phone won’t read texts or screen contents aloud when unwanted.

Fewer distractions

Disabling TTS can help you focus without disruptive narration.

Longer battery life

TTS requires power, so turning it off conserves battery.

Peace and quiet

You can enjoy silence instead of constant speech narration.

Frequently Asked Questions

Can I re-enable text to speech later?

Yes, you can re-enable TTS at any time by toggling it back on in Settings or individual apps.

How to Recover Deleted Text Messages on Android Without Computer

This guide will show you multiple methods to recover deleted text messages on your Android device without needing a computer.

Use Your Android’s Built-in Tools

Many Android devices have built-in tools that can help you recover recently deleted text messages.

Here are some options to try:

Recents List

Open your Messages app and look for a “Recents” section. This shows your most recent conversations even if a message was deleted. You may be able to find and recover deleted messages here.

Notifications Log

Your Android keeps a log of recent notifications. Go to Settings > Notifications > Notification Log. Look for notifications related to the deleted messages.

App Data

If you deleted a message very recently, the data may still be stored by the app. Try clearing the app cache and data for your Messages app via Settings > Apps. When you relaunch the app, it may retrieve deleted messages.

Use a File Recovery App

If the built-in options don’t work, your best bet is to use a file recovery app from the Play Store. These apps can scan your phone’s storage and recover deleted files and messages.

DiskDigger

DiskDigger is one of the most popular free file recovery apps. It’s easy to use – just grant permissions, scan your device, and recover any deleted message files it finds.

Dumpster

Dumpster is designed specifically for recovering deleted messages, call logs, contacts, and more. It has a simple interface and handy organizational tools.

Restore From a Backup

If you previously backed up your Android to the cloud or to a computer, you may be able to restore deleted messages from the backup. Google Accounts have an Android backup option, or you can use tools like Helium Backup.

Use Your Phone’s SIM Card

If you have an older Android device, the SIM card may contain deleted text messages you can recover. Take out the SIM card and insert it into another phone, then check if any deleted messages appear in the history.

Pros and Cons of Message Recovery Without a Computer

Pros:

  • Convenient – No need for extra tools or technical know-how
  • Fast – Built-in and app options work quickly
  • Free – No cost for using built-in tools or free apps

Cons:

  • Limited data – Can usually only recover messages deleted recently
  • No guarantees – Recovery depends on messages not being fully overwritten
  • Complex backups – Restoring from backups can be complicated

FAQs

What are my chances of recovering a text message deleted over a week ago?

If a text message is more than a few days old, the likelihood of recovering it without a specialized tool decreases significantly. Most free recovery apps can only retrieve messages deleted within the last 2-3 days.

Can I recover deleted messages without my phone?

No, recovering deleted text messages requires physical access to the device they were deleted from. You need to either use the phone’s built-in tools or run a recovery app directly on the device.

What should I do if my phone was reset to factory settings?

If your phone was reset, it will be very difficult to recover deleted messages. Your only option would be to restore the phone from a backup you had created prior to the reset. Otherwise, the data has likely been permanently erased.

How to Pin Someone on Snapchat for Android

Learn how to pin contacts on Snapchat for Android. Follow our step-by-step guide to pin your best friends, groups, and stories.

What Does Pinning Mean on Snapchat?

Pinning on Snapchat allows you to keep certain contacts, groups, and stories pinned to the top of your chat tab for easy access.

Pinned chats will appear above your other contacts and groups in the chat section.

How to Pin Chats on Snapchat for Android

Pinning chats is easy to do on Snapchat for Android.

Just follow these steps:

Pin an Individual Contact

  1. Open the Snapchat app and go to your Chat tab.
  2. Tap and hold the chat with the contact you want to pin.
  3. Tap the pin icon that appears at the top of the chat.

Pin a Group Chat

  1. Go to your Chat tab and tap and hold the group chat.
  2. Tap the pin icon to pin it.

Pin a Story

  1. Swipe over to view your Friends’ Stories.
  2. Press and hold the story you want to pin.
  3. Tap the pin icon to pin it.

That’s it! The contact, group, or story you pinned will now show at the top of your chat tab for easy access.

How to Unpin on Snapchat

Need to unpin something? No problem.

Just follow the same steps to long-press and unpin the chat:

  1. Tap and hold the pinned chat.
  2. Tap the unpin icon.

The chat will become unpinned and return to its regular position on your chat tab.

Pin Your Snapchat Favorites

Pinning on Snapchat is a great way to get instant access to your closest friends, must-see stories, and favorite groups.

Try pinning your top 3-5 chats so you can easily open them every time you launch Snapchat.

FAQs

Can I pin chats on iPhone?

Yes, the pinning feature works the same way on iOS. Simply long press a chat and tap the pin icon.

Is there a limit to how many I can pin?

There is no definitive limit, but Snapchat recommends pinning your top 3-5 chats for the best experience.

How to Change SIM Card on Android

Changing the SIM card on your Android phone is a simple process that takes just a few minutes.

By swapping out your old SIM for a new one, you can easily switch cell phone carriers or upgrade to a new plan on your current carrier.

Here is a step-by-step guide on how to change or swap the SIM card on any Android device.

Steps to Change SIM Card on Android

1. Locate the SIM Card Tray

The SIM card tray is usually located on the side or top edge of the phone.

It may have a small hole, indentation, or SIM card icon next to it.

Insert the end of the SIM tool (or a straightened paperclip) into the hole to pop out the tray.

2. Take Out the Old SIM Card

Gently pull the SIM tray out, being careful not to damage the actual tray.

Remove the current SIM card from the tray.

You may need to slide it out or carefully pop it out depending on the design.

3. Insert the New SIM Card

Place the new SIM card into the SIM tray, ensuring it lines up correctly.

Double-check that it is seated firmly and level in the tray.

4. Return the SIM Tray

Slide the SIM tray back into the SIM card slot.

Push it gently but firmly until it clicks back into place and is fully inserted.

5. Restart the Android Phone

Power your phone off and then back on for the new SIM card to be detected.

Your phone may automatically read the new card details and activate it.

Pros and Cons of Changing SIM on Android

Pros:

  • Switch cell phone carriers easily
  • Upgrade to a new data or service plan
  • Insert a local SIM when traveling internationally

Cons:

  • May need to back up data before changing SIM
  • Possibility of damaging SIM tray if not careful
  • Phone activation may take some time

FAQs

Do I need a SIM tool to change the SIM card?

Most Android phones include a SIM tool in the box for removing the SIM tray. You can also use a small paperclip or pin if needed.

Will I lose all my data if I swap SIM cards?

Your contacts, apps, photos, and other data will still be intact after changing SIM cards. However, text messages may not transfer over.

Can I switch SIM cards without turning my phone off?

It’s recommended you turn your Android phone off before swapping SIM cards. This allows the device to properly detect and activate the new SIM card.

How to Add a Contact on Android

Adding new contacts is a breeze on Android phones and tablets. In just a few taps, you can input all the details like name, phone number, email address, and more for each new contact.

Open the Contacts App

The Contacts app comes pre-installed on pretty much every Android device.

To get started adding a new contact:

  1. Open the Contacts app from your home screen or app drawer.
  2. Tap the overflow menu icon (3 vertical dots) in the top right.
  3. Select “New contact” from the menu.

Enter the Contact Details

You’ll now be on the new contact screen where you can enter all the details, such as:

  • Name
  • Phone number
  • Email address
  • Physical address
  • Job title
  • Nickname
  • Birthday
  • Notes
  • Etc.

Enter as many details as you want for the contact. The more you fill out, the better.

Save the Contact

Once you’ve entered all the contact’s details, tap “Save” at the top of the screen to save it to your contacts list. The new contact will now appear alongside your other contacts the next time you open the Contacts app.

And that’s all there is to it! With just a few taps, you can now add new contacts on Android quickly and easily.

FAQs

How do I edit a contact?

To edit an existing contact, open the Contacts app and tap on the contact you want to edit. Then tap the edit icon (usually a pencil) and make any changes. When done, tap Save.

Can I add a photo for a contact?

Yes, you can add a contact photo by tapping the blank avatar icon when creating a new contact or editing an existing one. You can choose to take a photo with your camera or select an existing photo from your gallery.

How do I delete a contact?

To delete a contact, tap and hold on the contact in your contacts list. Select delete contact from the menu that pops up and confirm the deletion.

How do I share a contact?

To share a contact, tap on the contact and select the share button (usually an arrow pointing upward out of a box). Choose how you want to share the contact info – messaging, email, Bluetooth, etc.

How do I search for contacts?

You can search for a contact by tapping the search bar at the top of the Contacts app and entering the contact name, phone number, or email address. Matching contacts will appear as you type.

How to Install Incompatible Apps on Android

A step-by-step guide to installing incompatible Android apps using APK files, emulators, and more.

Covers solutions like APKPure, VPNs, app permissions, and troubleshooting.

What Are Incompatible Apps?

Incompatible apps are Android apps that can’t be directly downloaded or installed on your device from the Google Play Store.

This usually happens when:

  • The app isn’t available in your country or region
  • Your Android version is too old for the app
  • Your device lacks certain hardware features the app requires

How to Install Incompatible Android Apps

Method 1: Download the APK File

APK files are the Android app package that you can install directly on your device. To install incompatible apps using APK:

  1. Find the APK file for the app you want online, from sites like APKMirror.
  2. Enable “Install from unknown sources” in your Android settings.
  3. Download the APK file and tap on it to install.

Method 2: Use an Android Emulator on PC

Emulators like BlueStacks let you install Android apps on your computer. To use:

  1. Download and install the emulator on your PC.
  2. Search for the app in the emulator’s app store and install it.
  3. Use the app through the emulator.

Method 3: Use a VPN

A VPN lets you mask your location so you can access region-restricted apps:

  1. Connect to a VPN server located in the app’s available region.
  2. Clear the Play Store cache and data.
  3. Search for and install the app normally.

Troubleshooting Tips

Enable App Permissions

If an installed app isn’t working, ensure you’ve allowed the necessary app permissions.

Update Google Play Services

Updating Google Play Services may help with compatibility issues for new apps.

Clear Cache and Data

Clearing the Play Store’s cache and data can sometimes resolve app installation issues.

FAQs

Why does my device say an app is incompatible?

Common reasons are your Android version being too old, your device missing required hardware, or the app not being released in your region.

Is installing APKs safe?

Downloading APK files from unofficial sources carries some risk, but files from reputable sites like APKMirror are generally safe. Always scan new APK files for malware before installing.

Can I get banned for using VPNs to install region-locked apps?

Most apps and platforms like Google Play don’t restrict VPN usage, but be sure to check the terms of service. Using VPNs to circumvent region locks is usually allowed.

How to Connect Apple Watch to Android

A step-by-step guide on connecting an Apple Watch to an Android smartphone. Includes tips on syncing data, receiving notifications, and using basic features.

What You’ll Need

To connect an Apple Watch to an Android phone, you’ll need:

  • An Apple Watch (Series 1 or later)
  • An Android phone running Android 5.0 or later
  • The Wear OS app installed on your Android phone

Connecting Your Apple Watch to an Android Phone

Step 1: Install Wear OS App

Download and install the Wear OS app on your Android phone. This app is required to connect and sync your Apple Watch.

Step 2: Pair Your Apple Watch

On your Apple Watch, go to Settings > Bluetooth and turn on Bluetooth. Next, on your Android phone, open the Wear OS app and select “Pair with a new wearable.” Follow the on-screen prompts to pair your Apple Watch with your Android smartphone.

Step 3: Sync Data

Once paired, your Apple Watch and Android phone will start syncing. Allow Wear OS access to contacts, calendar events, and other data you want to sync. Your watch will now mirror notifications and apps from your phone.

Using Your Apple Watch with an Android Phone

Although you won’t get full functionality, you can use your Apple Watch for basic features like:

  • Viewing and replying to notifications
  • Tracking fitness and activity
  • Using apps like Timer, Stopwatch, and Alarms
  • Controlling music playback

Limitations

Some limitations include:

  • No access to Apple apps like Messages, Mail, or Apple Pay
  • Limited third-party app support
  • No LTE cellular connectivity

Frequently Asked Questions

Can all Apple Watch models connect to Android?

Most Apple Watch models from Series 1 and later can connect to Android as long as they are running watchOS 5.0 or newer. The original 1st generation Apple Watch is not compatible with Wear OS.

Will Apple Watch work fully with Android?

No, you will not get full Apple Watch functionality when paired to Android. Many core Apple apps and features will not be available. You can only use basic smartwatch features.

Can I respond to iMessages on Apple Watch from Android?

Unfortunately, you cannot respond to iMessages from your Apple Watch when paired to an Android phone. The Messages app requires iOS, so you will only get regular SMS and third-party messaging app notifications.

How to Restore Game Progress on Android

This guide will show you how to restore your game progress if you get a new Android device or need to reinstall the game app.

Back Up Game Data to Google Play Games

The easiest way to save your game progress on Android is to back up your data to your Google account using Google Play Games.

Here’s how:

  1. Open the Play Games app on your Android device.
  2. Tap the “Settings” icon in the top left.
  3. Make sure “Backup game data” is enabled.

This will automatically back up app data from games synced to your Google Play Games profile. Your progress will then sync across any Android devices connected to the same Google account.

Transfer Local Game Data to New Device

If the game does not support Google Play Games backups, your progress may be saved locally on your device.

To transfer data to a new phone:

  1. Locate the Android/data folder on your old device. This contains app data saved locally.
  2. Copy the game’s data folder to cloud storage or a computer.
  3. Transfer the folder to the same location on your new device.
  4. Open the game app and your progress should be restored.

Be sure to use the exact same app version when transferring game data between devices.

Contact the Game Developer

If you cannot locate your locally saved data, contact the game developer. Many games have an account system or restoration process to recover lost progress.

Start Over As a Last Resort

If you cannot recover your previous game progress through any method, starting over may be your only option. Consider it an opportunity to replay and improve your experience!

FAQs

Can I back up game progress on iPhone?

Unfortunately Google Play Games only works on Android. For iPhone, you will need to rely on iCloud backups or game-specific account systems to save your progress.

How to Sync Email on Android

Keeping your email accounts synced on your Android device allows you to manage multiple email accounts from one place.

Whether you use Gmail, Yahoo, Outlook, or other email providers, syncing them to your Android makes it easy to access all your email.

Steps to Sync Email on Android

Follow these steps to sync email accounts on your Android phone or tablet:

1. Add Email Account

Open the Settings app and go to Accounts. Tap Add account > Email. Enter your email address and password. Tap Manual setup if your provider is not listed.

2. Configure Sync Settings

Choose what to sync – like contacts, calendar, and email. Enable sync for email. Choose sync frequency – Automatic or Manual.

3. Check Sync Status

Go back to Settings > Accounts to check sync status. A green dot indicates account is synced. Tap account to see last sync time.

Pros and Cons of Syncing Email on Android

Pros:

  • Access all accounts in one app
  • Get push notifications from all accounts
  • Sync contacts and calendars from all accounts

Cons:

  • Syncing can drain battery faster
  • Multiple notifications can be overwhelming
  • Requires monitoring sync issues for multiple accounts

FAQs

Why is my email not syncing?

If your email is not syncing properly, here are some things to try:
* Check your internet connection
* Disable battery optimizations for the email app
* Force stop the email app and restart it
* Remove and re-add the email account
* Update your Android OS and email app to latest version

How do I choose what to sync?

When adding the email account, you can choose what data to sync – mail, contacts, calendar, etc. On later versions of Android, go to Settings > Accounts > [account] > Account sync to pick what to sync for that account.

How to Delete Reddit Account on Android

This article provides a step-by-step guide on how to delete your Reddit account from an Android device.

Deleting your Reddit account will permanently remove your profile, posts, comments, saved content, and other data from Reddit.

When to Delete Your Reddit Account

Here are some common reasons you may want to delete your Reddit account:

  • You no longer use Reddit
  • You want to take a break from Reddit
  • You want to start fresh with a new account
  • You disagree with recent policy changes
  • You are concerned about privacy

How to Delete Reddit Account on Android

Follow these steps to delete your Reddit account from an Android phone or tablet:

  1. Open the Reddit app on your Android device.
  2. Tap your profile icon in the top left corner.
  3. Tap “Settings” at the bottom.
  4. Scroll down and tap “Deactivate Account.”
  5. Tap “Deactivate.”
  6. Enter your Reddit password and tap “Deactivate Account.”

Your Reddit account will now be scheduled for deletion. Reddit will delete your account, along with all associated data, after 30 days.

Reactivating Your Account

If you change your mind, you can reactive your Reddit account within 30 days of deactivation:

  1. Log in with your Reddit username and password.
  2. Follow the prompts to reactivate your account.

After 30 days, deactivated accounts cannot be restored.

Creating a New Reddit Account

If you want to start fresh, you can create a brand new Reddit account using a new email and username.

Frequently Asked Questions

Can I retrieve my old posts and comments after deleting my account?

No, all your Reddit posts, comments, and data will be permanently erased after account deletion. There is no way to recover it.

What happens to my Reddit username after I delete my account?

Your Reddit username is released back into the pool of available names. Anyone can signup with your old username after account deletion.

Can someone else claim my old username after I delete my Reddit account?

Yes. Once your account is deleted, any other Reddit user can create an account with your former username. Reddit usernames are unique, and deleted names get recycled.

The Pros of Deleting Your Reddit Account

  • Gain more free time back in your day
  • Avoid wasted time browsing Reddit
  • Take a break from social media and online negativity
  • Improve productivity and focus
  • Enhanced privacy after removing your data

The Cons of Deleting Your Reddit Account

  • Loss of Reddit community access and membership
  • Lose posting/comment history and karma
  • Miss out on discussions and content in subreddits you enjoy
  • Can’t easily get your old username back in the future

How to Put a Picture on Another Picture on Android

Putting one picture on top of another is a great way to get creative and make unique photo collages on your Android device.

With the right apps, you can easily layer images, blend them together, add text and stickers, and more.

Here’s a step-by-step guide to stacking pictures on Android.

1. Download a Photo Editing App

There are several good Android apps for layering photos:

  • PicsArt
  • PhotoDirector
  • Snapseed
  • Pixlr

These free apps provide all the tools you need to blend images, adjust transparency, and creatively composite your pictures.

2. Select the Bottom Photo

Open your chosen app and select the photo you want on the bottom layer. This will be the base image that additional photos will stack on top of.

3. Choose the Top Photo

Now select the photo you want on the top layer. This image will overlap the bottom photo.

4. Adjust Transparency

Use the opacity slider to adjust the transparency of the top layer. Lower opacity will reveal more of the bottom image underneath.

5. Resize and Position

You can resize and reposition the top layer photo to blend it with the bottom image. Overlap key elements to create interesting effects.

6. Add Filters, Stickers, Text

Use the editing tools to enhance your collage. Apply filters, add stickers, insert text, adjust colors, and more.

7. Save Your Photo

When you’re happy with your creation, save and export the finished product. Share your awesome double exposure pic!

Pros of Layering Photos on Android

  • Creative way to blend images
  • Fun to experiment with transparency
  • Lots of customization options
  • Free photo editing apps available

Cons of Layering Photos on Android

  • Can take practice to master double exposures
  • Limited tools on some free apps
  • May require newer Android model

FAQs

How do I save layered photos?

Most editing apps allow you to save your work to the device gallery in formats like JPG. Make sure to export or save a copy to preserve quality.

What’s the best app for Android photo collages?

PicsArt and PhotoDirector are two of the most robust Android apps for layering images and designing creative collages.

How to Check Running Apps on Android Phone

A step-by-step guide to checking which apps are running on your Android phone, allowing you to monitor battery usage and close unused apps.

Why Check Running Apps?

Checking which apps are currently running on your Android phone can help you:

  • See which apps are consuming battery in the background
  • Close unused apps to free up system resources
  • Monitor app behavior and troubleshoot issues

Check Running Apps in Recent Apps View

The easiest way to see your running apps is to open the Recent Apps view:

  1. Swipe up from the bottom of your screen or tap the Recent Apps button
  2. Scroll through the list of apps to see which ones are currently running

Use Task Manager Apps

You can also use task manager apps like Settings or third-party apps to view running apps:

Settings App

  1. Open your Settings app
  2. Go to Apps or Application Manager
  3. Tap Running to see currently running apps

Third-Party Task Managers

Apps like Advanced Task Killer provide more detail on running apps and allow you to stop them from the app.

Close Unused Apps

Once you’ve checked your running apps, you can close unused ones to free up system resources:

  1. Open the Recent Apps view
  2. Swipe up on an app preview to close it

Closing apps may help if your phone is slow or the battery is draining quickly.

FAQs

Is it bad to force close all apps?

It’s generally not recommended to force close all running apps. Some apps need to run in the background to work properly. Only close apps that you recognize as being unused.

Will closing apps improve battery life?

Closing unused apps, especially ones that use a lot of system resources, can help extend battery life. However, constantly stopping and reopening apps may drain the battery faster.

How to Get Rid of “Other” Storage on Android

Learn how to free up ‘other’ storage space on your Android device by cleaning the cache, unused apps, photos, and system files.

What is “Other” Storage on Android?

“Other” refers to files on your Android device that aren’t categorized as apps, media, or system data. It can include app cache, temporary files, system files, and more. Over time, this “other” storage can build up and take up significant space.

Why Does “Other” Storage Take Up Space?

There are a few main culprits for large amounts of “other” storage:

  • App cache: Apps store temporary data like login credentials or images in cache. This can build up over time.
  • Unused apps: Even if you don’t use an app anymore, it still takes up space until you uninstall it.
  • System files: Android uses system files in the background that contribute to “other” storage.
  • Large files: Things like offline maps, Play Music cache, podcasts, etc. are included in “other.”

How to Clear “Other” Storage on Android

Here are the top ways to free up “other” storage space on your Android device:

Clear App Cache

In your device Settings, find the Storage section. Tap Cached Data to clear cached files from all apps at once.

Uninstall Unused Apps

Go through your apps and uninstall any you no longer use. This frees up all the space the app was taking up.

Offload Large Files

Move large files like music, videos, and offline maps to external storage or a cloud service.

Clear Temporary Files

In Settings, go to Storage > Free Up Space to find and delete temporary files.

Delete Old Photos & Videos

Your camera roll may have lots of photos and videos you no longer need. Regularly go through and delete old media.

Tips to Prevent “Other” Storage Buildup

  • Turn off app auto-update in the Play Store.
  • Close apps you’re not using to prevent cache buildup.
  • Back up photos/videos and delete them from your device.
  • Use cloud storage instead of saving files directly on your device.

Frequently Asked Questions

How do I see what’s taking up “other” storage?

Go to Settings > Storage to see a breakdown of what types of files are using up space on your device. Tap the Other section to view specific files included there.

Is it safe to delete “other” system files?

It’s generally safe to delete cache and temporary files in the Other section. But avoid deleting critical system files that Android needs to run properly.

Will factory reset remove “other” storage?

Yes, a factory reset will wipe all data on your device, including all apps, files, and system data in the “other” category. This is a last resort though.

How to Find My AirPods Case on Android

Have you misplaced your AirPods charging case and need to find it quickly?

Luckily, Android devices have a “Find My Device” feature that can help locate missing AirPods cases too.

Here are some easy methods to find your AirPods case using any Android phone or tablet.

Enable Find My Device

First make sure Find My Device is enabled on your Android device. This feature comes pre-installed on most Android phones and tablets.

Here’s how to check:

  1. Open Settings and go to Security & Location.
  2. Scroll down and tap Find My Device.
  3. Toggle on Find My Device if it’s disabled.

Use Find My Device to Locate AirPods Case

Once Find My Device is on, use these methods to pinpoint the location of your lost AirPods case:

View Last Known Location

In Find My Device, you’ll see a map with the last known location of your paired AirPods case. This gives you a good starting point for where to look.

Make Your AirPods Case Play a Sound

Tap “Play Sound” in Find My Device. This will make your AirPods case start beeping loudly for you to hear nearby.

Mark as Lost

If your AirPods case is nowhere nearby, tap “Mark As Lost” in the Find My Device menu. This will lock your AirPods case and send you its last known location before the battery runs out.

Frequently Asked Questions

Can I find AirPods if not paired to my Android phone?

No, your AirPods case must be paired and connected to your Android device to show up and be located using Find My Device.

What if Find My Device can’t locate my AirPods case?

Make sure Location services and Bluetooth are enabled on your Android device. Also, check that Find My Device is toggled on for your AirPods case in Bluetooth settings.

Do AirPods have a Find My feature built-in?

No. AirPods rely on Apple’s Find My network and the Find My app. But Android devices can still locate lost AirPods cases using Find My Device.

Can I use Find My Device remotely?

Yes, if you have another Android device signed into the same Google account, you can remotely access Find My Device to locate a lost AirPods case.

How to Tell if Someone Uses Incognito Mode on Android

Learn how to detect if someone is using incognito mode on Android by checking for signs like disabled screenshots, no browser history, and more.

What is Incognito Mode?

Incognito mode, also known as private browsing, is a feature in Android web browsers like Chrome and Firefox.

It allows users to browse the internet without the browser saving their browsing history, cookies, site data, or information entered in forms.

Why Would Someone Use Incognito Mode?

There are a few reasons why someone may use incognito mode on their Android device:

  • To visit websites privately without leaving a browsing history trail
  • To prevent cookies from being stored that could save login info or track their activity
  • To shop online for surprises like gifts without the other person finding out
  • To log into multiple accounts on the same site without logging out each time

How to Check if Incognito Mode is Enabled

Check the Browser Interface

The easiest way to check if incognito mode is enabled is to simply look at the browser interface.

There will usually be some sort of indicator, like:

  • A dark theme or different color scheme
  • “Incognito” in the title or address bar
  • An incognito icon of a spy or detective hat

Look for Disabled Features

In incognito mode, certain browser features are disabled or work differently:

  • Browser history will not be saved
  • Bookmarks can be added but will be deleted after the session
  • Downloads will be saved but not browser history of accessing them
  • Website permissions like location may need to be re-allowed
  • Extensions/plugins may be disabled

Check System Settings

In Android’s system settings, you can view currently running apps and processes. If a browser like Chrome is running with incognito processes, it will typically show.

Try Taking a Screenshot

Most browsers block taking screenshots in incognito mode. So try taking a screenshot of the browser page – if it fails, incognito mode is likely active.

Signs of Incognito Browser Use

If you are suspicious that someone is using incognito mode to hide their browsing activity, watch for signs like:

  • Closing browser windows abruptly or acting secretive when using their device
  • No browser history showing up at all
  • Recently visited sites, search history, and cookies not matching their browsing habits
  • Login credentials not being saved

FAQs About Incognito Mode

Can websites detect incognito mode?

Some websites can detect incognito mode through things like browser plugin data, but most cannot outright tell if a user is browsing privately or not.

Is incognito mode really private?

Incognito mode keeps your browsing history, cookies, and site data private on your own device. But it does not make you anonymous on the internet – your network, IP address, and online actions can still be monitored.

Does Android’s guest mode work the same as incognito?

Android’s guest mode and incognito mode have some overlap in privacy features, but guest mode is focused on letting someone borrow your device temporarily while incognito is for private browsing.

How to Flip a Picture on Android

Learn how to easily flip or mirror a picture on your Android device using built-in editing tools.

What Does Flipping or Mirroring a Picture Mean?

Flipping or mirroring a picture refers to reversing the image horizontally, so the left side appears on the right and vice versa.

This can be useful for getting the perfect selfie or flipping an image to face the right direction.

Why Would You Want to Flip a Picture?

Here are some common reasons for flipping or mirroring a picture on Android:

  • To get the perfect selfie when using the front-facing camera – our instincts tell us a mirrored selfie looks “right”
  • To flip a scanned document or photo to face the right direction
  • To create symmetrical images for design or art projects
  • To reverse an image when screen recording your phone’s display

How to Flip or Mirror a Picture Using Android’s Built-In Editor

The easiest way to flip a picture on Android is by using the built-in Photos or Gallery app editor:

  1. Open the photo you want to flip in your device’s Photos or Gallery app.
  2. Tap the Edit icon (looks like a pencil or pen).
  3. Tap the Crop & Rotate icon (looks like a diagonally rotated square).
  4. Tap the Flip horizontally icon (looks like two arrows pointing left and right).
  5. The image will now be flipped. Tap Save to save the changes.

That’s all there is to it! The editor in your device’s gallery app makes it quick and easy to flip photos on Android.

How to Batch Flip Multiple Pictures at Once

If you need to flip several photos at the same time, a batch editing app like Photo Editor Pro lets you easily mirror multiple pictures together:

  1. Open Photo Editor Pro and grant permission to access your photos.
  2. Tap Batch Edit.
  3. Select the photos you want to flip.
  4. Tap Flip.
  5. Confirm the changes and tap Save.

This will mirror all the selected pictures in one go, saving you time flipping images one by one!

Other Ways to Flip or Mirror Photos

Here are a couple of other quick options for flipping pictures on your Android device:

  • Use your front camera: Open the picture, switch to the front selfie camera, and take a photo of your phone’s screen to capture a mirrored version.
  • Use a third-party app: Photo editing apps like Snapseed, PicsArt, and Adobe Photoshop Express offer flip tools as well.

Tips for Flipping Pictures

  • Flipping an image won’t affect its quality or resolution.
  • Always save flipped photos as a copy – don’t overwrite your original image file.
  • Double-check the orientation, especially for scanned documents or photos you want facing a certain direction.
  • You may need to crop out edges after flipping if the aspect ratio is altered.

FAQs

Can you flip a picture on Android horizontally and vertically?

Yes, most Android photo editors allow flipping photos both horizontally and vertically for maximum flexibility. Just look for horizontal and vertical flip icons when using the built-in editor.

Is there a way to batch flip photos on iPhone as well?

Yes! On iPhone, you can use the built-in Photos app to select multiple images and flip them horizontally with just a couple taps. There are also third-party batch editing apps for iOS like Enlight Pixaloop.

What happens when you flip a selfie?

Flipping a selfie taken with your front camera will mirror the image to how you normally appear in a mirror. This makes selfies look more natural to our eyes than a non-mirrored shot.

How to Pair Skullcandy Earbuds to Android

Pairing Skullcandy earbuds to your Android device is a quick and simple process that only takes a few minutes.

In this guide, we’ll walk you through the step-by-step instructions to get your Skullcandy earbuds connected via Bluetooth.

Steps to Pair Skullcandy to Android

Follow these steps to pair your Skullcandy earbuds to an Android smartphone or tablet:

1. Activate Pairing Mode on Earbuds

First, ensure the Skullcandy earbuds are turned off and not currently connected to any device. Then press and hold the multi-function button on the earbuds for 2-3 seconds until the LED light begins flashing red and blue to indicate pairing mode.

2. Turn Bluetooth On via Android Settings

On your Android device, open the Settings menu and ensure Bluetooth is turned on. The Bluetooth menu will begin scanning for nearby available devices.

3. Select “Skullcandy Earbuds” to Connect

Under the list of Available Devices, you should see an option pop up for “Skullcandy Earbuds”. Tap on this to initiate pairing. The earbuds LED light will turn blue once successfully connected.

4. (Optional) Rename Earbuds

If desired, you can rename your earbuds within your Android Bluetooth settings to make them easier to identify in the future.

Pros and Cons of Skullcandy Earbuds for Android

Pros:

  • Good sound quality with enhanced bass
  • Long battery life
  • Comfortable and secure fit
  • Easy to pair and connect
  • Affordable price point

Cons:

  • Audio can sometimes sound distorted at max volume
  • Not completely wireless, still has wire between earbuds
  • Noise isolation could be better

FAQs

Why won’t my Skullcandy earbuds connect to my Android phone?

If your Skullcandy earbuds won’t connect to your Android device, first make sure Bluetooth is enabled on your phone. Then reboot both your phone and earbuds and try pairing again. Ensure the earbuds are in pairing mode, indicated by the flashing LED. Also check that no other nearby device is connected to the earbuds.

How do I reset my Skullcandy earbuds?

To reset Skullcandy earbuds, hold down the multi-function button for 10-15 seconds until the LED light flashes red and blue, indicating a reset to factory settings. This will clear any previous paired connections.

Why does only one Skullcandy earbud connect to my phone?

If only one Skullcandy earbud is connecting, the earbuds may need to be reset. Follow the reset steps above. Also ensure both earbuds are charged and being worn while pairing in order to connect properly.

How to Update Cash App on Android

Cash App is a popular mobile payment service that allows users to send and receive money easily through their Android devices.

However, like all apps, Cash App needs to be updated periodically to fix bugs, add new features, and improve security.

Why You Should Keep Cash App Updated

Here are some of the key reasons it’s important to keep your Cash App version up-to-date on your Android device:

  • Bug fixes – App updates often fix known bugs and glitches in the current app version.
  • New features – Updating gives you access to new features added in the latest version.
  • Security patches – Updates can patch security vulnerabilities and keep your app and data safe.
  • Performance improvements – Updates may contain optimizations that improve app speed and reliability.

How to Update Cash App on Android

Updating the Cash App on your Android device only takes a few quick steps:

  1. Open the Google Play Store app on your Android.
  2. Tap the hamburger menu icon in the top left corner.
  3. Tap “My apps & games.”
  4. Under “Updates available,” find Cash App and tap “Update.”
  5. Tap “Accept” to begin downloading the latest version.
  6. Once downloaded, the new version will install automatically.

Enable Auto-Update

To save yourself the hassle of manually updating Cash App, enable auto-updates:

  1. Go to the Play Store app and tap the hamburger menu.
  2. Tap “Settings.”
  3. Toggle on “Auto-update apps.”

This will automatically update Cash App and your other apps whenever new versions are released.

Update Cash App Over Cellular Data or Wi-Fi

You can update apps like Cash App over either Wi-Fi or mobile data. Updating over Wi-Fi is recommended to avoid large data usage.

Troubleshoot Update Issues

If you are having trouble installing an update for Cash App, try the following troubleshooting tips:

  • Check for internet connection errors.
  • Restart your Android device.
  • Clear the Play Store app cache and data.
  • Uninstall and reinstall Cash App.
  • Contact Cash App customer support.

FAQs

Is updating Cash App necessary?

Yes, updating Cash App regularly is recommended to get important bug fixes, new features and enhanced security through patches. An outdated app has higher risks.

Will I lose my Wallet balance if I update Cash App?

No, your Cash App balance and transaction history are tied to your account, not the app version. Updating the app will not cause you to lose your current Wallet balance or history.

How do I get the latest Cash App features?

The easiest way to get new features on Cash App is to keep the app updated to the latest version via auto-updates in the Play Store. Major new features roll out in fresh app releases.

Conclusion

Keeping Cash App updated on your Android device is simple and ensures you have the latest features and security. Enable auto-updates for convenience. If you have issues updating, try troubleshooting your internet connection, app cache, or reinstalling the app. Overall, staying updated is vital for the best Cash App experience on Android.

How to Turn On Predictive Text on Android

A step-by-step guide to enabling predictive text on your Android device to get word suggestions as you type.

What is Predictive Text?

Predictive text, also known as auto-text or word suggestions, is a feature on smartphones that provides suggested words or phrases as you type.

It uses your previous writing patterns and an internal dictionary to predict the next word you may want to use.

This can speed up typing on mobile devices with smaller keyboards.

Benefits of Predictive Text

Here are some of the benefits of using predictive text on your Android phone:

  • Faster typing – You can accept word suggestions instead of typing everything out.
  • Fewer typos – The suggestions help avoid typos from small touchscreen keyboards.
  • Support for multiple languages – It provides suggestions in different languages you use.
  • Learning as you go – Predictions improve over time as you keep typing.

How to Enable Predictive Text on Android

Here are step-by-step instructions to turn on predictive text on your Android device:

On Android 9 and Lower

  1. Open your device’s Settings app.
  2. Tap on System > Languages & input > Virtual keyboard.
  3. Tap on the keyboard you want to customize, like Gboard.
  4. Tap Text correction. Enable options like “Suggest text corrections” and “Next-word suggestions.”
  5. You may also customize other settings like languages, emoji suggestions, etc.
  6. Tap the back arrow to save changes.

On Android 10 and Higher

  1. Go to Settings > System > Languages & input.
  2. Tap on the virtual keyboard, like Gboard.
  3. Tap Text correction and enable “Spell check” and “Suggest text corrections.”
  4. Under Advanced, enable “Next-word suggestions” and “Personalized suggestions.”
  5. Tap the back arrow to save changes.

How to Use Predictive Text

Once enabled, you’ll see word suggestions appear as you type. Here’s how to use them:

  • Start typing a word. You’ll see up to three suggestions above the keyboard.
  • Tap on a suggestion to insert it, or keep typing to ignore.
  • Over time, predictions will improve based on your typing habits.
  • You can tap-and-hold a prediction to remove it from the suggestions.

Pros and Cons

Pros

  • Faster typing
  • Fewer spelling and grammar errors
  • Support for emoji and gifs

Cons

  • Learning curve to use suggestions
  • Can suggest unwanted or inaccurate words
  • Requires sharing typing data for personalized predictions

FAQs

Can I use predictive text for multiple languages?

Yes, most keyboard apps like Gboard support predictive text in multiple languages. Just enable each language in your keyboard settings.

Will predictive text drain my battery faster?

Using predictive text has minimal impact on battery life. The processing happens locally on your device. It should not noticeably reduce battery life.

How to Attach a Photo to an Email on Android

Adding a photo to an email on Android is easy and only takes a few taps. Whether you want to send vacation photos to friends and family or attach product images for work, this guide will show you how to quickly attach photos from your Android device.

Locate the Photo You Want to Attach

First, open the Photos or Gallery app on your Android and browse to the specific photo you want to attach. Tap on the photo to open it.

Tap the Share Button

At the bottom of the photo, tap the share button (it looks like a box with an arrow coming out of it). This will open up the sharing menu.

Select Gmail or Email App

From the sharing menu, tap on Gmail or whatever email app you use. This will open a new email message with your photo added as an attachment.

Compose Your Email

With your photo now attached, compose your email as normal by adding recipients, a subject line and body text. The attached photo will send along with the email.

Send Your Email

Once you’ve finished composing your email, tap the send button and your email will be on its way with photo attached!

Tips for Attaching Photos to Email on Android

Here are some additional tips for seamlessly attaching photos to emails on Android:

  • You can attach multiple photos at once from your gallery.
  • Tap and hold on a photo to select multiple images.
  • Resize large photos before attaching to reduce file size.
  • Double check that the correct photo is attached before sending.

Troubleshooting Issues

If you’re having issues attaching photos to emails on your Android device, here are some troubleshooting steps:

  • Make sure you have an active internet connection.
  • Check that your photos have finished uploading from your camera.
  • Restart your email app and try attaching again.
  • Clear the app cache for your email app.
  • Update your Android OS and email app to the latest versions.

How to Backup Text Messages on Android Without App

This guide will teach you how to easily backup text messages on your Android device without needing any extra apps. Learn to export SMS to your computer.

Use Android’s Built-in SMS Export Feature

The easiest way to backup text messages on Android is to use the built-in export feature.

Here’s how to use it:

  1. Open the Messages app on your Android device.
  2. Tap the three dot menu button in the top right corner.
  3. Select “Settings” from the menu.
  4. Tap “Chat settings” > “Export messages”.
  5. Select a date range to export messages from.
  6. Tap “Export to CSV file”. This will save all your SMS to a CSV file on your phone’s storage.

You can then connect your Android device to a computer and transfer the CSV file over. Open it in a spreadsheet program to view the messages.

Use ADB to Pull SMS from Your Android

Another way is to use ADB (Android Debug Bridge) to pull the SMS database directly from your device.

Here’s how:

  1. Enable USB debugging on your Android device.
  2. Connect your phone to PC with a USB cable.
  3. Open command prompt/terminal on computer.
  4. Type adb devices to verify connection.
  5. Type adb pull /data/data/com.android.providers.telephony/databases/mmssms.db C:\backup\smsbackup.db to pull SMS database.
  6. You can view this DB file in a SQLite browser or convert it to CSV.

This will give you a complete backup of all text messages on your device. It does require some technical know-how.

Use a Computer Backup Program

Some third party computer programs like dr.fone and iSkysoft Toolbox can also backup SMS from your Android over a USB connection. They provide a simple interface to select and export messages.

Frequently Asked Questions

Can I backup SMS without root?

Yes, the built-in export and ADB methods mentioned above do not require root access. Root is only needed for more advanced backup tools.

Is my data secure when backing up SMS?

As long as you keep the backup file safe and secure, your data should remain private. Do not store the export file in a public location.

What formats can I export SMS to?

The most common formats are CSV, HTML, and XML. Some tools also allow backup to PDF or direct database formats.

How to Cancel Paramount Plus on Android

If you no longer wish to pay for Paramount Plus, canceling your subscription is easy to do right from your Android device.

Here is a step-by-step guide on how to cancel Paramount Plus on Android.

Steps to Cancel Paramount Plus on Android

Follow these steps to cancel your Paramount Plus subscription on an Android phone or tablet:

1. Open the Paramount Plus App

Launch the Paramount Plus app on your Android device. You must have the latest version installed.

2. Go to Your Account

Tap on the profile icon in the bottom right corner to access your account page.

3. Select “Subscription”

On the account screen, select “Subscription” to manage your Paramount Plus membership.

4. Choose “Cancel Subscription”

On the next page, find and tap “Cancel Subscription.” This will cancel auto-renewal.

5. Confirm Cancellation

Review the cancellation information then select “Confirm Cancellation” to complete the process.

FAQs

What happens when I cancel Paramount Plus?

You will have access until the end of your current billing period. Your subscription will not renew at the end of the period.

Can I reactivate Paramount Plus after canceling?

Yes, you can resubscribe at any time. Your account and watch history will still be available if you reactivate within 90 days.

Will I get a refund if I cancel mid-period?

No, canceling will only stop auto-renewal at the end of the current billing cycle. You will not receive a refund for the current period.

Conclusion

Canceling Paramount Plus on your Android device is easy and only takes a few taps. Just access your account settings, subscription, and confirm cancellation. You will continue to have access until the membership period ends. Reactivating is also simple if you change your mind later on.

How to Shorten a Video on Android

This blog post covers multiple ways to shorten or trim video length on Android phones using built-in and third-party apps.

Use the Photos App to Trim Videos

The easiest way to cut Android videos is by using the built-in Photos app that comes pre-installed on most Android devices.

To trim or shorten a video on Android using the Photos app:

  1. Open the Photos app and find the video you want to trim.
  2. Tap on the video thumbnail to open it.
  3. Tap on the Edit icon (scissors icon) at the bottom.
  4. Drag the trim sliders at the bottom to set the start and end points for the trimmed video.
  5. Tap Done to save the trimmed video. The original will remain unchanged.

This method allows basic trimming and cutting unwanted sections from the start or end of the video.

Use Video Editor Apps for Advanced Editing

For more advanced video editing capabilities like cutting clips from the middle, splitting videos, adding transitions, etc. you’ll need to use a dedicated video editor app.

Some good video editor apps for Android include:

  • KineMaster
  • Adobe Premiere Rush
  • PowerDirector
  • FilmoraGo
  • VivaVideo

These apps allow you to precisely trim video clips, split videos, rearrange segments, add music and effects, and export to different formats. Some are free with ads/watermarks while others require a subscription.

Use Online Video Trimming Tools

You can also use free online tools like ClipChamp, Kapwing, etc. to trim, cut, split, or edit videos right within your mobile browser.

Just upload the video to the website, use their interface to cut it, and re-download the trimmed video to your device.

This can be a quick way to shorten videos without installing any apps, but the editing capabilities may be limited compared to full-featured editor apps.

Considerations for Trimming Android Videos

  • Trimming does not affect the original video, it saves a new shortened copy.
  • Export trimmed videos in compatible formats like MP4 for easy sharing.
  • High resolution or very long videos may be slow to edit on mobile devices.
  • Use the Photos app for basic trimming needs, and specialized apps for advanced editing.

FAQs

Does trimming a video reduce quality?

No, simply trimming or shortening a video does not reduce its quality. The trimmed video will retain the same resolution and bitrate as the original. However, re-encoding or compressing the trimmed video to a different format may slightly reduce quality.

Can I trim videos on iPhone?

Yes, you can use the Photos app to trim and edit videos on iPhone just like on Android. There are also many good video editing apps for iPhone such as iMovie, Splice, FilmoraGo, etc.

How to Turn Off Sleep Mode on Android

Learn how to disable sleep mode on your Android device with step-by-step instructions covering common Android versions.

What is Sleep Mode?

Sleep mode, also known as standby mode, is a power saving feature on Android devices. It automatically turns off the screen after a certain period of inactivity.

Why Turn Off Sleep Mode?

There are a few reasons you may want to turn off sleep mode on your Android device:

  • Keeping the screen on for extended periods of time without touching it
  • Running apps that require the screen to be constantly on
  • Troubleshooting display or touchscreen issues

Disable Sleep Mode in Settings

The easiest way to turn off sleep mode is through your Android device’s Settings app:

  1. Open Settings and go to Display.
  2. Look for Sleep or Screen timeout option and set it to the maximum time or “Never” to disable.
  3. You may also need to disable Ambient display or Screen saver options.

Turn Off Sleep Mode in Oreo and Pie

For Android 8.0 Oreo and 9.0 Pie:

  1. Go to Settings > Display > Advanced > Screen timeout.
  2. Select “Never” option to stop screen from turning off.

Disable Sleep on Android 10

On Android 10 and newer:

  1. Go to Settings > Display.
  2. Set Screen timeout to “No timeout”.

Use Apps to Keep Screen On

You can also use third-party apps from the Play Store to keep your Android screen on, like:

  • Keep Screen On
  • Stay Alive!
  • Screen On and Lock

Frequently Asked Questions

Does turning off sleep mode drain battery?

Yes, keeping your screen on constantly will drain your battery faster than normal. Only disable sleep when you need to.

Will my Android device overheat without sleep mode?

Possibly, if using resource-heavy apps. Extended high CPU usage can cause overheating issues. Monitor device temperature.

How to Fix a Broken Charger Port on Android

Learn how to diagnose and fix a broken or loose charger port on your Android phone or tablet.

This guide covers cleaning the port, re-soldering connections, and replacing the part.

Symptoms of a Broken Charger Port

A broken charger port on your Android device can exhibit the following symptoms:

  • The charger falls out easily or does not stay connected
  • The device only charges at certain angles
  • Charging is intermittent or stops working
  • The charging port feels loose or wobbly
  • There is debris, lint, or corrosion inside the port

Cleaning the Charger Port

Often a broken charger port is caused by a buildup of debris inside. Try cleaning it out with these steps:

  1. Use a toothpick or small non-metallic tool to gently scrape out any lint or dirt
  2. Use compressed air to blow out any loose particles
  3. Dip a cotton swab in isopropyl alcohol and swab the inside of the port
  4. Allow the port to fully dry before reconnecting the charger

Re-soldering Loose Connections

If cleaning does not fix the issue, the USB port connections may have become loose. Carefully re-soldering the connections can restore connectivity:

  1. Open up the device to access the motherboard
  2. Use a soldering iron to re-melt the solder points around the USB port
  3. Let the solder joints cool and solidify before reassembling
  4. Test charging with the port now re-secured to the board

Replacing the Charger Port

For severely damaged ports, replacement may be necessary. Follow these steps:

  1. Purchase the correct replacement charging port for your device model
  2. Watch teardown guides to properly disassemble the phone and access the port
  3. Use a soldering iron to desolder the original port
  4. Carefully solder the connections for the new port
  5. Reassemble the device and test charging function

Pros of Replacing the Port

  • Fixes the issue fully with a brand new part
  • Restores normal charging function

Cons of Replacing the Port

  • More expensive than cleaning or re-soldering
  • Advanced soldering skills required
  • Risk of damage to phone during disassembly

FAQs

What if cleaning does not work?

If cleaning out the port does not resolve the issue, then the USB connections have likely come loose. In this case, re-soldering or replacing the port would be necessary.

Can I replace a USB-C port with micro USB?

No, the charger port must be replaced with the same type that originally came with the phone – USB-C, micro USB, etc. Using a different port type will likely not fit or charge properly.

How can I prevent damage to the port?

Avoid exposing the charging port to moisture or debris. When not in use, plug in the charger or a port cover. Avoid rough handling of the charging cable that can loosen connections.

How to Delete Duplicate Photos on Android

A step-by-step guide to removing duplicate photos and freeing up storage space on your Android device using built-in tools.

What are Duplicate Photos?

Duplicate photos are copies of the same photo stored in multiple locations on your Android device.

They take up valuable storage space and clutter your photo gallery.

Why Delete Duplicate Photos?

Here are some key reasons to remove duplicate photos on your Android:

  • Free up storage space – Duplicates can quickly eat up gigabytes of storage.
  • De-clutter your gallery – Makes it easier to find and view photos.
  • Faster backup and sync – Less data to transfer and backup.
  • Better organization – No more mess of duplicates scattered everywhere.

How to Find Duplicate Photos

Android has built-in tools to help you easily locate duplicate files:

Using Files App

The Files app has a ” cleanup” menu to find duplicate files. Go to the app and select:

  1. Tap the 3-dot menu.
  2. Choose Cleanup.
  3. Tap Find Duplicates.

It will scan all folders and show you duplicate photos and files.

Using Google Photos

If you backup photos to Google Photos, it has a tool to identify duplicates:

  1. Open the Google Photos app.
  2. Go to Library > Utilities > Find duplicates.
  3. It will scan all photos and show duplicate results.

How to Delete Duplicate Photos

Once you’ve located duplicate photos, you can remove them by:

Select and Delete

View duplicates and select unwanted copies to delete:

  1. Long press on a duplicate photo.
  2. Tap other copies to select all duplicates.
  3. Hit delete icon to remove selected.

Merge Duplicates

Merge all duplicates into one copy:

  1. Long press on a duplicate photo.
  2. Tap “Merge” option.
  3. It will merge all copies into one.

Prevent Duplicate Photos

To avoid duplicates in the future:

  • Turn off HDR – Avoid multiple copies of each photo.
  • Disable unnecessary backups.
  • Manually delete old duplicates periodically.

FAQs

What are the best duplicate finder apps?

Some top-rated apps include Duplicate Files Fixer, Remo Duplicate Photos Remover, and Duplicate Cleaner. They provide advanced tools to find and delete duplicates.

Will delete duplicates free up space?

Yes, removing duplicate files can free up significant storage space on your Android device. The amount depends on how many duplicates exist.

How to Find Hidden Message Apps on Android

Learn how to detect and find hidden messaging apps that may be installed on an Android device.

What are Hidden Message Apps?

Hidden message apps are messaging apps that are designed to hide their existence and content on an Android device. They often do not appear in the app drawer or list of installed apps. Examples include hidden SMS apps, secret messenger apps, private photo and video vault apps.

People may use these apps to hide communications or content from others who have access to their device. While they can be used for benign purposes, hidden messaging apps are also sometimes misused for inappropriate communications or cheating in relationships.

How to Find Hidden Message Apps on Android

Check for Duplicate Apps

Often hidden apps are disguised as other innocuous apps on your device. Check through your apps list and look for duplicates. For example, there may be two calculators where one is actually a secret messaging app in disguise.

Search App Settings and Permissions

Go to your phone settings and look at all apps listed under Settings > Apps. You can sort by date installed or size to spot newer or larger apps. Inspect permissions of suspicious apps to see what device access they have.

Use Detective and Scanner Apps

There are various “secret text detector” and “hidden app finder” apps you can download to actively scan your device and detect hidden apps. These work similarly to antivirus apps.

Manually Check File Folders

Use a file explorer or manager app to manually browse system files and folders on your Android device storage. Look for any suspicious or strangely named app packages (APK files) stored outside of the typical apps installation folders.

Other Ways to Monitor for Hidden Apps

Keep an eye on unexpected data usage, battery drain, or odd notifications which may indicate hidden app activity. Check device accessibility settings for anything enabling display over other apps or remote control.

Set up parental monitoring and time restrictions if you want to restrict particular apps and content on an Android device.

What to Do If You Find Hidden Apps

If you discover inappropriate, malicious, or undesirable hidden apps on your or someone else’s Android device, uninstall them right away. You may also want to have a conversation about why those apps were installed and how the device should be used responsibly going forward.

Monitoring apps and open communication can go a long way towards building trust and setting clear boundaries around device usage in families and relationships.

FAQs

How can I tell if a messaging app is hidden?

Clues that a messaging app may be hidden include not appearing in your app list, having a generic name, lacking an icon, or being disguised as a different type of app.

Will factory reset remove hidden apps?

Yes, a factory reset will wipe all apps – including any hidden messaging apps – and restore the device to original factory conditions.

How to Turn Off Emergency SOS on Android

The emergency SOS feature on Android allows you to quickly call emergency services and alert your emergency contacts by pressing the power button several times.

While this can be useful in an actual emergency, you may want to disable it if the feature is too sensitive or getting triggered accidentally.

From Settings App

The easiest way to turn off emergency SOS on Android is through the Settings app:

  1. Open the Settings app on your Android device.
  2. Scroll down and tap on “System”.
  3. Select “Gestures” or “Advanced features”.
  4. Tap on “Emergency SOS”.
  5. Toggle off the switch next to “Use emergency SOS”.

This will completely disable the emergency SOS feature on your device so it won’t activate even if you press the power button multiple times.

Disable Auto Call and Messages

If you don’t want to completely turn off emergency SOS, you can just disable the auto call and message functions:

  1. Follow steps 1-4 above.
  2. Uncheck the box next to “Auto call after countdown”.
  3. Uncheck “Send messages after countdown”.

This will keep emergency SOS enabled but won’t automatically contact anyone when activated.

From Quick Settings

On some Android devices, there is a quick settings toggle for emergency SOS. To disable it:

  1. Swipe down from the top of your screen to view Quick Settings.
  2. Look for the “Emergency SOS” tile and tap on it.
  3. Toggle off the switch to disable the feature.

FAQs

What happens when I activate emergency SOS?

Emergency SOS will sound an alarm, automatically call the local emergency number, and send alerts with your location to your emergency contacts.

Does it work without network connectivity?

Emergency SOS can work even without cellular network connectivity. It uses your device sensors to detect emergencies and contacts emergency services over satellite networks.

How to Disable Pop Up Blocker on Android

Pop up blockers can be useful for blocking annoying ads, but sometimes they block pop ups you want to see.

Here’s how to manage pop up blockers on Android.

Check if a Pop Up Blocker is Enabled

First, check if a pop up blocker is enabled.

Open the Chrome browser on your Android and go to a site that normally shows pop ups.

If no pop ups appear, a blocker is likely enabled.

Disable Pop Up Blocking in Chrome

To disable the built-in pop up blocker in Chrome for Android:

  1. Open Chrome and tap the three dots menu icon
  2. Go to Settings > Site Settings > Pop-ups and redirects
  3. Toggle “Blocked” off

This disables the pop up blocker completely in Chrome.

Allow Pop Ups from Specific Sites

To keep the pop up blocker enabled but allow specific sites:

  1. Follow steps 1-2 above
  2. Tap “Add” under “Allow”
  3. Enter the site URL you want to allow

This will keep pop up blocking enabled but allow pop ups from exempt sites.

Disable Pop Up Blocking in Other Browsers

Most major browsers have built-in pop up blocking you can disable. Look in the browser’s settings for a “Privacy & Security” or similar section.

Use a Different Browser

Try using an alternative browser like Firefox which may not have pop up blocking enabled by default.

Disable Pop Up Blocker Apps

Some Android devices have pop up blocker apps pre-installed. Open Settings > Apps and disable or uninstall any pop up blocker apps.

FAQs

Why do I need to disable my pop up blocker?

You may need to disable your pop up blocker to allow pop ups that contain important content, like logins or notifications. Some websites won’t function properly with pop up blocking enabled.

How to Delete Sent Text Messages on Android

Step-by-step guide on how to delete sent text messages on Android phones and prevent them from being seen. Includes options like deleting single texts or entire threads.

Why Delete Sent Messages

There are many reasons why you may want to delete text messages you’ve sent from an Android device. For example:

  • Privacy – Remove embarrassing or sensitive info you shared
  • Free up space – Large text threads take up storage
  • Hide evidence – Delete texts you don’t want seen

Delete Single Sent Texts

If you just need to remove one particular sent text:

  1. Open your messaging app on Android (such as Messages)
  2. Find the conversation with the text you want to delete
  3. Long press on the text bubble you want to delete
  4. Tap ‘Delete message’ to remove it

This will instantly delete that single sent text from the thread.

Delete Entire Sent Threads

To delete a whole conversation thread you’ve sent:

  1. Open your messaging app and find the thread
  2. Tap and hold the thread to select it
  3. Tap the trash can icon to delete the thread
  4. Confirm deletion when prompted

This will permanently erase the entire sent conversation from your messaging history.

More Ways to Delete Sent Messages

A few other options for deleting sent texts include:

  • Use a text cleaning app to bulk delete messages
  • Clear app cache/data to wipe texts (erases all messages)
  • Perform a factory reset to delete everything

Frequently Asked Questions

Can I recover deleted messages?

Maybe, if you have a backup or use an app like Android Messages which stores texts in the cloud. Otherwise, deleted texts are likely gone forever.

How to Retrieve Deleted Voice Messages on Android Phone

Having your important voice messages deleted accidentally can be frustrating.

Thankfully, there are a few methods you can use to retrieve deleted voice messages on your Android device.

Checking Call History and Voice Mail

One of the easiest ways to find deleted voice messages on Android is to check your call history and voice mail.

Here’s how:

  • Open the Phone app and tap the Recents tab.
  • Scroll through your call history to find the caller who left the deleted voice message.
  • Tap on the caller’s name or number and select “View full history”.
  • You may find the deleted voice message here, depending on your Android OS.
  • You can also open your voice mail through the Phone app and look for the deleted message there.

Using a File Manager App

Most Android devices save voice messages as audio files which get stored in the device’s internal storage.

You can use a file manager app to browse through your phone’s data and find these deleted voice message files.

  • Install a good file manager app like File Manager or Files by Google.
  • Open the app and look for a Voice Mail folder in the storage.
  • You may find the deleted voice message audio files here which you can play.

Using Data Recovery Apps

If the above methods don’t work, you can use Android data recovery apps to scan your device and extract deleted voice messages.

Some good options are:

  • DiskDigger – Scans your device and recovers lost voice mails and audio files for free.
  • EaseUS MobiSaver – Retrieves deleted voice messages even from broken Android phones.
  • GT Recovery – Recovers deleted voice messages along with other data like photos, messages, contacts, etc.

To recover deleted voice messages using these apps:

  1. Download and install any data recovery app on your Android.
  2. Grant required permissions to the app.
  3. Scan your device storage using the app.
  4. Filter results to show deleted audio/voice files only.
  5. Preview and recover the deleted voice messages.

Tips to Avoid Losing Voice Messages

  • Don’t delete voice mails unless you’ve saved them elsewhere.
  • Back up your voice mails regularly to cloud or PC.
  • Use an app like Automatic Call Recorder to record all calls.
  • Check sizes of audio files in Voice Mail folder to identify important ones.

FAQs

Where are voice messages stored on Android?

Android devices usually save voicemails as audio files in the internal storage. They are stored in a folder called Voicemail or Voice Mail in the device’s internal memory or SD card storage.

Can you recover permanently deleted voicemails?

In most cases, you can recover deleted voice messages on Android as long as they are not overwritten by new data. Using data recovery apps, you can restore permanently deleted voicemails as long as traces of them exist on the device storage.

How to Turn Off SafeSearch on Android

Would you like to disable SafeSearch and disable screening on your Android device? You can remove SafeSearch limits from your browser and search app settings by following a few easy steps.

This detailed instruction will explain how to disable SafeSearch filtering in Chrome, Firefox, and other popular Android browsers.

What is SafeSearch?

Search engines like Google, Bing, and YouTube all offer the filtering feature known as SafeSearch. When activated, it prevents adult and explicit search results from showing up. The objective is to make searching safe, especially for kids.

But, if you want unfiltered access to search results, you might wish to disable SafeSearch. Learn how to quickly disable this filtering on your Android smartphone or tablet by reading on.

Turning Off SafeSearch in Chrome for Android

Search engines like Google, Bing, and YouTube all offer the filtering feature known as SafeSearch. When activated, it prevents adult and explicit search results from showing up. The objective is to make searching safe, especially for kids.

But, if you want unfiltered access to search results, you might wish to disable SafeSearch. Learn how to quickly disable this filtering on your Android smartphone or tablet by reading on.

Via Chrome Settings

  1. On your Android smartphone, launch the Chrome app.
  2. In the top-right area, tap the three-dot menu symbol.
  3. Choose Settings from the drop-down menu.
  4. Go to the bottom and select Content settings.
  5. Choose SafeSearch filters.
  6. To disable SafeSearch, select “Do not filter explicit results.”

Via Chrome Flags

  1. Enter chrome:/flags into the Chrome address bar.
  2. Using the top search bar, look for “SafeSearch.”
  3. Tap “Default” next to the Activate Chromium SafeSearch checkbox.
  4. Set the setting to Disabled.
  5. Restart Chrome for the modification to take effect.

Disabling SafeSearch in Firefox for Android

To turn off SafeSearch in Firefox for Android:

  1. On your smartphone, launch the Firefox app.
  2. In the top-right corner, press the menu button.
  3. Go to Settings > Search.
  4. Deactivate the “Block offensive and harmful outcomes” setting.

Turning Off SafeSearch in Other Android Browsers

Other browsers, such as Samsung Internet, Microsoft Edge, Opera, and others, follow a similar procedure:

  1. Go to the browser’s settings.
  2. Check for options like “SafeSearch” or “Filter explicit results.”
  3. Deactivate the SafeSearch filtering options.

If you can’t find the required options, look for instructions in the browser’s help manual.

Disabling SafeSearch in the Google App

To remove SafeSearch filtering from the Google search widget and app:

  1. On your Android device, launch the Google app.
  2. At the top-right corner, tap the profile symbol.
  3. Go to Settings > General.
  4. Deactivate the “SafeSearch filters” option.

Turning Off SafeSearch on YouTube

YouTube also has its own SafeSearch setting. To disable it:

  1. Tap the profile icon in the YouTube app.
  2. Go to Settings > General.
  3. Disable the “Restricted Mode” option.

Frequently Asked Questions

Is disabling SafeSearch permanent?

No, you can reactivate SafeSearch at any time by following the procedures outlined above. The configurations are not permanent.

Can I password-protect by disabling SafeSearch?

SafeSearch settings can be password-protected in some parental control programs. You can also limit changes to settings on children’s profiles.

Will this affect other devices signed into my account?

No, turning off SafeSearch is a device-specific setting. It will not turn off SafeSearch on other devices.

Turn Off SafeSearch for Unfiltered Android Search

You may disable SafeSearch limits in your Android device’s browser and search app settings with a few touches. This allows you unrestricted access to search results.

Remember that deactivating the SafeSearch filter may result in more explicit/offensive suggestions and content being displayed. When disabling this safety feature, use your best judgment.

How to Disable the Green Dot on Android 12

Quickly learn how to disable the green dot notification indicator on Android 12 phones like Pixel 6 and Galaxy S22 with easy step-by-step instructions.

One of the visual changes introduced in Android 12 is a persistent green dot that indicates if an app has unread notifications.

While some users find this helpful, others think it’s distracting or cluttered.

Fortunately, Android 12 includes settings to disable the notification dots if you prefer a cleaner look.

Steps to Disable the Green Dot on Android 12

Turning off the notification dots only takes a few taps in your Android settings menu:

1. Open Settings

First, open the Settings menu on your Android 12 device. You can find the Settings app in your apps list or search for it.

2. Tap Notifications

Scroll down and select “Notifications” to open the notifications settings.

3. Tap Notification Dots

Next, select “Notification Dots” to access the specific green dot settings.

4. Toggle Off Notification Dots

Finally, turn the switch next to “Show Notification Dots” off. This will immediately disable the green notification dots.

That’s all there is to it! The persistent green dots will no longer appear on app icons. You can always return to Notification Dots and toggle them back on if you want the dots again later.

Pros & Cons of Disabling Notification Dots

Pros

  • Cleaner app tray without dots
  • Less visual clutter on home screen
  • Icons have a simpler, minimalist look

Cons

  • Lose at-a-glance info if you have unread notifications
  • Need to open apps to see if you have notifications

FAQs

Can I selectively disable dots for some apps?

Unfortunately no, the notification dots setting affects all apps. You can’t disable dots for just some apps in Android 12.

Will this disable all notification badges?

No, only the dots will be disabled. App icons can still display numeric badges for pending notifications.

How to Make Internet Faster on Android: 12 Effective Tips to Boost Your Connection Speed

Don’t worry, in this guide, I’ll share some effective tips to make internet faster on Android. With over 20 years of experience in the mobile niche, here are some tricks I’ve picked up to optimize and boost your connection speed.

The internet has become an essential part of our daily lives. Be it for work, studying, entertainment or just staying connected – we rely on fast and reliable internet access. However, sometimes your internet speed on Android seems slower than normal. Frustrating, right?

Learn how to speed up your internet on Android with simple tweaks like clearing cache, adjusting settings, using a VPN, and more. Tips include checking for updates, switching WiFi bands, and reducing background data usage.

Understand the Culprits Behind Slow Internet Speed

Before jumping to solutions, it’s important to identify possible reasons for slow internet on your Android device.

Network Congestion

When there are too many devices connected to the same WiFi network simultaneously, it can cause congestion and lower speeds for all. Things like downloading large files, streaming videos also contribute to this.

Outdated Software/Apps

Older versions of Android OS, applications or your internet browser could be culprits. They might not optimize internet usage as efficiently.

Cell Tower Distance/Interference

If you rely on mobile data, factors like distance from cell towers or physical obstructions can weaken signals. This directly impacts download/upload speeds.

Antivirus Scans

Some antivirus apps constantly scan downloaded files/websites in real-time which consumes data allowances and slows internet usage.

Cached Junk

Over time, leftover temporary files from past downloads/browsing sessions accumulate in cache/temporary storage. This cached data consumes resources.

Now that you understand potential reasons, let’s dive into practical solutions to optimize internet speed on your Android device.

1. Check and Update Android OS & Apps

Outdated software is one of the main factors slowing down internet. To resolve this:

  • Go to Settings > System > Advanced > System update and check for OS updates. Install immediately.
  • Open Google Play Store and check all app updates under the Menu > My apps & games > Updates section.

Updating to latest versions patches bugs, improves performance and security. This alone can boost speeds significantly.

2. Tweak WiFi Band Settings

Modern routers offer both 2.4GHz and 5GHz WiFi bands. 2.4GHz has weaker but broader range while 5GHz transmits faster but over shorter distances.

To get optimum speeds:

  • Connect to 5GHz band if available and your location supports good reception.
  • If not, try moving closer to router or using beamforming enabled 2.4GHz band for best speeds at your location.

3. Clear Browser Cache & Data

Web browsers like Chrome tend to cache temporary website/media files for faster load times. But over time, this cached “junk” builds up, slowing down the browser.

To declutter:

  • Open browser menu and select Settings > Privacy > Clear Browsing Data
  • Check “Cached images and files” and set time range to “All time”. Click clear.

Repeat process for any other browsers like Firefox, Samsung etc. to free up storage space.

4. Use a VPN For Secure Browsing

VPNs (Virtual Private Networks) create an encrypted “tunnel” between your device and internet to mask online activity and boost speeds. When using public WiFis, a VPN also secures against hackers slowing down connection.

Some popular free VPN options for Android include ProtonVPN, Windscribe and Hotspot Shield. Try switching it on to achieve better throughput.

5. Check for Mobile Data Usage Problems

If relying on mobile data, check your carrier network strength/reception and data plan allowance. Issues like:

  • Weak signals in location
  • Hitting monthly plan limit
  • Background apps consuming unlimited data

could be throttling speeds. Consider adjusting data usage in Settings or upgrading plans if needed.

6. Disable “Auto-Update” for Apps

While convenient, letting apps auto-update anytime consumes steady data/WiFi bandwidth in background. This can slow down active internet usage.

To prevent background updating:

  • Go to Settings > Apps
  • Tap individual apps and disable “Auto-update” toggle under App details.

Now updates only occur when you initiate from the Play Store manually.

7. Close Unused Apps for Better Performance

Apps left running in memory can drain resources even if not actively used. This causes internet browsing to lag.

To boost available RAM and CPU:

  • Long press Home button to view recently used apps.
  • Swipe away apps not currently in use by sliding them up.

Keeping fewer unnecessary processes running helps achieve greater throughput.

8. Adjust Picture/Video Streaming Quality

While high definition streaming is great for entertainment, lower resolutions consume less data. Consider adjusting quality based on your connection speeds.

For e.g. on YouTube app:

  • Tap settings icon > Quality
  • Select resolution best suited as per available speed e.g 480p or 720p instead of 1080p for mobile data.

This lets you enjoy content without worrying about eating up speeds or hitting data caps.

9. Switch Off Auto-Play Previews in Browsers

Many modern browsers auto-play short previews or sneak peeks of videos on website visits to enhance experience. However, behind the scenes these additional media streams contribute to speed lag.

To optimize:

  • Open Chrome or browser settings
  • Disable “Auto-play videos” toggle under content section.

Now pages load instantly without unnecessary streams being initiated.

10. Disable Background Data Usage

Like auto-updating apps, allowing background data usage lets other apps freely access internet in between active usage.

To restrict this:

  • Go to Settings > Network & Internet > Mobile Network
  • Under App preferences, toggle “Limit mobile data usage” ON.

Now only the current foreground app can use mobile data for smooth experience.

11. Enable Data Saver Mode

Android’s built-in Data Saver feature compresses data usage of all apps for significant savings. Internet seems faster overall due to reduced bandwidth consumption.

To activate:

  • Go to Settings > Network & Internet > Data usage
  • Slide the toggle for “Data Saver” to ON position.

Watch videos ads, check emails smoothly without touching data caps now.

12. Use a Firewall App for Protection

Third party firewall apps allow you to block apps’ access to internet selectively when not in use. Potential ad/tracking requests from background are paused. This ensures dedicated bandwidth only for focused usage.

Options include NetGuard or AFWall+ – try one for extra control over incoming/outgoing connections.

FAQs

Will using a VPN slow down my connection?

Using a good quality paid VPN may cause initial dip in speeds as it encrypts traffic. However, this slowdown is usually minimal (~10-15%). Benefits like security and bypassing throttling outweigh any minor performance hit for reliable VPNs.

Which is better for speeds – WiFi or Mobile Data?

In most cases, a strong and uncongested WiFi network will provide faster internet than mobile data. However, factors like location, carrier network strength, congestion levels and plan allowances determine real-world throughput in the end for each.

How do I check internet speed on Android?

There are several internet speed test apps available including Speedtest, Fast.com and Ookla Speedtest. Run tests periodically through these while on different networks to monitor and compare actual download/upload speeds.

Pros and Cons

Pros:

  • Simple software and settings tweaks to noticeably boost internet speeds
  • Useful tips applicable to all Android devices on any network/carrier
  • Maintain data privacy and security while optimizing connectivity

Cons:

  • Physical limitations like distance from cell towers cannot be overcome via software alone
  • Speed boost may vary depending on original network strength/congestion levels
  • Requires testing different methods one by one to find most effective combination

Conclusion

With smartphones becoming integral to work and play, it’s frustrating dealing with slow internet connections. However, optimizing your Android device doesn’t need to involve complex solutions. Simple tweaks to software settings, app management and switching up connection behaviors can greatly improve speeds.

I hope this guide has provided helpful insight into boosting internet performance on Android through practical tips. Feel free to try different combinations and let me know if you need any assistance troubleshooting specific issues. Speedy connectivity awaits with a few clicks!

How to Pin Apps on Android: A Step-by-Step Guide

Learn how to pin apps on Android effortlessly with our comprehensive guide. Follow our easy steps to keep your favorite apps just a tap away!

Are you tired of endlessly scrolling through your Android device to find your most-used apps? It’s time to make your life easier by learning how to pin apps on your Android smartphone or tablet. In this guide, we’ll walk you through the simple steps to keep your favorite apps right at your fingertips. Whether you want to declutter your home screen or ensure quick access to essential tools, pinning apps is the way to go.

What Does It Mean to Pin Apps on Android?

Before diving into the how-to, let’s clarify what it means to “pin” an app on Android. Pinning is a feature that allows you to lock an app in the foreground, preventing accidental closures or unauthorized access. It’s a handy tool to ensure that your most-used apps are readily available without navigating through a sea of icons.

How to Pin Apps on Android: A Step-by-Step Guide

Now, let’s get down to the nitty-gritty of pinning apps on Android. Follow these straightforward steps:

Step 1: Access the Recent Apps Menu

To begin, tap the square or recent apps button at the bottom of your screen. This will display a list of your recently used applications.

Step 2: Swipe Up or Down to Find the App

Swipe up or down to scroll through the list of recent apps until you locate the one you want to pin.

Step 3: Tap the App Icon

Once you find the desired app, tap on its icon. This will open the app in full screen.

Step 4: Pin the App

Now, here comes the magic moment. To pin the app, look for the pin icon (often represented by a thumbtack) at the bottom right or left corner of the screen. Tap it.

Step 5: Confirm the Pin

A confirmation message will appear, asking if you want to pin this app. Confirm by tapping “Pin.”

Step 6: Use the Pinned App

Voilà! The app is now pinned and will remain open on your screen. You can use it freely without worrying about accidentally closing it.

Benefits of Pinning Apps on Android

Pinning apps on your Android device offers several advantages:

1. Easy Accessibility: Your most-used apps are always just a tap away, saving you time and effort.

2. Enhanced Productivity: Pinning productivity apps, like calendars or note-taking apps, ensures they’re readily available for quick tasks.

3. Child Lock: If you have children, pinning apps can act as a child lock, preventing them from accessing sensitive apps.

4. Multitasking: You can pin multiple apps and switch between them seamlessly.

FAQs

Q1: Can I unpin an app?

Yes, to unpin an app, simply touch and hold the recent apps and back buttons simultaneously until a message appears confirming the unpinning.

Q2: Can I pin apps on Android tablets?

Absolutely! The process is the same on Android tablets as on smartphones.

Q3: What’s the difference between pinning and locking apps?

Pinning an app keeps it open on your screen, while locking an app usually requires a PIN or pattern to access it. They serve different purposes but can complement each other for added security.

Pros:

  • Easy and quick access to favorite apps.
  • Enhanced productivity.
  • Child lock feature.
  • Ideal for multitasking.

Cons:

  • May not be suitable for all apps (e.g., apps with sensitive information).

Conclusion

In a world where we rely heavily on our smartphones for various tasks, knowing how to pin apps on Android is a valuable skill. It simplifies your daily routine and ensures you have quick access to the apps that matter most. So, start decluttering your home screen and boost your productivity by pinning your favorite Android apps today!

Remember, the key to mastering this feature is practice. Pinning apps will soon become second nature, making your Android experience even more enjoyable.

If you found this guide helpful, share it with your friends and family, and don’t hesitate to explore more Android tips and tricks on our blog.

Happy pinning!


How to Update Facebook on Android: A Step-by-Step Guide

Learn how to effortlessly update Facebook on your Android device to enjoy the latest features and improvements.


Are you tired of missing out on the latest features and bug fixes on your Facebook app for Android? Keeping your Facebook app updated is crucial to ensuring a smooth and secure social media experience.

In this guide, we will walk you through the simple steps of how to update Facebook on Android.

Whether you’re a seasoned Android user or a newcomer, you’ll find this step-by-step tutorial easy to follow.

In this article, you will discover:

  • The importance of keeping your Facebook app up to date.
  • Step-by-step instructions on how to update Facebook on your Android device.
  • Tips to troubleshoot common update issues.
  • The benefits of staying current with app updates.

So, let’s dive into the world of Android and ensure you’re always using the latest version of Facebook.


Why Should You Update Your Facebook App on Android?

Before we jump into the how-to section, let’s understand why it’s crucial to keep your Facebook app updated on your Android device:

  1. Security: Facebook frequently releases updates to patch security vulnerabilities. Running an outdated version of the app may expose you to potential threats.
  2. Performance: Updates often include performance enhancements, making your Facebook experience smoother and faster.
  3. New Features: You don’t want to miss out on exciting new features, such as dark mode, improved navigation, or enhanced privacy settings.
  4. Bug Fixes: Updates also address various bugs and glitches that may be affecting your app’s usability.

Now that you understand the importance, let’s get into the nitty-gritty of updating Facebook on Android.


How to Update Facebook on Android: A Step-by-Step Guide

Follow these simple steps to ensure you have the latest version of Facebook on your Android device:

Step 1: Open Google Play Store

Begin by locating the Google Play Store app on your Android device. It’s usually represented by a colorful triangle icon.

Step 2: Access the Menu

In the Google Play Store, tap the three horizontal lines in the upper-left corner to open the menu.

Step 3: Go to “My Apps & Games”

From the menu, select “My Apps & Games.” This will take you to a list of all the apps installed on your device.

Step 4: Find Facebook

Scroll down the list until you find the Facebook app. If there’s an update available, you will see the “Update” button next to it.

Step 5: Update Facebook

Tap the “Update” button next to the Facebook app. Your Android device will now download and install the latest version of Facebook.

Step 6: Launch Facebook

Once the update is complete, tap the “Open” button to launch the updated Facebook app.

Congratulations! You’ve successfully updated Facebook on your Android device. You can now enjoy all the latest features and improvements.


Troubleshooting Common Update Issues

If you encounter any issues while updating Facebook on your Android device, here are some common solutions:

  1. Check Internet Connection: Ensure you have a stable internet connection to download the update.
  2. Clear Cache: Sometimes, accumulated cache can interfere with updates. Go to your device’s settings, find the Facebook app, and clear its cache.
  3. Restart Your Device: A simple restart can resolve many update problems.
  4. Check Storage: Insufficient storage space can prevent updates. Delete unused apps or files to free up space.

Benefits of Keeping Facebook Updated on Android

Updating your Facebook app isn’t just about staying current; it also offers several benefits:

Pros:

  • Enhanced Security: Stay protected from potential threats and privacy breaches.
  • Improved Performance: Enjoy a smoother, faster app experience.
  • Access to New Features: Be among the first to explore exciting new features and improvements.
  • Bug Fixes: Say goodbye to annoying glitches and crashes.

Cons:

  • Data Usage: Updates may consume data, so ensure you’re connected to Wi-Fi or have a sufficient data plan.
  • Compatibility: Newer updates might not work on older Android devices.

Conclusion (Action)

Keeping your Facebook app updated on your Android device is a straightforward process that offers numerous benefits. It ensures your security, enhances performance, and grants you access to exciting new features. Don’t miss out on the latest Facebook experience – follow our step-by-step guide and enjoy a seamless social media journey.

Is there anything else you’d like to know about updating apps on Android or Facebook in general? Feel free to explore our FAQs or drop your questions in the comments below.

FAQs:

  1. How often should I update my Facebook app on Android?
    • It’s advisable to enable automatic updates for Facebook on your Android device. However, if you prefer manual updates, check for them regularly, as Facebook releases updates frequently.
  2. Will updating Facebook delete my data or settings?
    • No, updating the Facebook app should not delete your data or settings. Your account information and preferences will remain intact.
  3. Can I revert to an older version of Facebook if I don’t like the update?
    • In most cases, it’s not possible to revert to an older version of the Facebook app. It’s best to adapt to the changes or provide feedback to Facebook for future updates.
  4. What should I do if the update fails or encounters errors?
    • If you face issues during the update process, refer to our troubleshooting section above for possible solutions. If the problem persists, contact Facebook support or seek help from your device manufacturer.

We hope this guide has been informative and helpful in ensuring you’re always using the latest version of Facebook on your Android device. Stay connected and enjoy a seamless social media experience!